DIY 5 Tier Wood Cupcake Stand
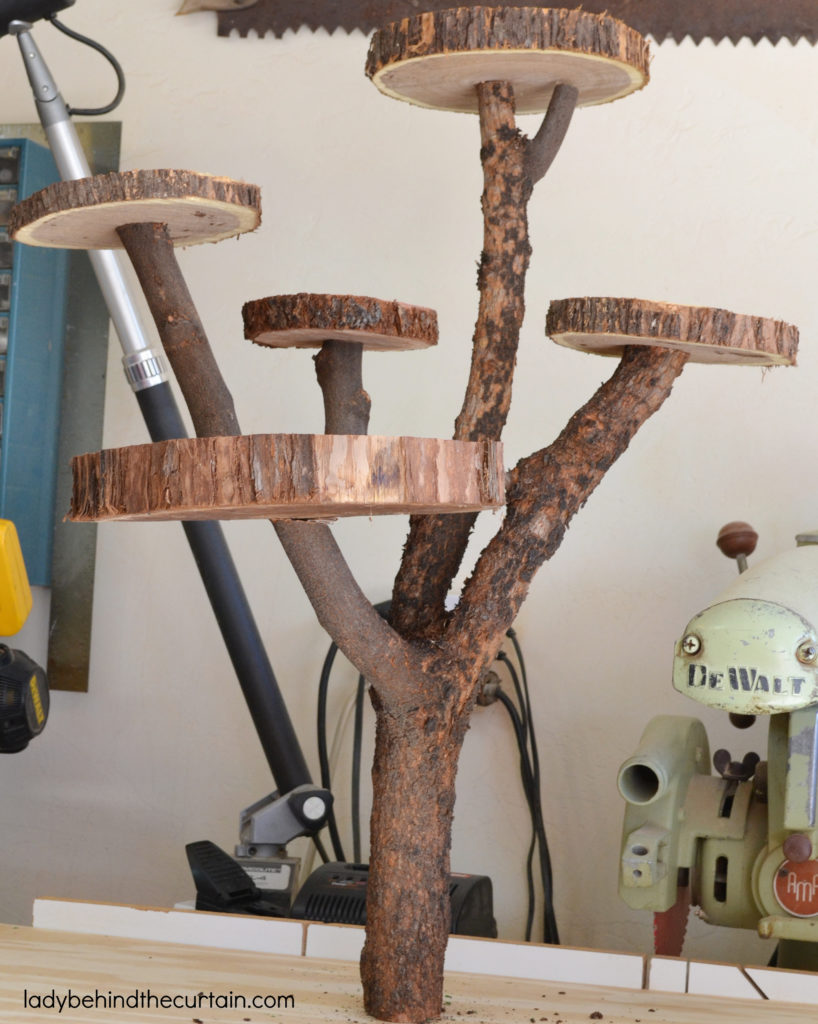
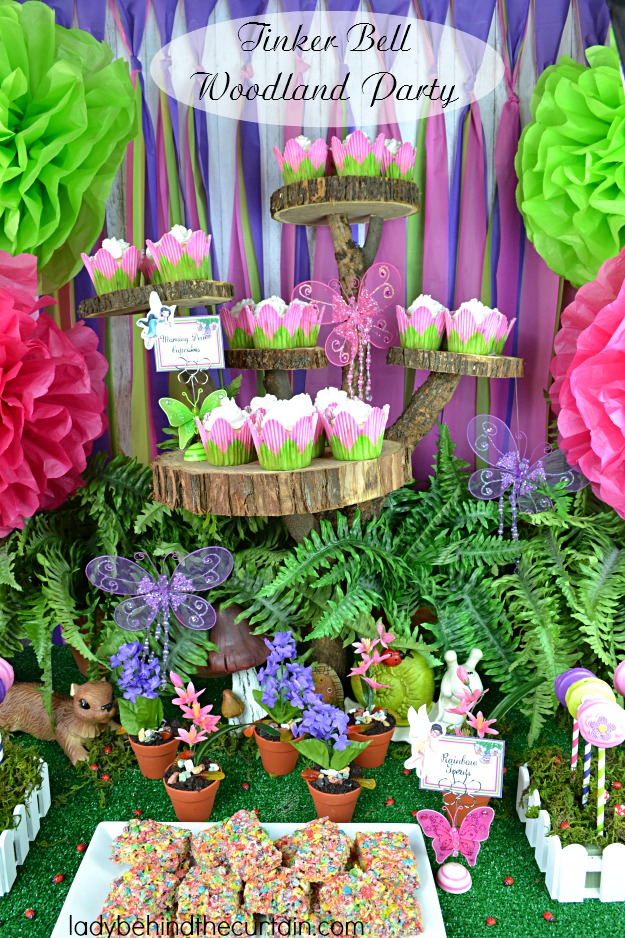
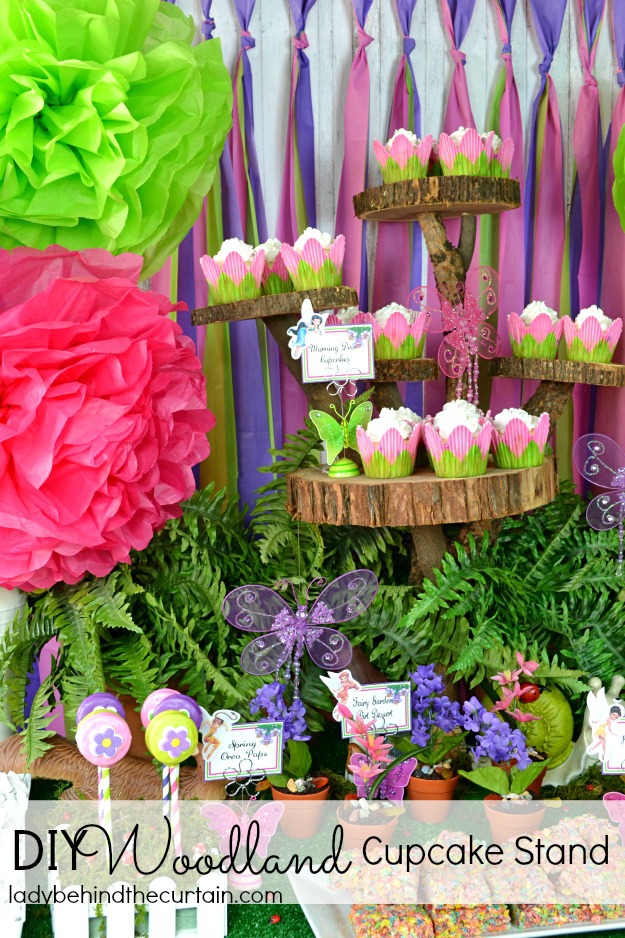
DIY 5 Tier Wood Cupcake Stand: This awesome cupcake stand has 5 tiers! This fun rustic homemade cupcake stand will fit any rustic themed party I created this DIY Woodland Cupcake Stand for my Tinker Bell Woodland Party. I also plan on using it for my rustic western themed party. Barn weddings are all the rage. This cupcake stand would fit right in!
Storage
One of the great things about this cupcake stand is how easy it is to store. Since there is no glue and everything has been attached with screws it can easily be taken a part and stored.
The Wood
I made this stand from wood I had around the house. If you don’t have piles of wood I’m sure you know someone that has a fireplace with a supply of wood you could pick through. Another option is getting your own wood from the either the woods, or in my case the dessert. OR…looking in the neighborhood for tree trimmings. Your best option is firewood.
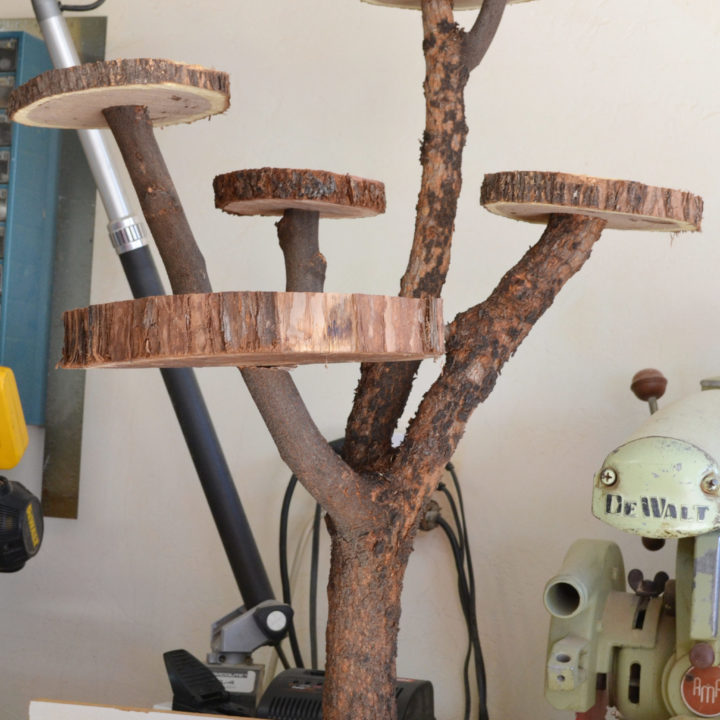
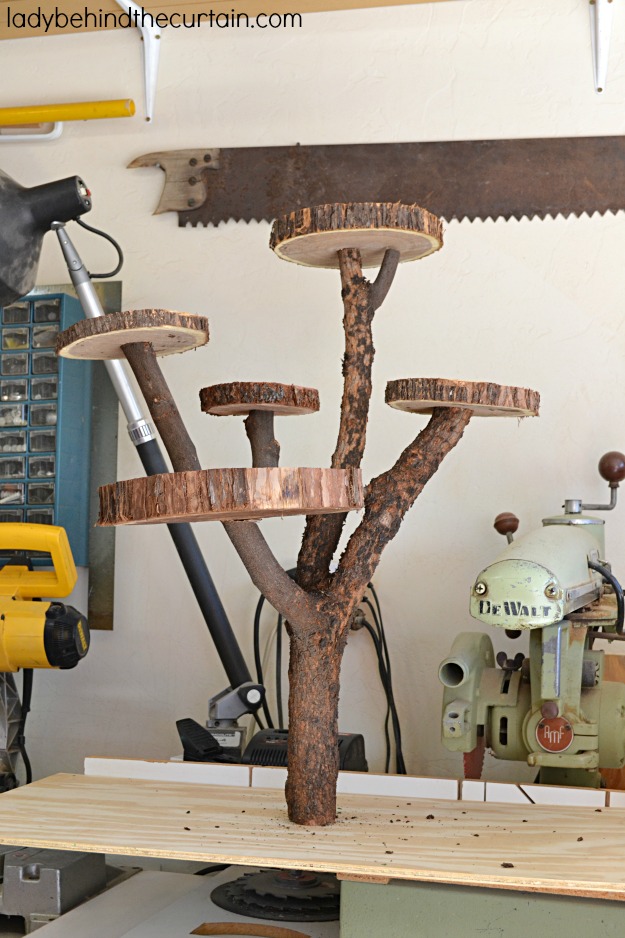
The tricky part is finding the right shape of branch. The best way to start is by looking for a thick branch with three arms.
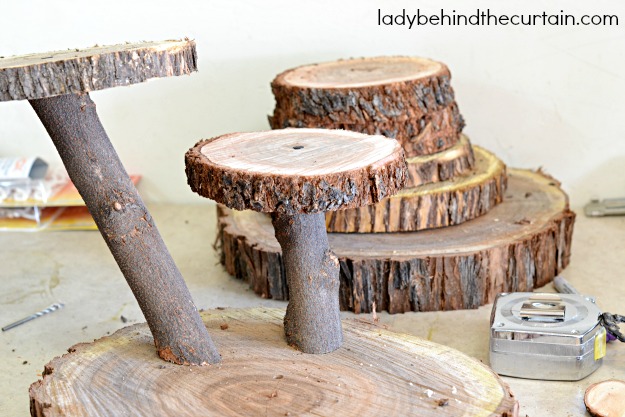
The disks are in three sizes 6-inchs, 9-inches and 12-inches. To make the multiple tiers, attach a small branch to the top of a tier and then another disk to the top of the branch. Try to cut the disks as straight as possible. Read below for a tip on how to level the disks.
How to Make DIY Woodland Cupcake Stand
SUPPLIES and MATERIALS
•piece of plywood wider then your finished cupcake stand measuring from the platform that stands away from the center branch the most.
•sturdy branch with three arms.
•five wooden disks in different sizes
•screws
•saw
•drill
Decide where each disk will be placed and where to add multiple layers.
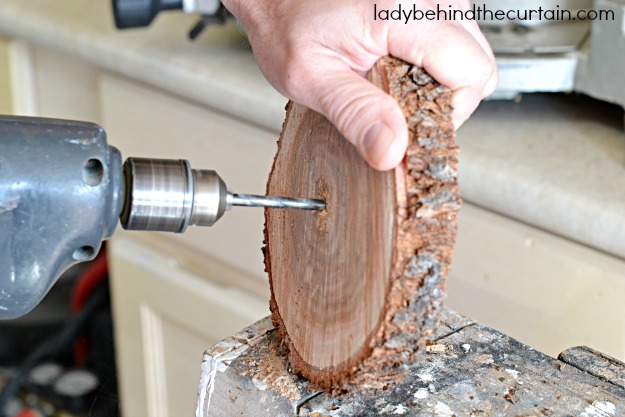
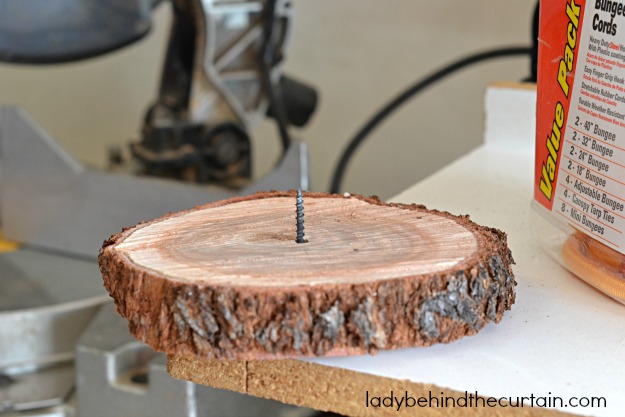
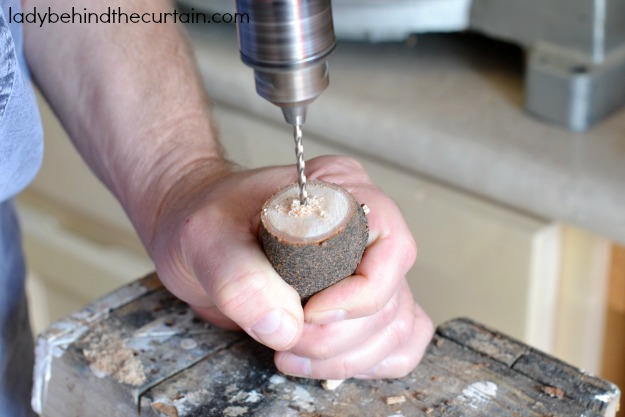
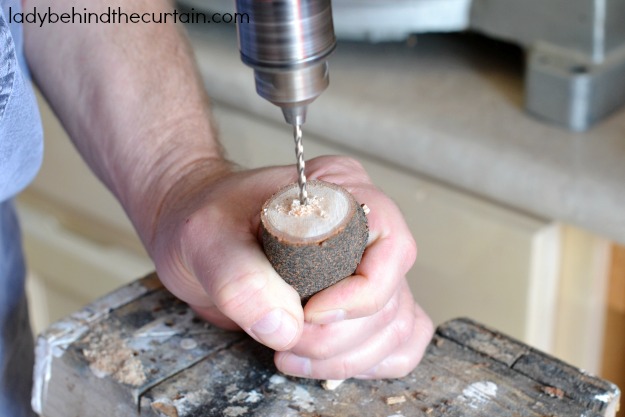
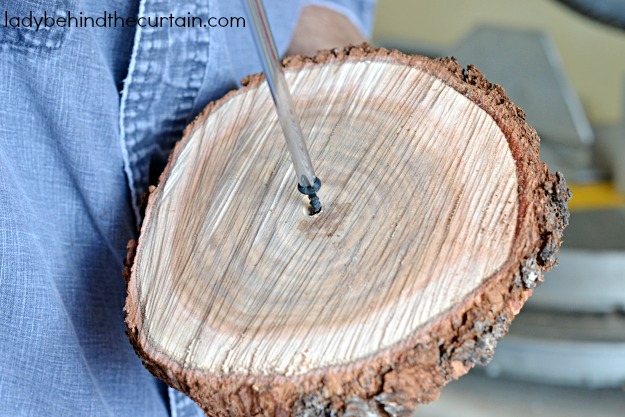
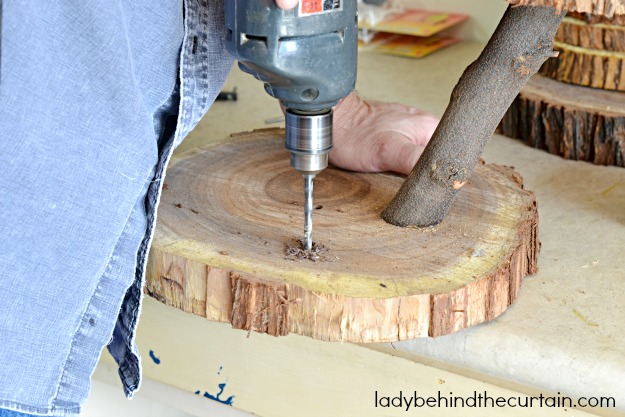
Drill holes in the disks. THIS IS VERY IMPORTANT! The holes you drill in the disks should be big enough for the screws to slip all the way through BUT…the holes you drill in the branches should be slightly smaller than the size of your screws. This will give the screws something to hold onto as they are being screwed into the branches.
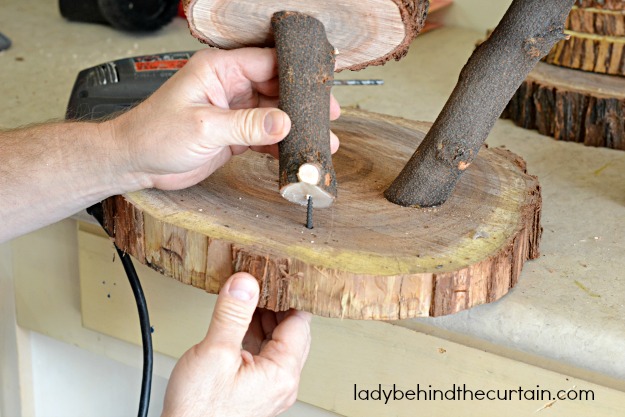
Once you have all the branches matched up with the disks and have all your holes drilled it’s time for assembly. Attach the disk to the branch.
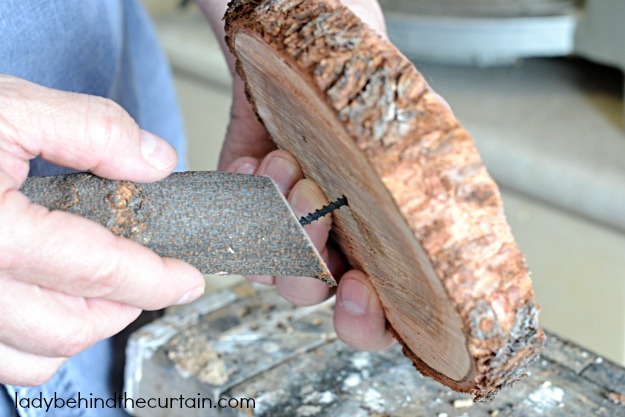
LEVEL TIP: If some of your disks are not level simply loosen the screw and wedge a small piece of card board on the underside of the disk between the top of the branch and the disk.
DIY 5 Tier Wood Cupcake Stand
Perfect for rustic parties!
Materials
- play wood
- tree branch with three branches
- 5 wooden disks
Tools
- saw
- drill
Instructions
The tricky part is finding the right shape of branch. The best way to start is by looking for a thick branch with three arms.
The disks are in three sizes 6-inchs, 9-inches and 12-inches. To make the multiple tiers, attach a small branch to the top of a tier and then another disk to the top of the branch. Try to cut the disks as straight as possible.
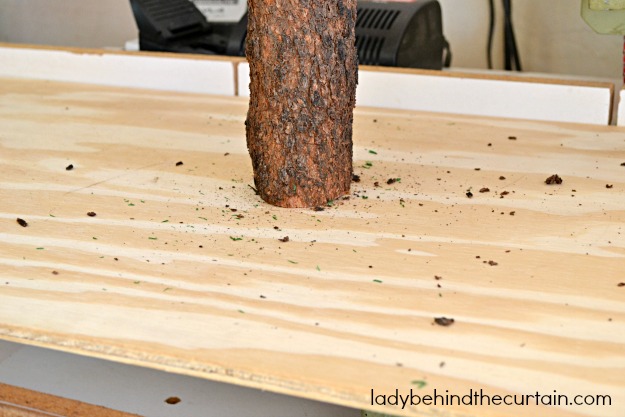
Screw the branch to a sheet of plywood. This will make the cupcake stand very sturdy.
Drill holes in the disks. THIS IS VERY IMPORTANT! The holes you drill in the disks should be big enough for the screws to slip all the way through BUT...the holes you drill in the branches should be slightly smaller than the size of your screws. This will give the screws something to hold onto as they are being screwed into the branches.
Add multi layer platforms to the largest disk.
Choose the disk size, the branch height, and the placement of the newly added platforms. Drill the disks and branches the same way the large tree branch and other disks were drilled.
Once you have all the branches matched up with the disks and have all your holes drilled it's time for assembly. Attach the disk to the branch.
ADDING MULITPLE LAYERS: Choose the disk size, the branch height, and the placement of the newly added platforms. Drill the disks and branches the same way the large tree branch and other disks were drilled.
LEVEL TIP: If some of your disks are not level simply loosen the screw and wedge a small piece of card board on the underside of the disk between the top of the branch and the disk.
SIGN UP FOR THE LADY BEHIND THE CURTAIN NEWSLETTER AND FOLLOW THE LADY BEHIND THE PARTY ETSY SHOP

NEWSLETTER: Receive (twice a month) seasonally themed newsletters full of recipes, tips and tricks. Sometimes even FREE gifts! ETSY SHOP: Did you know that Lady Behind the Curtain has an Etsy Shop? LADY BEHIND THE PARTY is a shop full of DOWNLOADABLE hand designed (by me) party supplies. Click here for the Newsletter→CURTAIN CALL NEWSLETTER Click here for the Esty Shop→LADY BEHIND THE PARTY
THANKS FOR VISITING♥





Sheryl, I am in love with this cupcake stand and the entire party – it’s all simply beautiful! You did an amazing job on everything!
Thanks Cindy! We had tons of fun!
Just wanted to thank you for these awesome ideas….Just perfect for my granddaughters birthday party (just hoping I can pull it off)… Its all beautiful!!!
Thanks Kate! I had tons of fun styling this one! Good Luck!