Easy Halloween Fudge
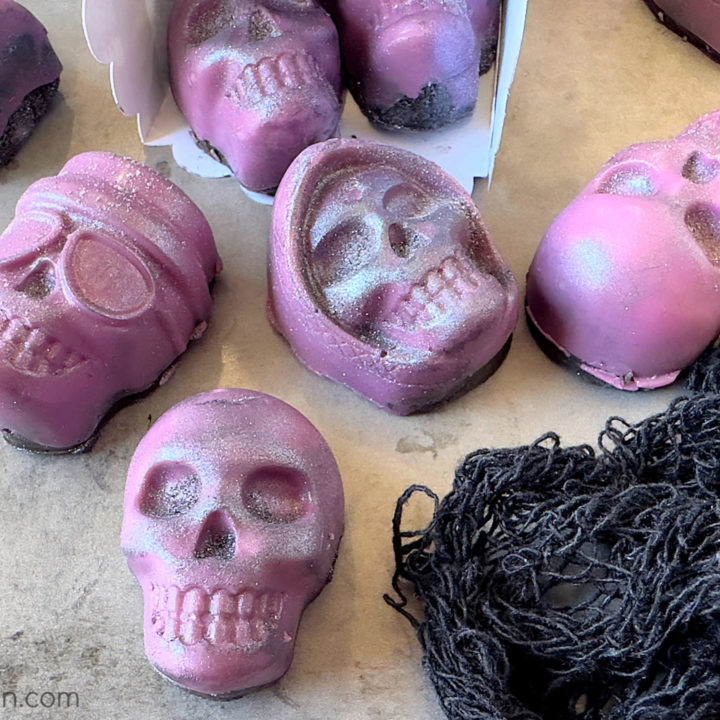
The Ultimate Trick-or-Treat 5-Minute Halloween Chocolate Fudge Recipe. Are you looking to impress your trick-or-treaters this Halloween with a delicious treat? Look no further! In just 5 minutes, you can whip up a batch of decadent chocolate fudge that will wow your guests at any Halloween party. Get ready to learn all about this quick and easy recipe that will elevate your Halloween celebration to the next level. Perfect for a kid’s Halloween Party and also great for an adult Halloween party. This skull-shaped fudge is creamy on the inside and dipped in a crisp candy coating. Also included is the free download for the popcorn box!
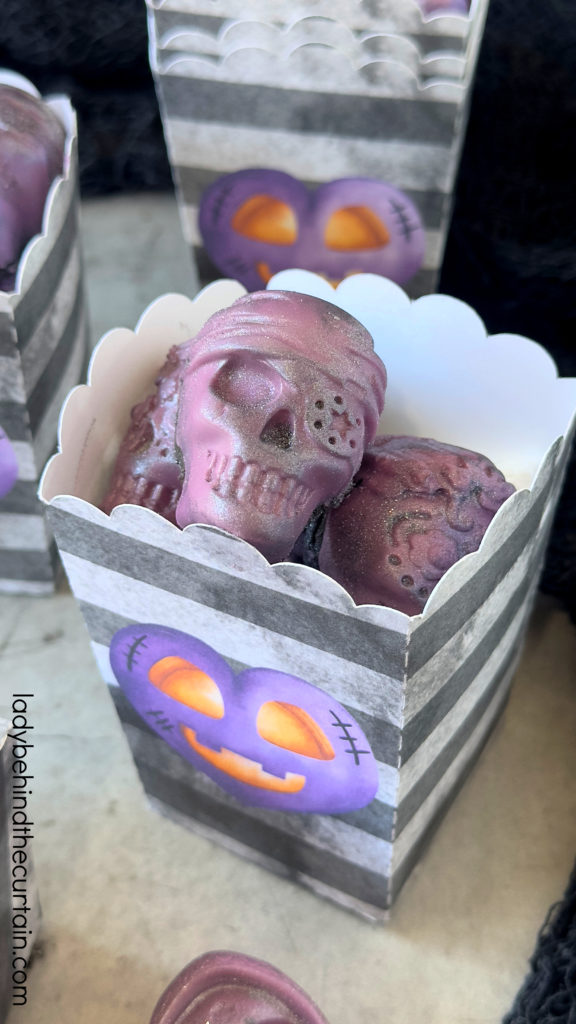
How to Make Halloween Skull-Shaped Fudge
To create this delectable Halloween chocolate fudge, you’ll only need a few simple ingredients you likely already have in your kitchen. Let’s look at what you’ll need to make this delicious treat in just 5 minutes.
Before you dive into making this quick and easy Halloween chocolate fudge, it’s essential to prepare your ingredients and tools. Gather your chocolate chips, peanut butter chips, sweetened condensed milk, butter, vanilla extract, and any optional add-ins like nuts or sprinkles. If using a candy mold, make sure to add a spray of non-stick cooking spray. Once everything is organized and ready to go, you’ll be ready to move on to the fun part – decorating your fudge with spooky Halloween designs.
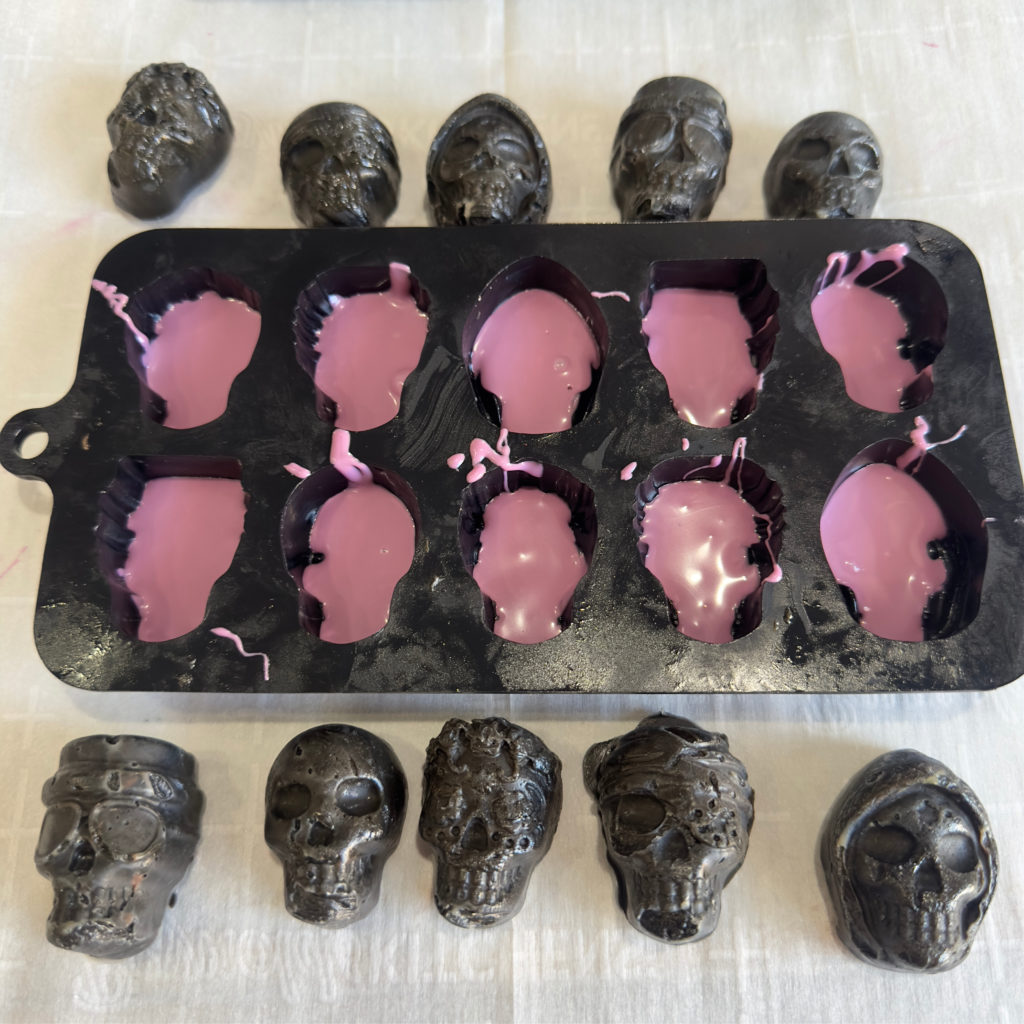
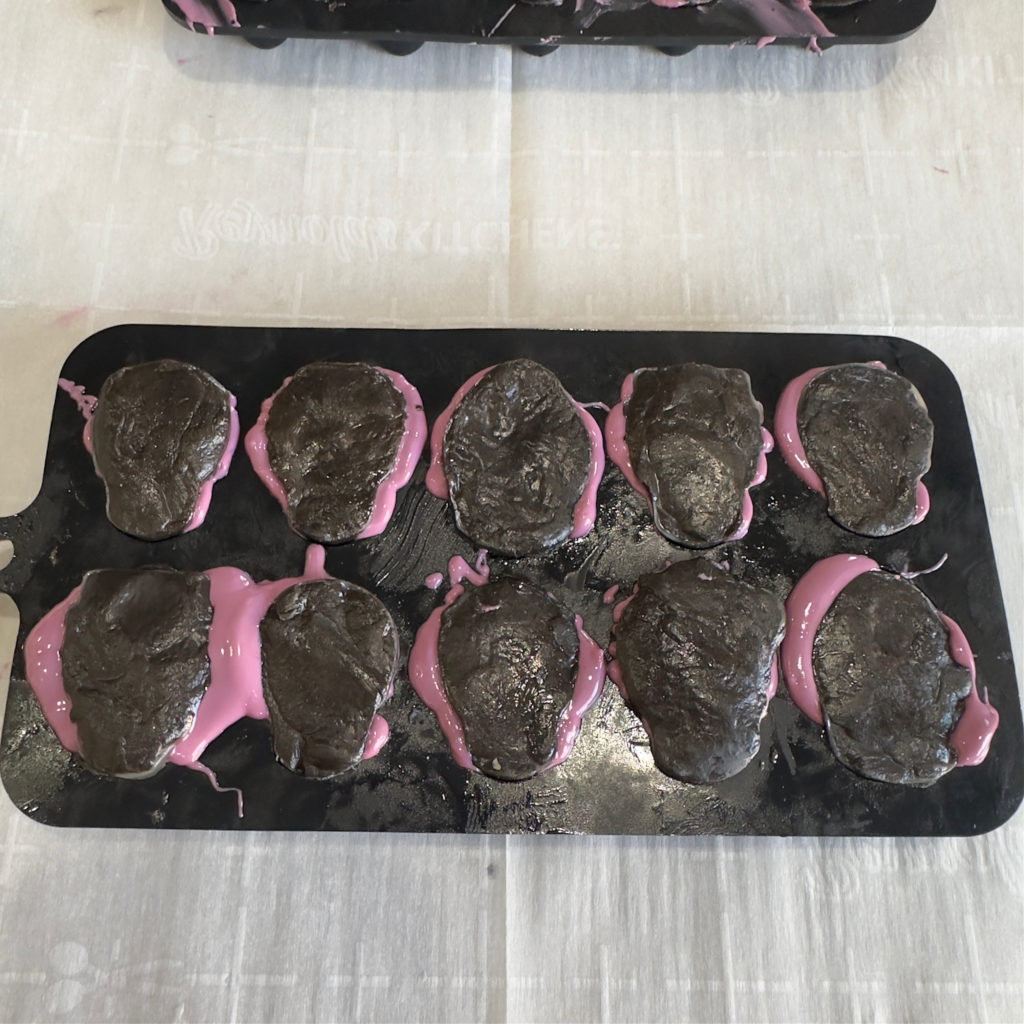
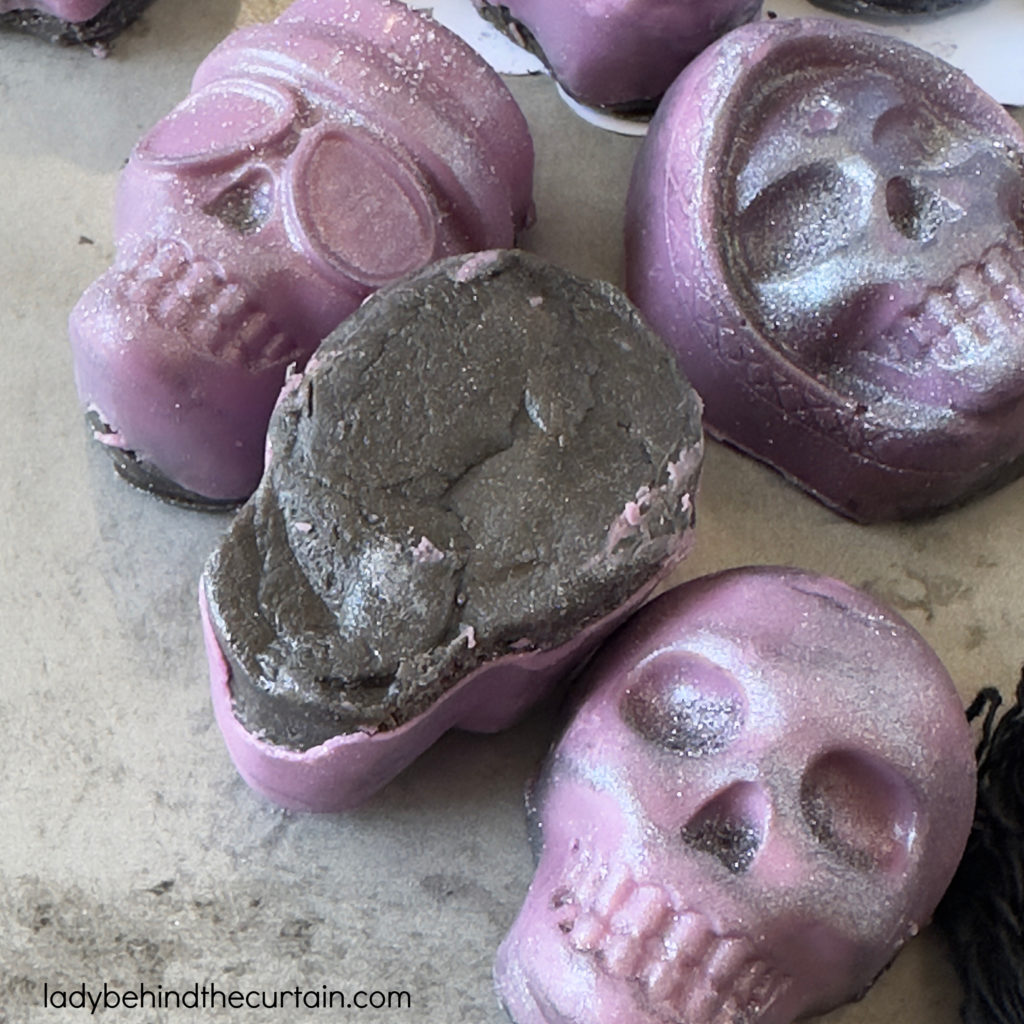
MATCH THE SKULL DESIGN TO THE TRAY–PRESS FUDGE SKULLS INTO THE CANDY-COATED MOLDS.
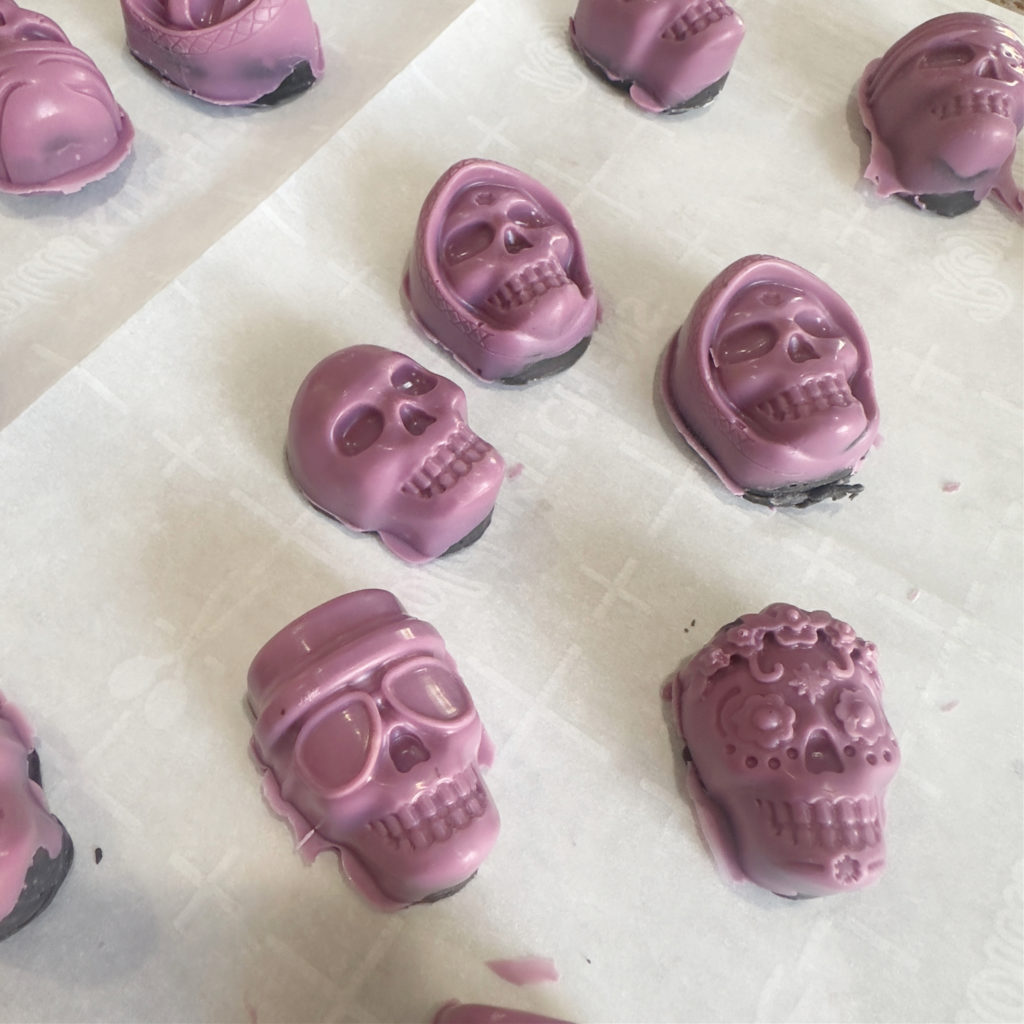
PLACE CANDY-COATED FUDGE STILL IN THE SILICONE MOLDS IN THE REFRIGERATOR TO HARDEN. ONCE THE MOLDS ARE HARDENED, GENTLY PEEL SKULLS FROM THE MOLD.
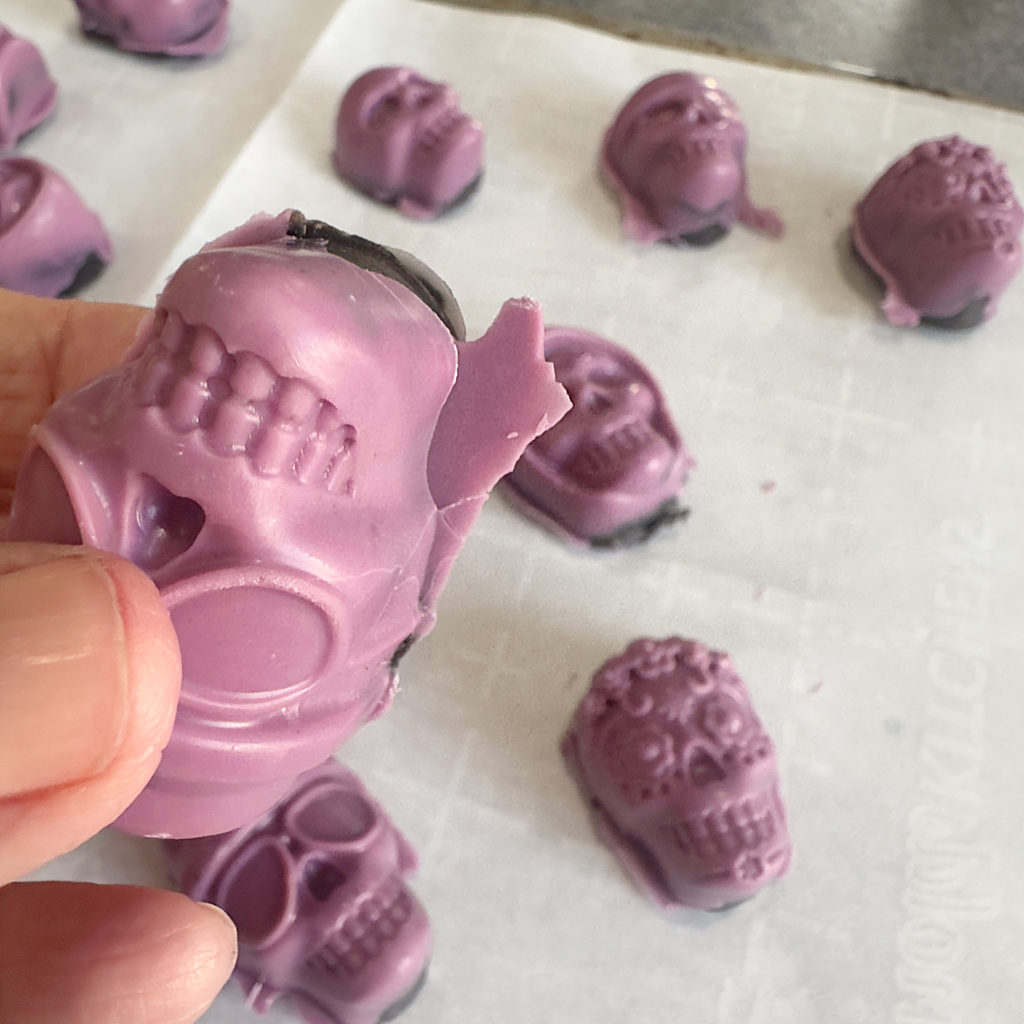
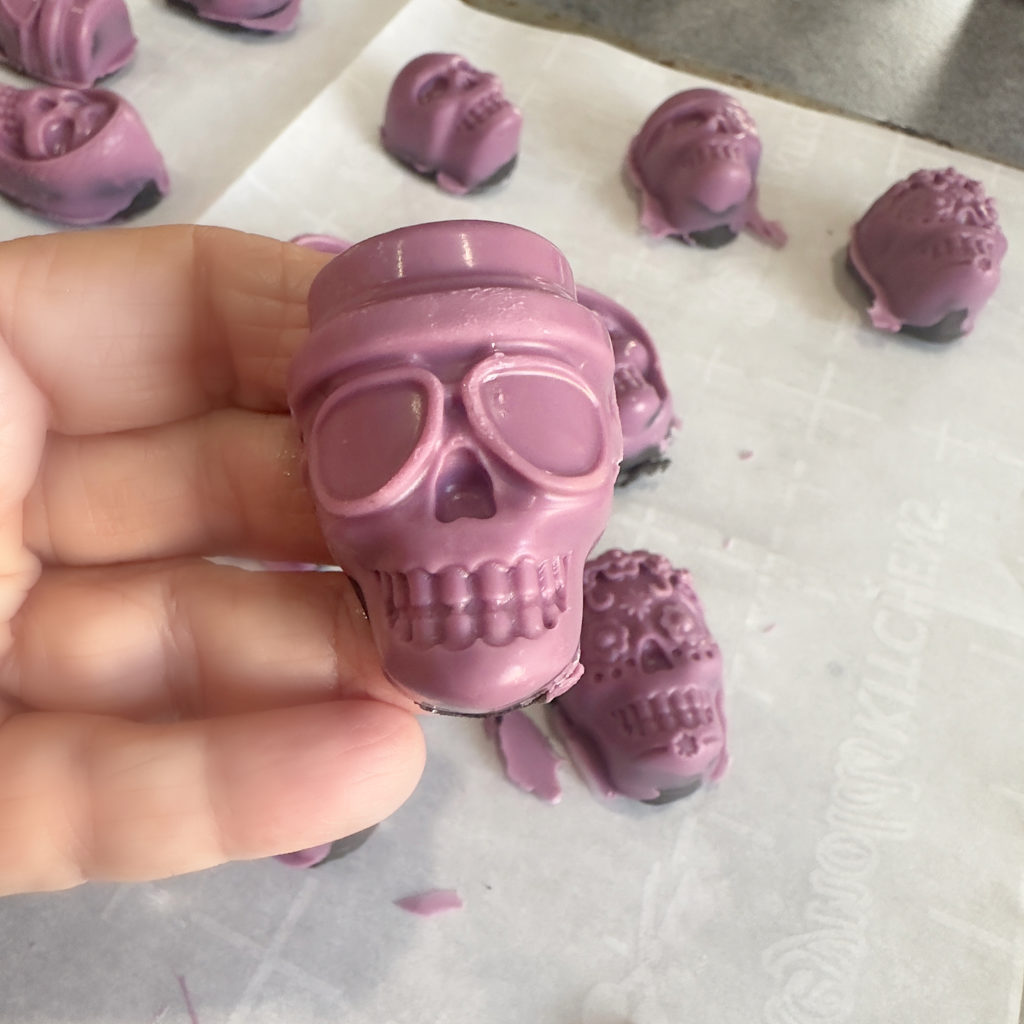
IF YOU HAVE UNEVEN EDGES, SNAP THE COLD CANDY COATING OFF THE MOLD. RUB YOUR WARM FINGERS AROUND THE EDGES TO CREATE A SMOOTH EDGE. IF THE CANDY IS TOO THICK TO SNAP OFF, USE A MICROPLANE AND GENTLY SAW OFF THE UNEVEN EDGES.
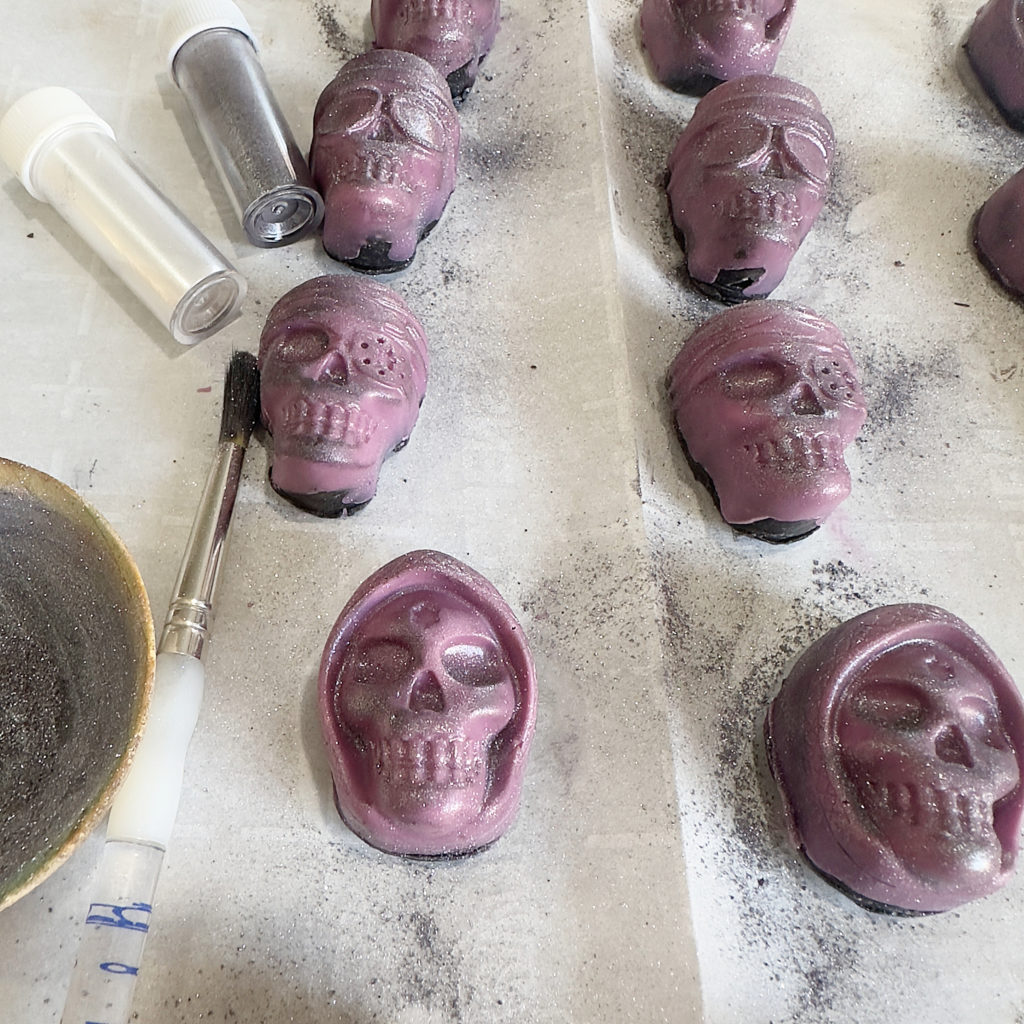
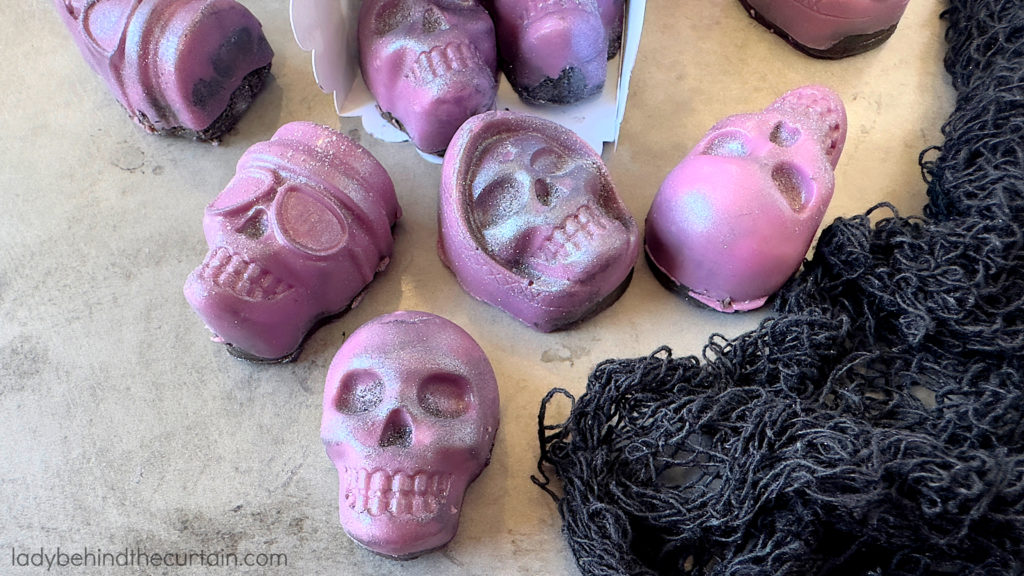
FOR A FUN EFFECT, BRUSH ON PEARL DUST. I USED A MIXTURE OF BLACK AND SILVER.
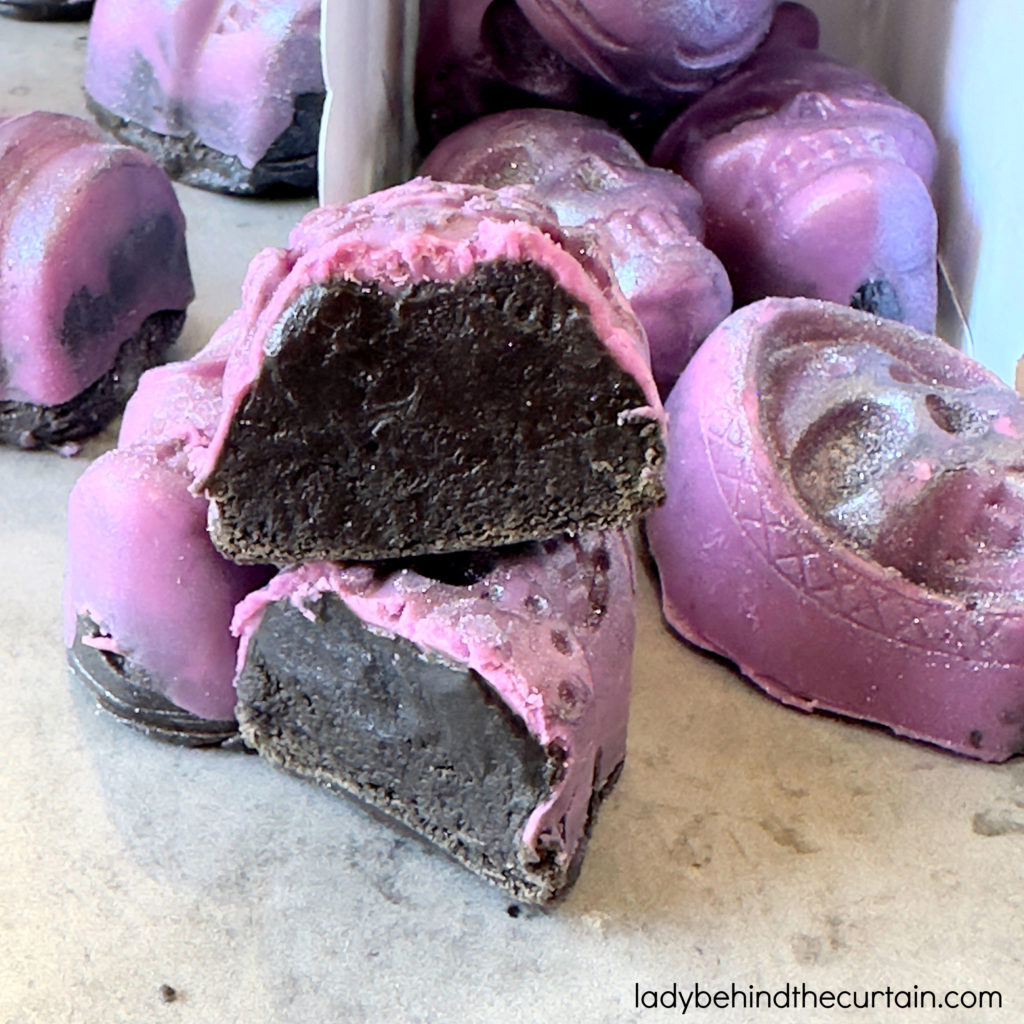
VIEW FROM THE BACK AND INSIDE OF THE CREAMY EASY-TO-MAKE FUDGE!
CREEPY HALLOWEEN FUDGE RECIPE INGREDIENTS-full printable recipe below in recipe card
- 1 (10 ounce) bag semisweet chocolate chips
- 1 cup peanut butter chips
- 1 (14 ounce) can unsweetened condensed milk
- 2 tablespoons unsalted butter, softened
- 1 teaspoon vanilla extract
- black gel food coloring
- Optional: skull shapes candy mold (each skull measures—1½ inches tall x 1 inch thick)
- 1 cup purple melting wafers
- black edible pearl dust (Wilton)
SKULL SHAPED HALLOWEEN FUDGE INSTRUCTIONS
- Lightly spray candy mold with nonstick cooking spray.
- In a 4-cup microwaveable measuring cup, mix chocolate chips, peanut butter chips, milk, and butter. Mix ingredients.
- Microwave uncovered on high for 1 minute, stir and continue at 60% for 30 seconds.
- Stir in vanilla and black gel food coloring (the amount is up to you).
- Keep stirring until creamy.
- Spoon the fudge mixture into the prepared candy mold.
- Lightly press to ensure the fudge has contact with the skull impression of the mold.
- Refrigerate uncovered for about 1 hour or until firm.
- Gently remove the fudge from the mold. Place skull-shaped fudge on a cookie sheet lined with parchment paper.
- Reheat the remaining fudge for 30 seconds.
- Lightly press into a skull-shaped candy mold.
- Refrigerate for 1 hour or until firm.
- Gently remove the fudge from the mold and place it on the lined cookie sheet with the first batch of fudge.
- BEFORE MELTING THE CANDY WAFERS—(if using a candy mold with an assortment of shapes) Match the shape to the mold and place them in front of the shape on the candy mold.
- In a small microwaved safe bowl add the melting wafers. Heat 1 minute, stir until the candy is melted and creamy.
- Spoon a small amount of the melted candy into each skull well.
- Press the matching skull shape into the well with the melted candy.
- Put candy mold in the refrigerator for 15 minutes or until the candy has hardened.
- Gently remove the candy from the mold.
- Pour pearl dust into a small bowl. Use a small paintbrush that has never been used for paint. Dust the skulls with the dust.
THE SKULL CHOCOLATE MOLD
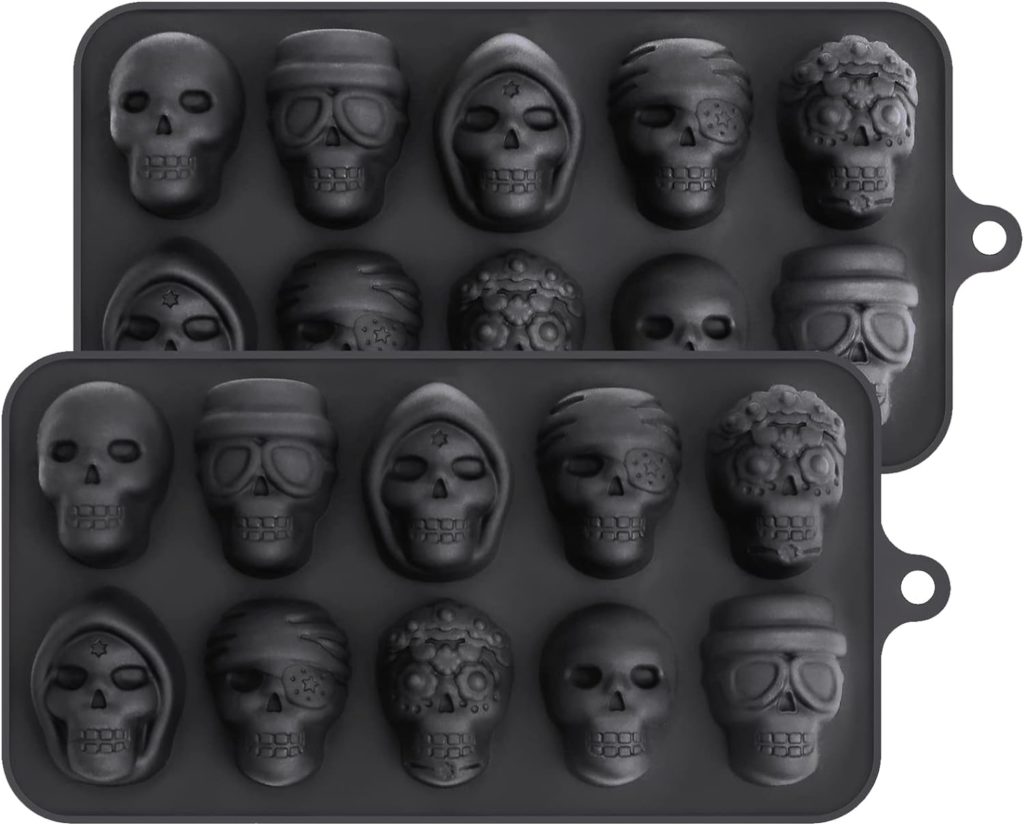
This is the mold I used to create these fun spooky Halloween treats. Skull Silicone Mold Size: 8 x 4.3 x 0.9 inch. Each skull cavity measures about 1.7 inches in length and 1.2 inches in width. Any silicone mold will work. CLICK HERE FOR THE LINK→SKULL CHOCOLATE SILICONE MOLD
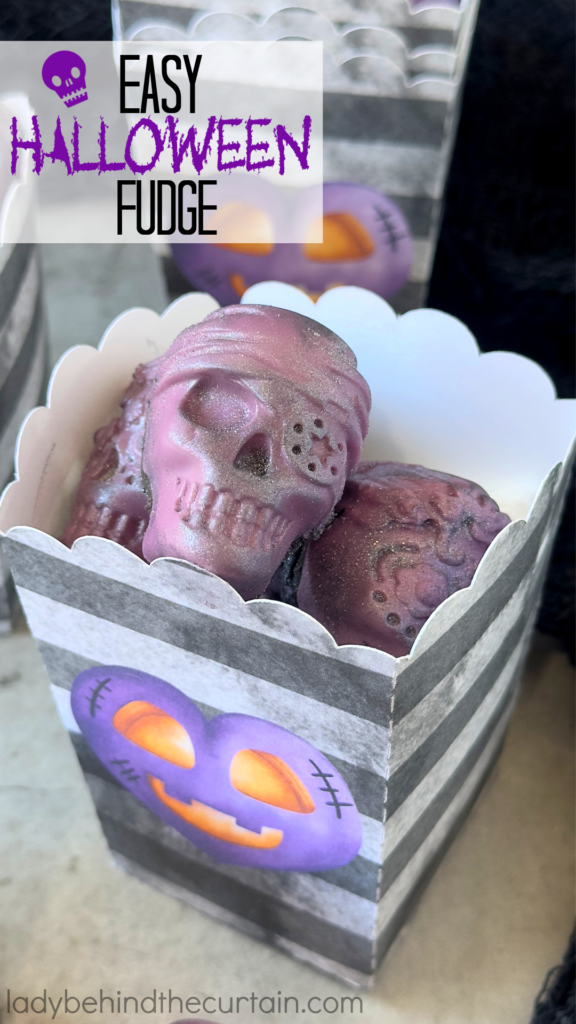
FREE HALLOWEEN POPCORN BOX DOWNLOAD
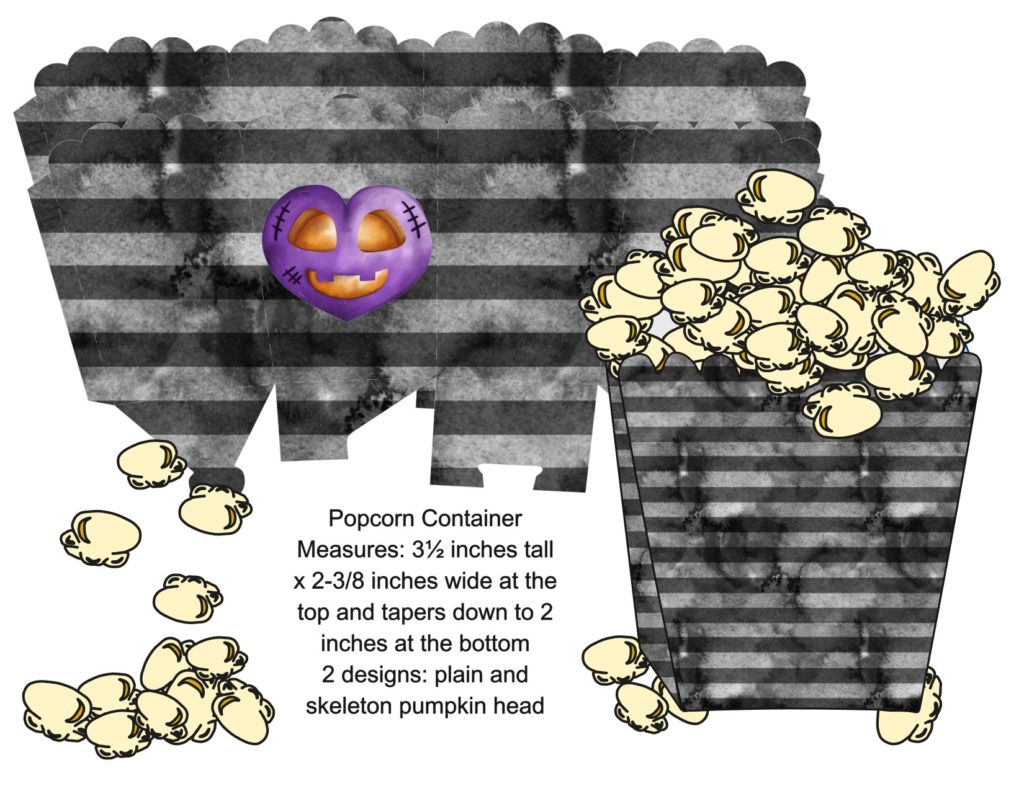
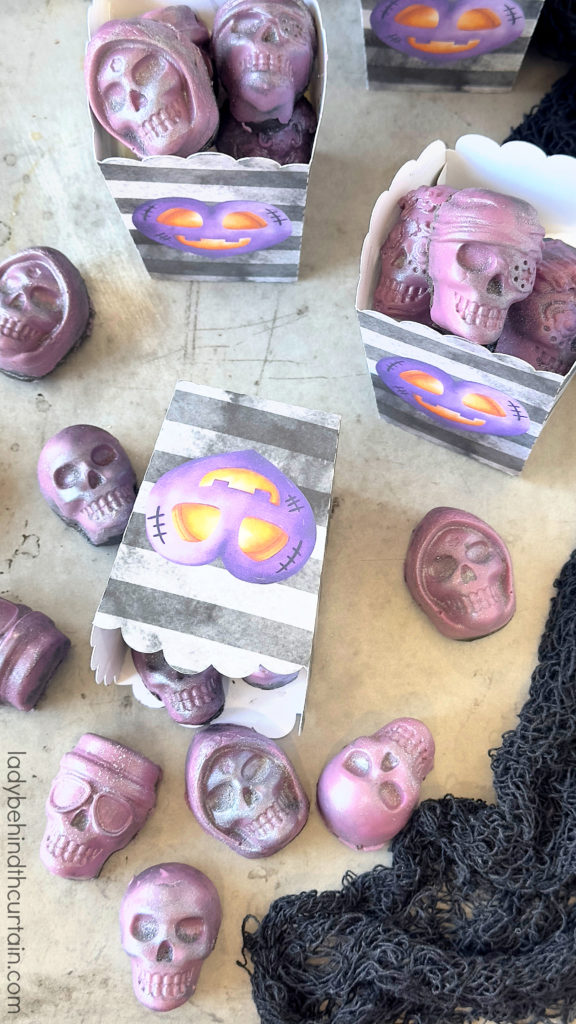
- HALLOWEEN PUMPKIN HEAD POPCORN TREAT BOX: 2 STYLES! 1-plain with black and gray stripes, the other with black and gray stripes, and a purple pumpkin head. This popcorn box is the perfect size for popcorn, muddy buddies, puppy chow, pretzels, party mix, and more! ♥ Popcorn Box—Measures: 3½ inches tall on the back x 2-3/8 inches wide at the top and tapers down to 2 inches at the bottom—EASY TO FOLLOW INSTRUCTIONS ARE INCLUDED—CLICK HERE FOR THE DOWNLOADS↓
- POPCORN CONTAINER (plain)
- POPCORN CONTAINER WITH SKULL
- POPCORN CONTAINER INSTRUCTIONS
PRESENTATION
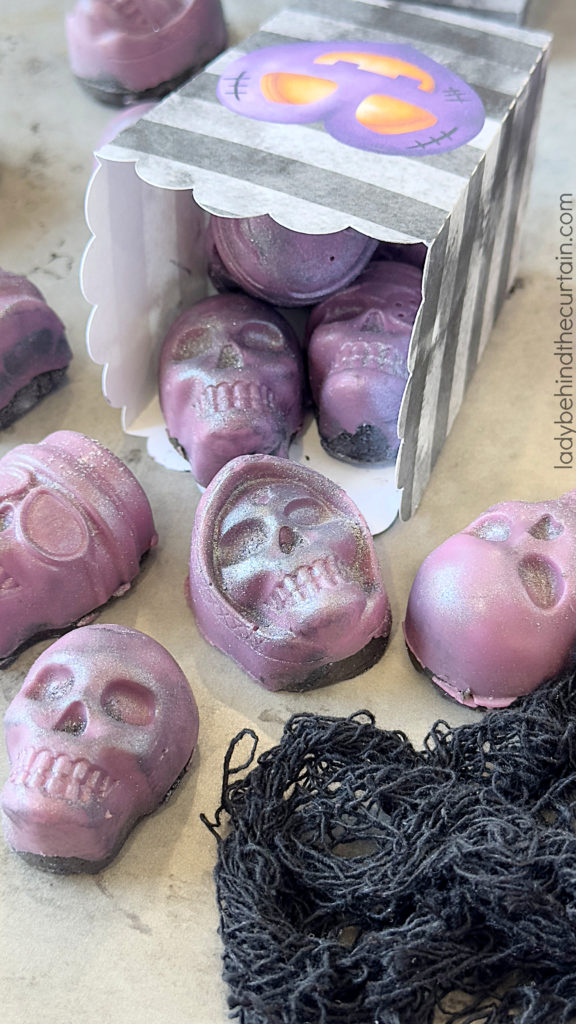
For a final touch, consider how you’ll present your Halloween chocolate fudge to your eager trick-or-treaters. Whether you opt for cute Halloween-themed popcorn boxes (free download provided) or arrange the fudge on a festive serving platter, the presentation can make all the difference in enhancing the overall experience. Once you’ve added your flair, it’s time to think about how you’ll store your fudge to keep it fresh for the big night.
How to Store Fudge
To keep your Halloween chocolate fudge fresh and delicious for the big night, store it in an airtight container at room temperature. Avoid placing it in direct sunlight or near any sources of heat, as this can cause the fudge to melt or lose its shape. If you’re making your fudge in advance, consider storing it in the refrigerator to prolong its shelf life. Just be sure to let it come to room temperature before serving to ensure a creamy texture that will delight your trick-or-treaters. Once you’ve mastered the art of storage, you can start exploring different variations to add even more excitement to your Halloween treat lineup.
FUN FUDGE VARIATIONS
If you’re feeling adventurous, there are endless possibilities for adding a twist to your Halloween chocolate fudge recipe. Consider stirring in some chopped nuts for added crunch, or mixing in crushed candy or cookies for a fun flavor burst. For a spooky touch, you could even swirl in some food coloring to create a marbled effect. With a little creativity, you can customize your fudge to suit any Halloween theme or taste preference. Keep experimenting until you find the perfect variation that will have everyone coming back for more. NOTE: I DON’T RECOMMEND ADDING ANYTHING TO THIS FUDGE RECIPE IF YOU CHOOSE TO USE A CANDY MOLD. The addition of nuts, candy, or cookies with mess up the shape of the mold. Ready to take your Halloween treats to the next level? Check out the next section for some spooktacular ideas for party snacks that will have your guests howling for more.
Halloween Party Treats
To elevate your Halloween party spread, why not whip up some additional spooky snacks to complement your delicious chocolate fudge? Get creative with themed treats like Halloween Rice Krispy Treat Pops, Jack-O-Lantern Caramel Apple Slice Pops, or even make your own Caramel Apple Pretzels for a salty-sweet surprise. Don’t forget to set the mood with some eerie decorations and a playlist of haunting tunes to get your guests in the Halloween spirit. With these festive party treats, your gathering is sure to be a hit! Keep the fun going with even more wickedly delicious recipes and unforgettable moments that will leave everyone enchanted and wanting more.
HALLOWEEN FUDGE RECIPES
LATEST POSTS
In just 5 minutes, you can create a show-stopping Halloween treat with this easy chocolate fudge recipe. From the simple ingredients to the fun decorating options, this recipe is a must-try for any Halloween party. So why not give it a whirl and make this Halloween the sweetest one yet? Indulge in this decadent fudge and treat yourself and your guests to a delicious surprise. Happy Halloween!

Easy Halloween Fudge
Ingredients
- 1 (10 ounce) bag semisweet chocolate chips
- 1 cup peanut butter chips
- 1 (14 ounce) can unsweetened condensed milk
- 2 tablespoons unsalted butter, softened
- 1 teaspoon vanilla extract
- black gel food coloring
- Optional: skull shapes candy mold (each skull measures—1½ inches tall x 1 inch thick)
- 1 cup purple melting wafers
- black edible pearl dust (Wilton)
Instructions
- Lightly spray candy mold with nonstick cooking spray.
- In a 4-cup microwaveable measuring cup, mix chocolate chips, peanut butter chips, milk, and butter. Mix ingredients.
- Microwave uncovered on high for 1 minute, stir and continue at 60% for 30 seconds.
- Stir in vanilla and black gel food coloring (the amount is up to you).
- Keep stirring until creamy.
- Spoon the fudge mixture into the prepared candy mold.
- Lightly press to ensure the fudge has contact with the skull impression of the mold.
- Refrigerate uncovered for about 1 hour or until firm.
- Gently remove the fudge from the mold. Place skull-shaped fudge on a cookie sheet lined with parchment paper.
- Reheat the remaining fudge for 30 seconds.
- Lightly press into a skull-shaped candy mold.
- Refrigerate for 1 hour or until firm.
- Gently remove the fudge from the mold and place it on the lined cookie sheet with the first batch of fudge.
- BEFORE MELTING THE CANDY WAFERS—(if using a candy mold with an assortment of shapes) Match the shape to the mold and place them in front of the shape on the candy mold.
- In a small microwaved safe bowl add the melting wafers. Heat 1 minute, stir until the candy is melted and creamy.
- Spoon a small amount of the melted candy into each skull well.
- Press the matching skull shape into the well with the melted candy.
- Put candy mold in the refrigerator for 15 minutes or until the candy has hardened.
- Gently remove the candy from the mold.
- Pour pearl dust into a small bowl. Use a small paintbrush that has never been used for paint. Dust the skulls with the dust.
SIGN UP FOR THE LADY BEHIND THE CURTAIN NEWSLETTER

NEWSLETTER: Receive (twice a month) seasonally themed newsletters full of recipes, tips, and tricks. Sometimes even gifts! Click here for the Newsletter→CURTAIN CALL NEWSLETTER
THANKS FOR VISITING♥


The skeleton mold is such a nice trick. It makes the fudge into individual skull treat masterpieces. The edible glitter really takes it up a notch too. These Halloween chocolates are so fancy and will make beautiful gifts.
Thank You Scarlet.