Monster Pool Noodle Centerpiece
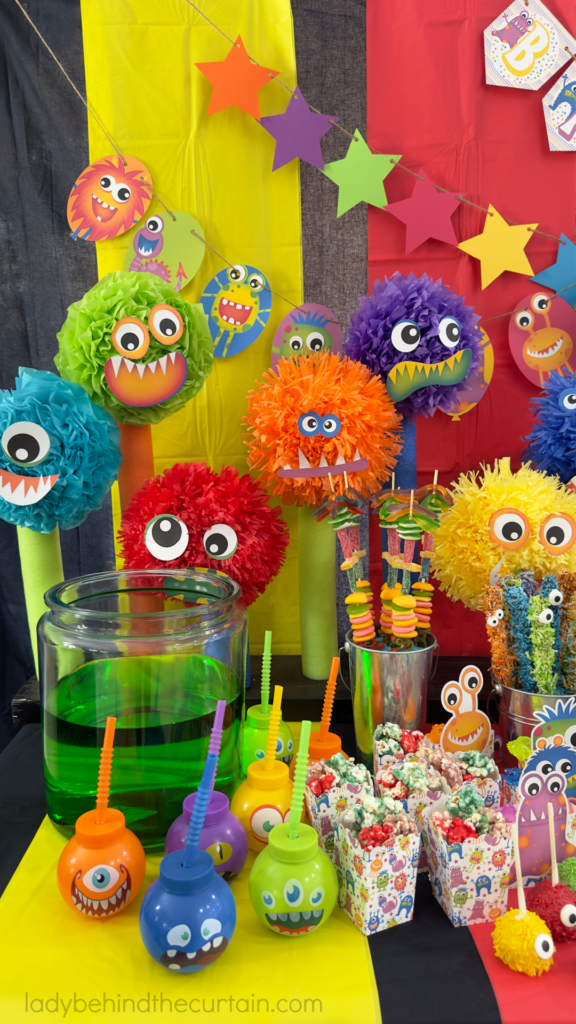
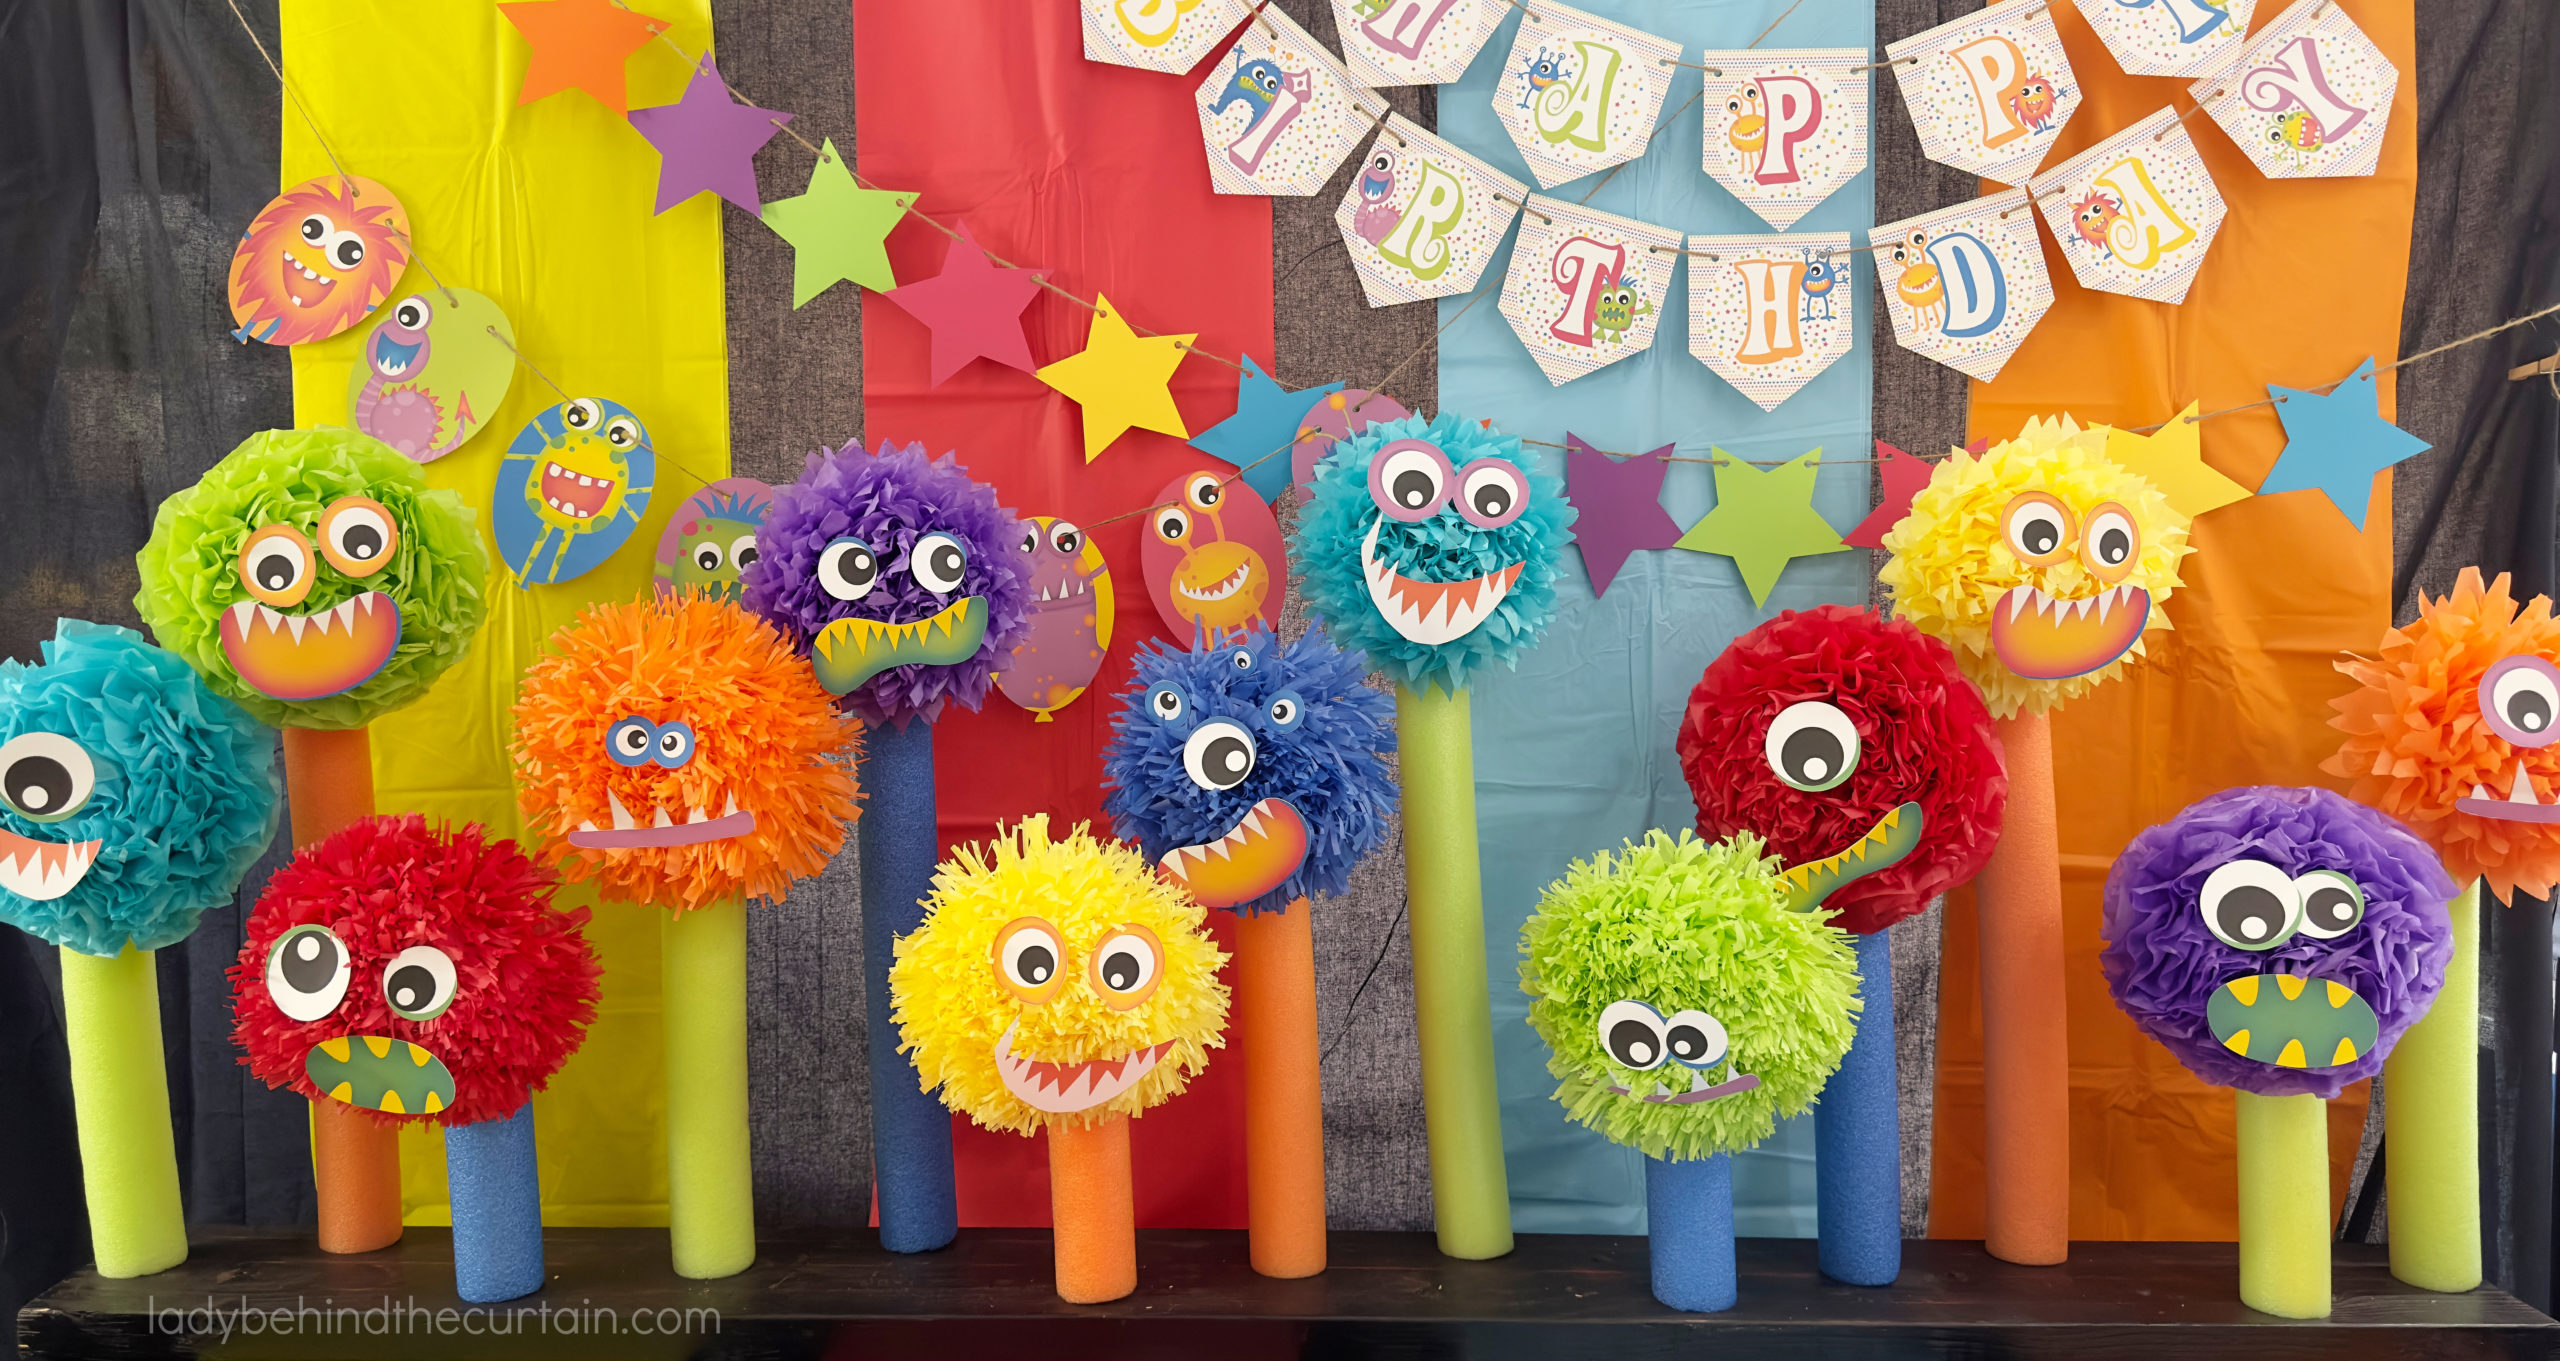
Monster Pool Noodle Centerpiece: This easy to make creative birthday party centerpiece or party backdrop, inexpensively adds a collection of colors and height to your party table. Print and cut out the FREE assortment of monster eyes and monster mouths (links below) to create your own monster collection. Also below you will find instructions on how to mix and match or transform the monsters into birthday candles. The perfect kid’s birthday party decoration idea! Scroll down for full FREE MONSTER BIRTHDAY PARTY PRINTABLE COLLECTION.
How to Make a Monster Pool Noodle Backdrop Base
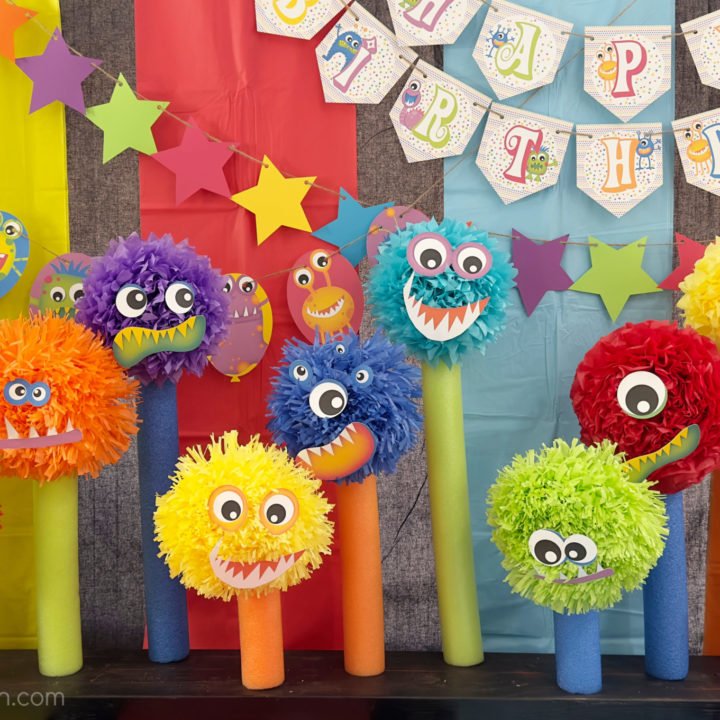
This adorable monster birthday party design can be put down the center of a party table or used as a backdrop. The bright colors of the tissue paper adds the perfect pop of color while staying within the monster theme. SCROLL DOWN FOR HOW TO MAKE TISSUE PAPER FLOWER MONSTER HEADS↓
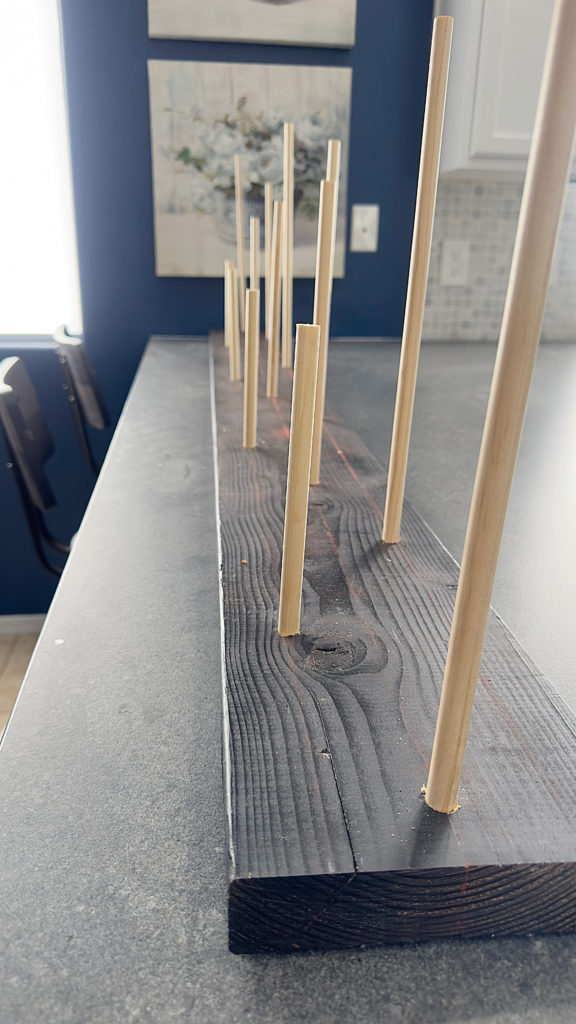
FUN NOODLE MONSTER CENTERPIECE SUPPLIES -full printable instructions below in how to card
CLICK HERE FOR THE BASE INSTRUCTIONS→POOL NOODLE MONSTER CENTERPIECE INSTRUCTIONS
- 2in x 8in x 6ft piece of wood (I found mine on the clearance cart at Home Depot)
- 3-4 ½inch round 4 foot long wooden dowels (found at Home Depot)
- 6 pool noodles (found at Dollar Tree)
- 2 (40 sheets) 20x20in packages multi colors tissue paper (found at Walmart)
- 26 gauge wire
- black spray paint
- ½ inch drill bit
- electric drill
- wire cutters
- scissors
- double stick tape
- white card stock paper (for printing the eyes and mouths)
- optional 5 blade scissors
PUTTING THE MONSTER BACKDROP PIECE TOGETHER
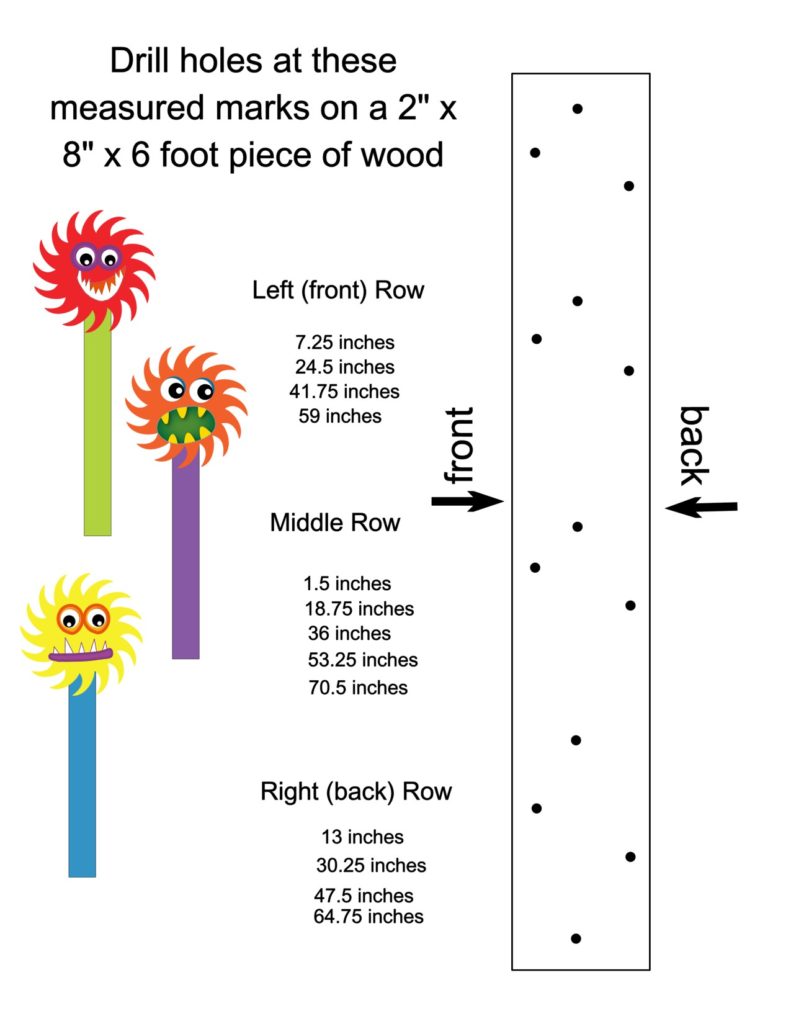
- Drill ½inch holes in wood as indicated in photo.
- Paint board.
- Cut dowels: 4 (15 inch), 5 (11 inch), 4 (8 inch)
- Insert cut dowels into drilled holes
- Cut Pool Noodles: 4 (22 inches), 5 (19 inches), 5 (12 inches)
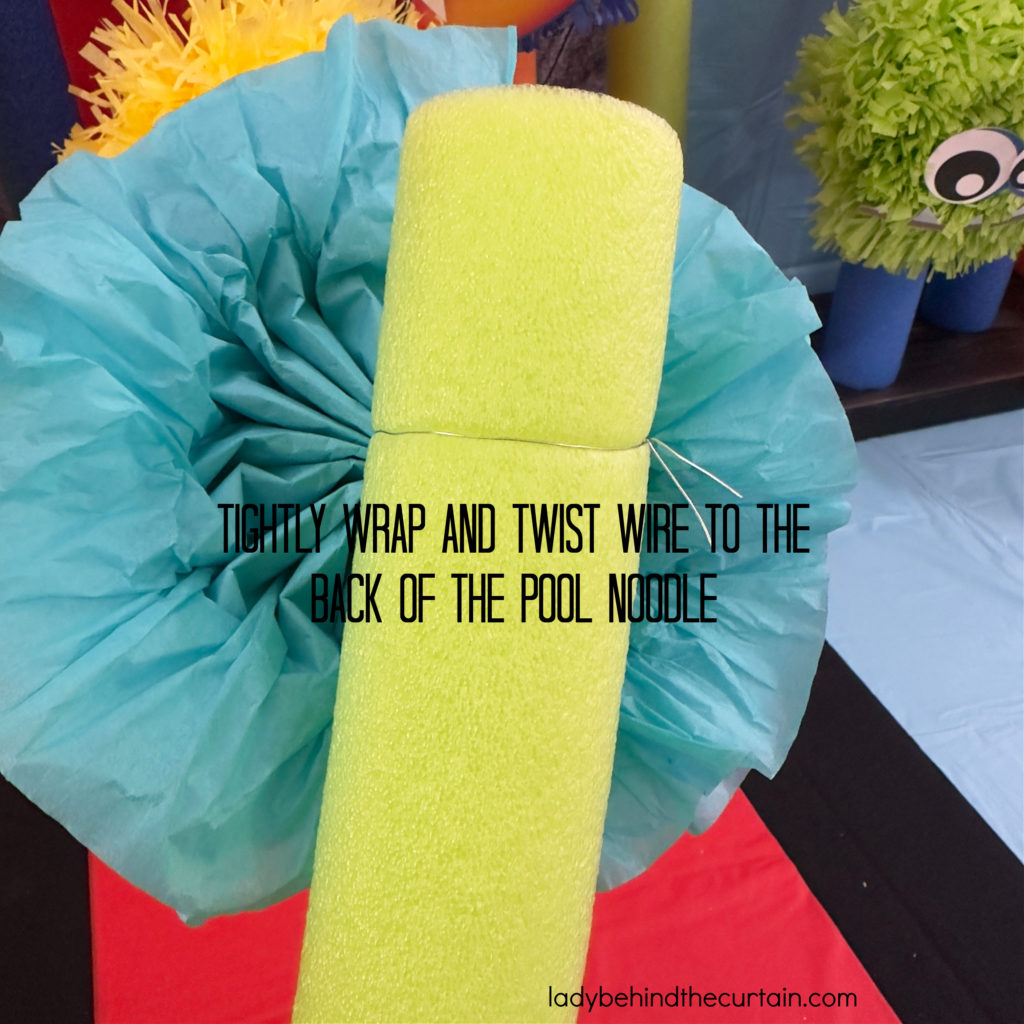
- Wrap wire (with tissue paper flower already attached) 3-4 inches down from the top of the pool noodle and tightly twist on.
- Print and cut out monster eyes and monster mouths.
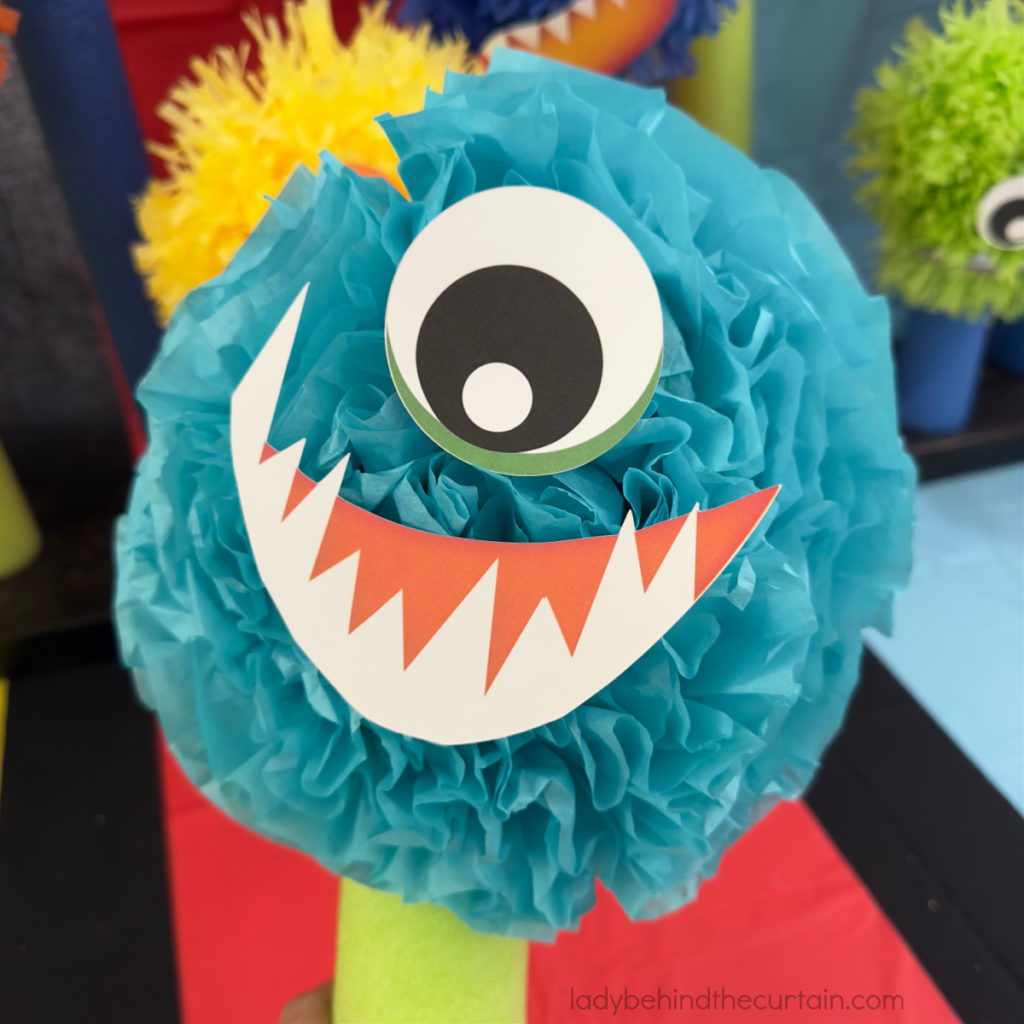
- Add double stick tape to the back of the printed monster faces, press to the flower heads.
FREE MONSTER BIRTHDAY PARTY PRINTABLE COLLECTION
It’s easy to see that adding pops of color is what makes a birthday party treat table fun and visually appealing. SCROLL DOWN TO DISCOVER HOW THIS MONSTER CENTERPIECE CAN BE TRANSFORMED INTO BIRTHDAY CANDLES.
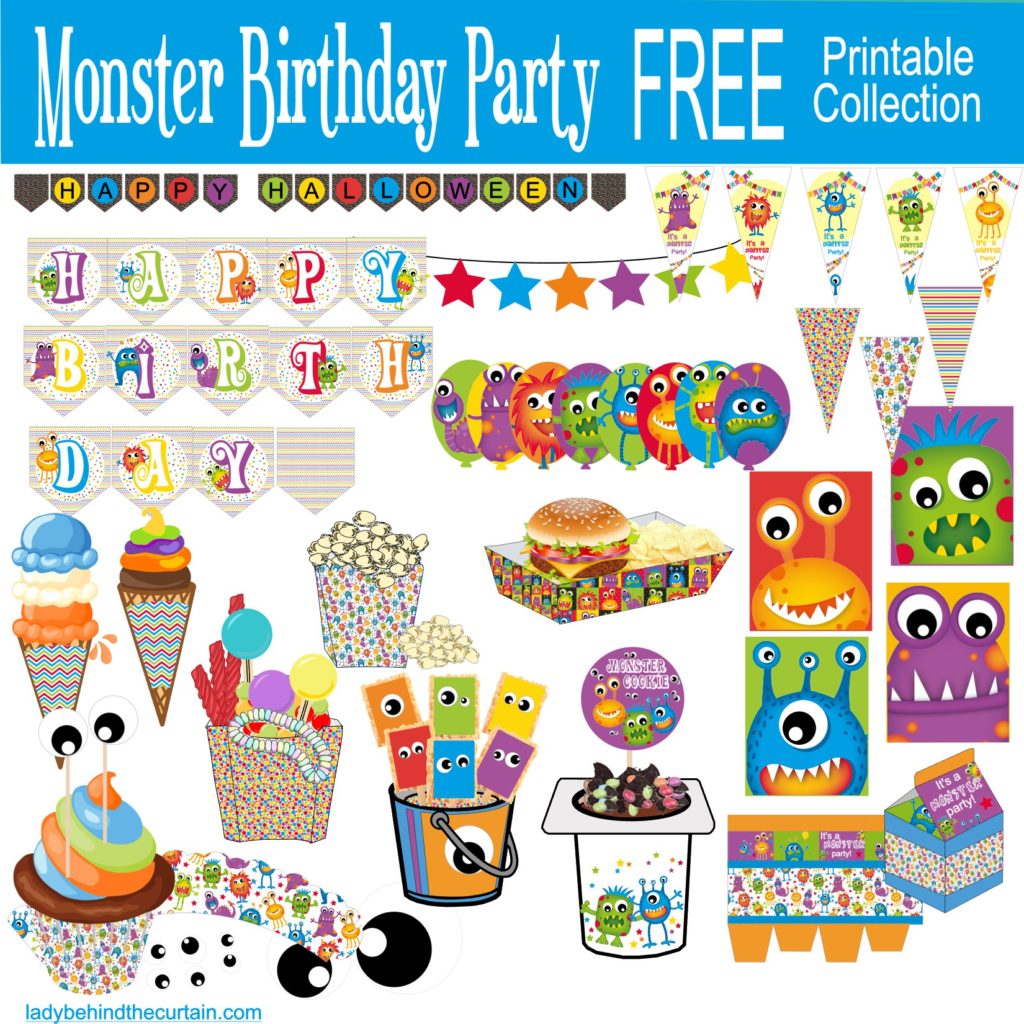
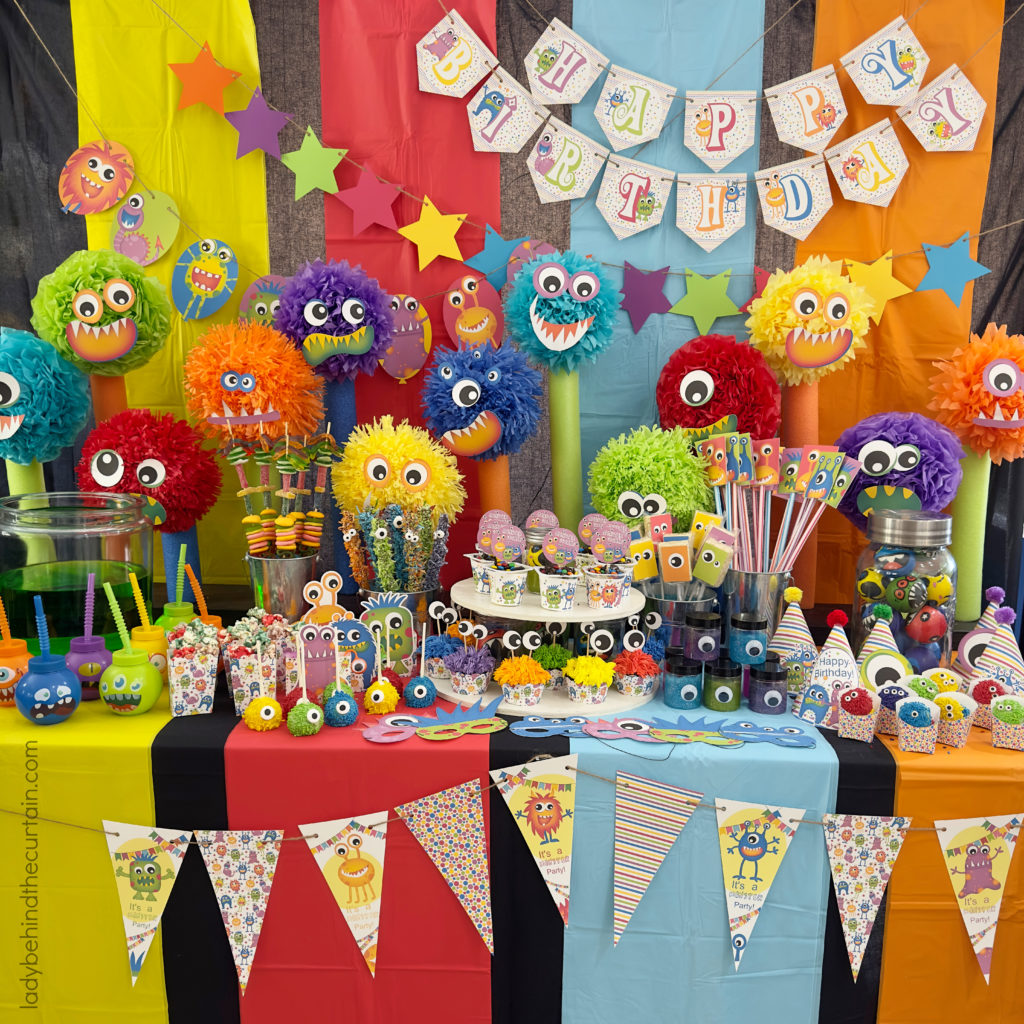
Cartoon Monster Party FREE Printable Collection: Whether you’re planning a kids birthday party or a fun light hearted Halloween party, this collection comes with a Happy Halloween banner and a Happy Birthday banner both are super cute! These fun little monster have big eyes and are ready to party. The collection has cupcake wrappers, banners, food containers, bingo game and more!
How to Make Tissue Flower Monster Heads
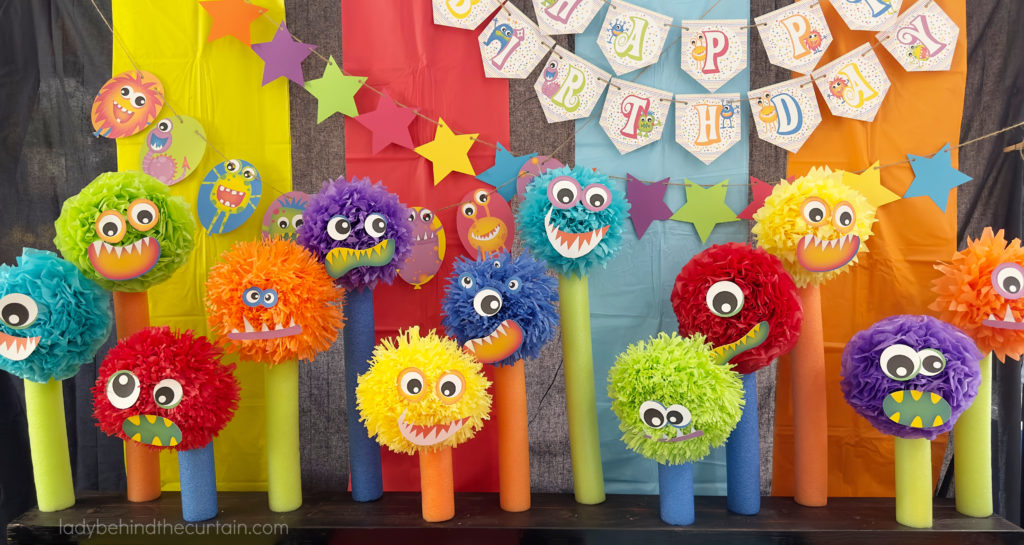
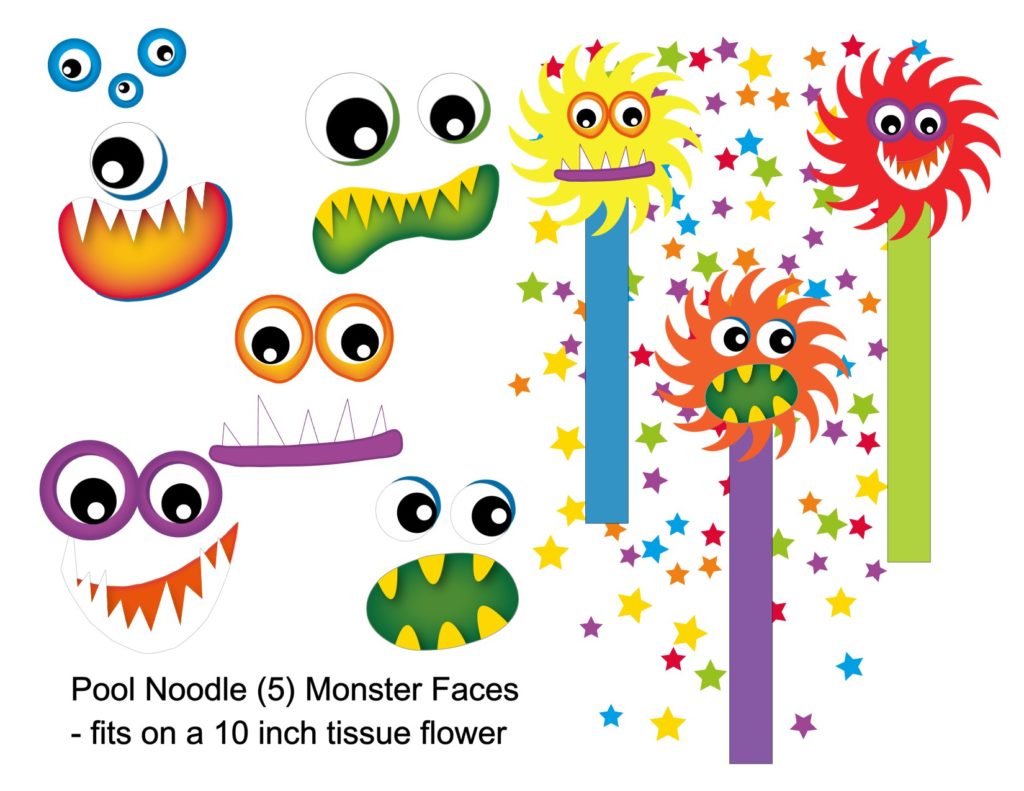
TISSUE PAPER MONSTER FACE POOL NOODLE CENTERPIECE: This easy to make monster party centerpiece will add a huge impact on your party table. Whether you line it down the center of the guest table or use it as a backdrop to a party treat table, your guests are going to love the fun monster faces, brightly colored tissue paper flower heads, and colorful pool noodles. Use pool noodles to create a unique party table display. Drill holes in a piece of wood to fit ½ inch dowels, cut dowels to fit half way up the desired height of the pool noodle, slide pool doodles over the dowels. Make tissue flowers. The faces fit perfectly on a 10 inch tissue paper flower. ♥5 Monster face designs—use double stick tape to adhere the faces to the flowers. —CLICK HERE FOR THE DOWNLOADS↓
- TISSUE FLOWER MONSTER FACE 1
- TISSUE FLOWER MONSTER FACE 2
- TISSUE FLOWER MONSTER FACE 3
- TISSUE FLOWER MONSTER FACE 4
- TISSUE FLOWER MONSTER FACE 5
- TISSUE FLOWER MONSTER FACE JUST EYES
- TISSUE FLOWER MONSTER FACE JUST MOUTHS
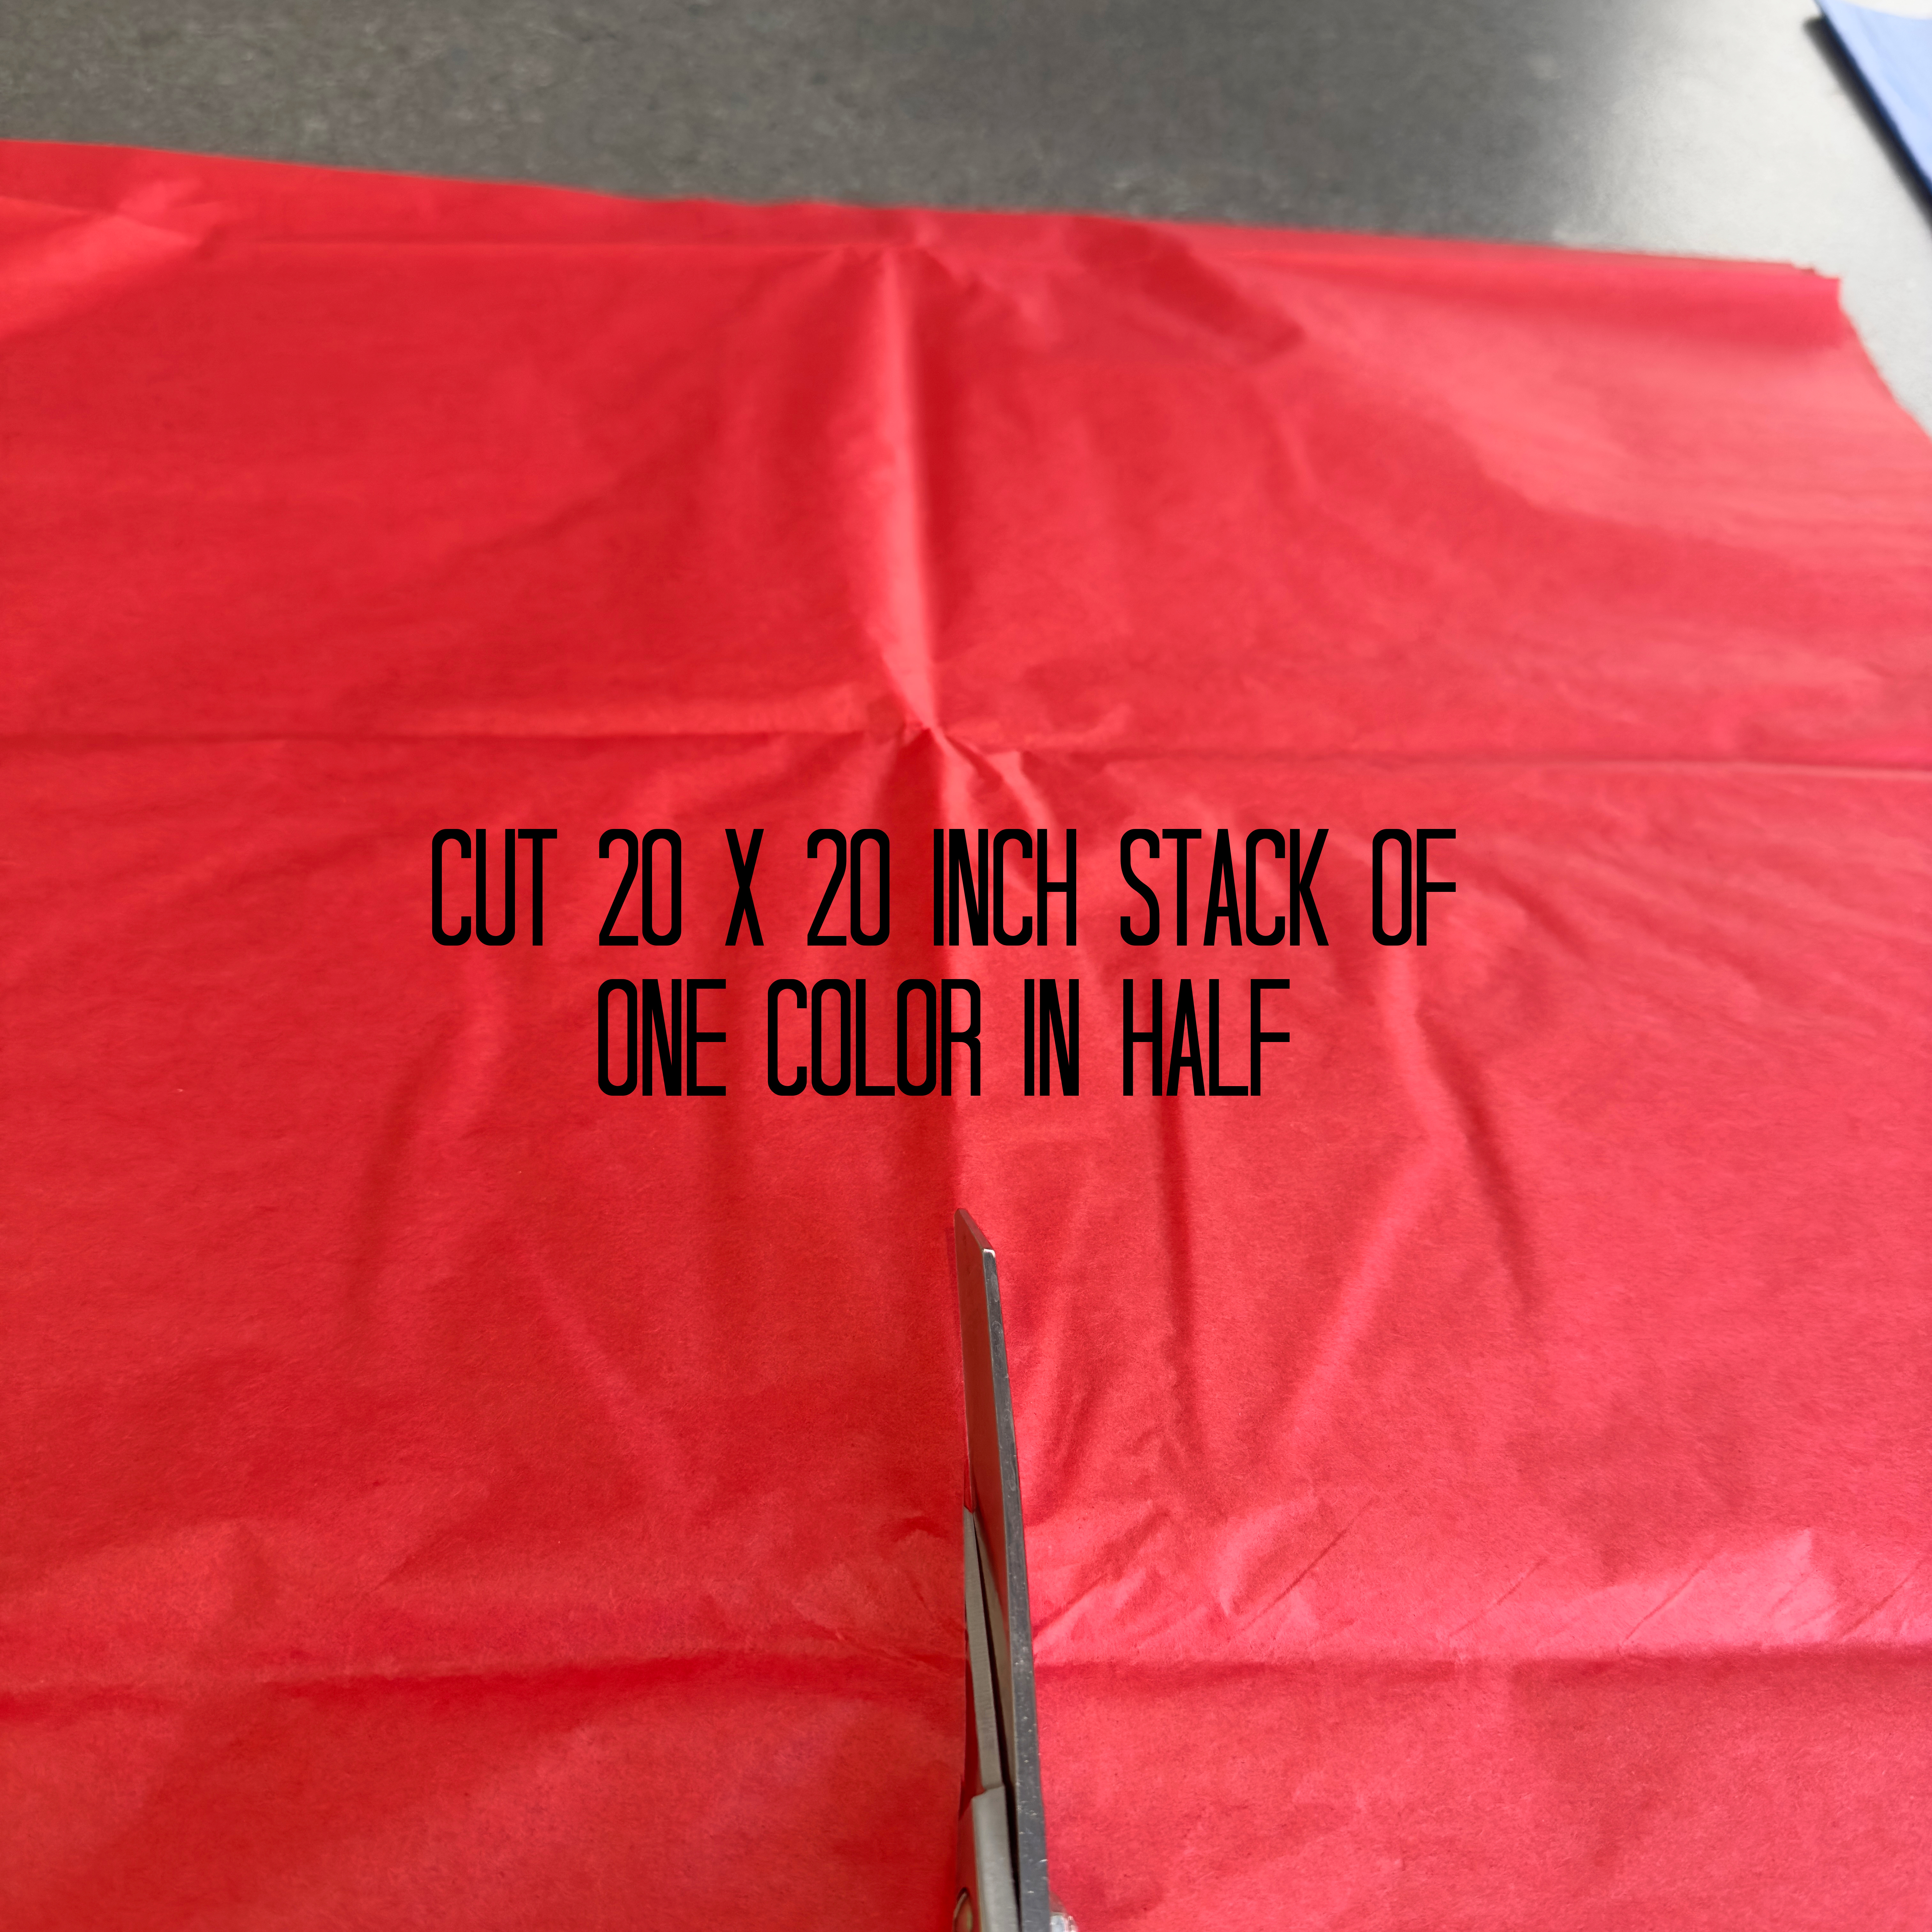
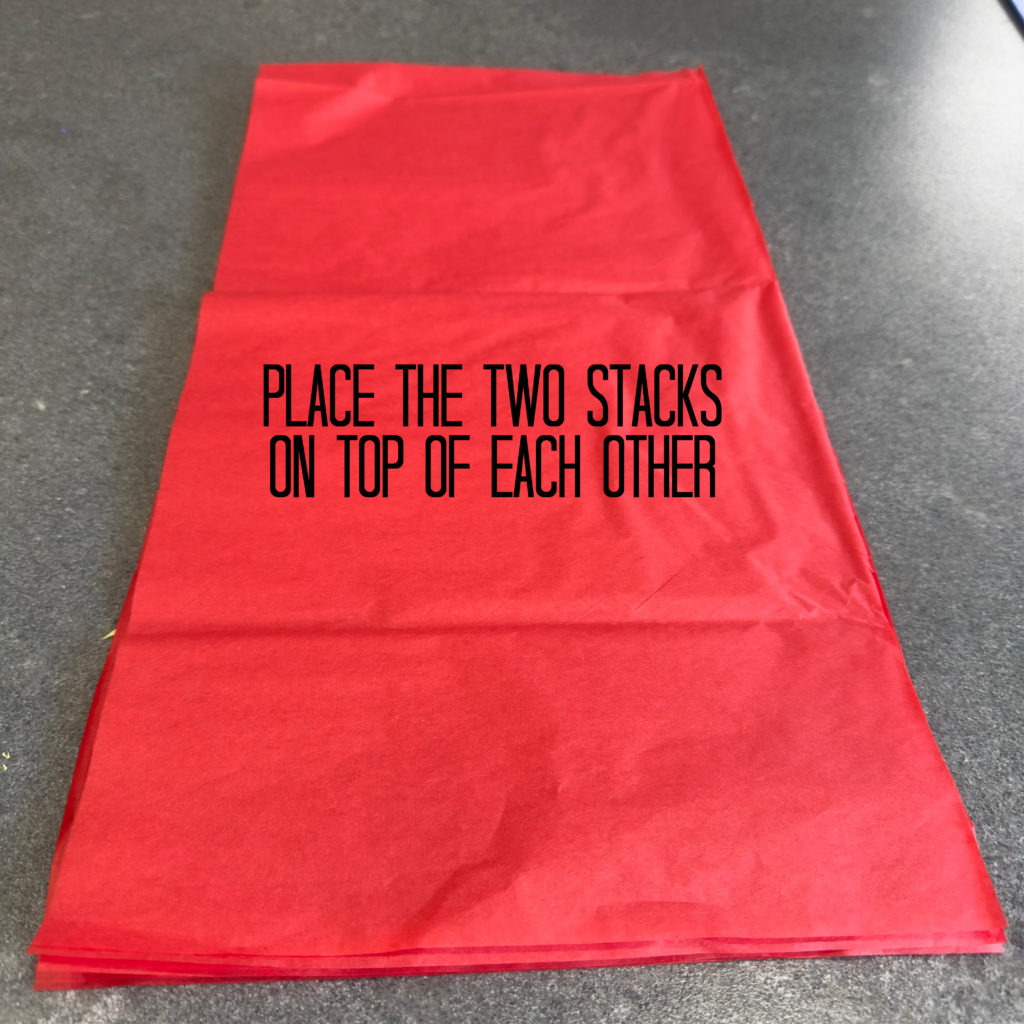
- Open tissue paper, lay the same color on top of each piece, cut in half (I used the fold line as my guide), place the cut pieces on top of the other side.
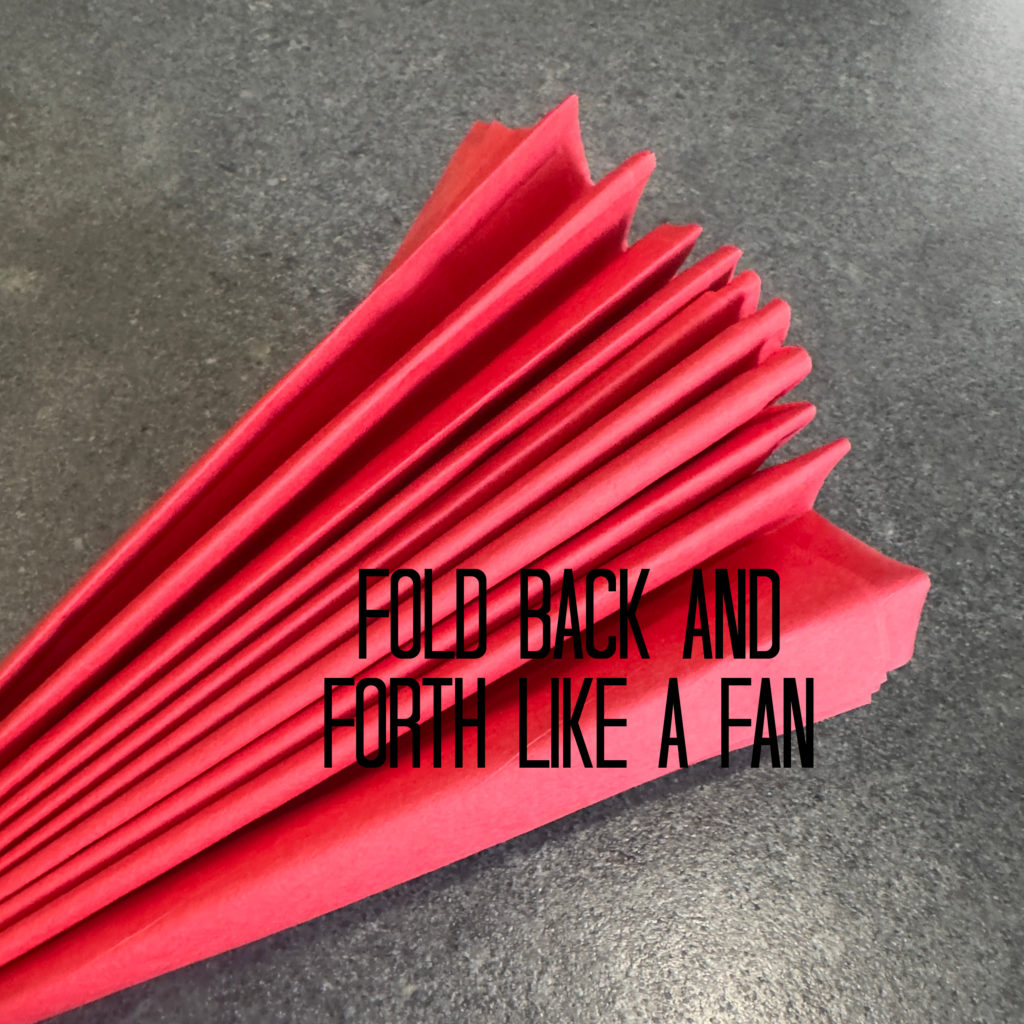
- Fold like a fan in a back and forth motion.
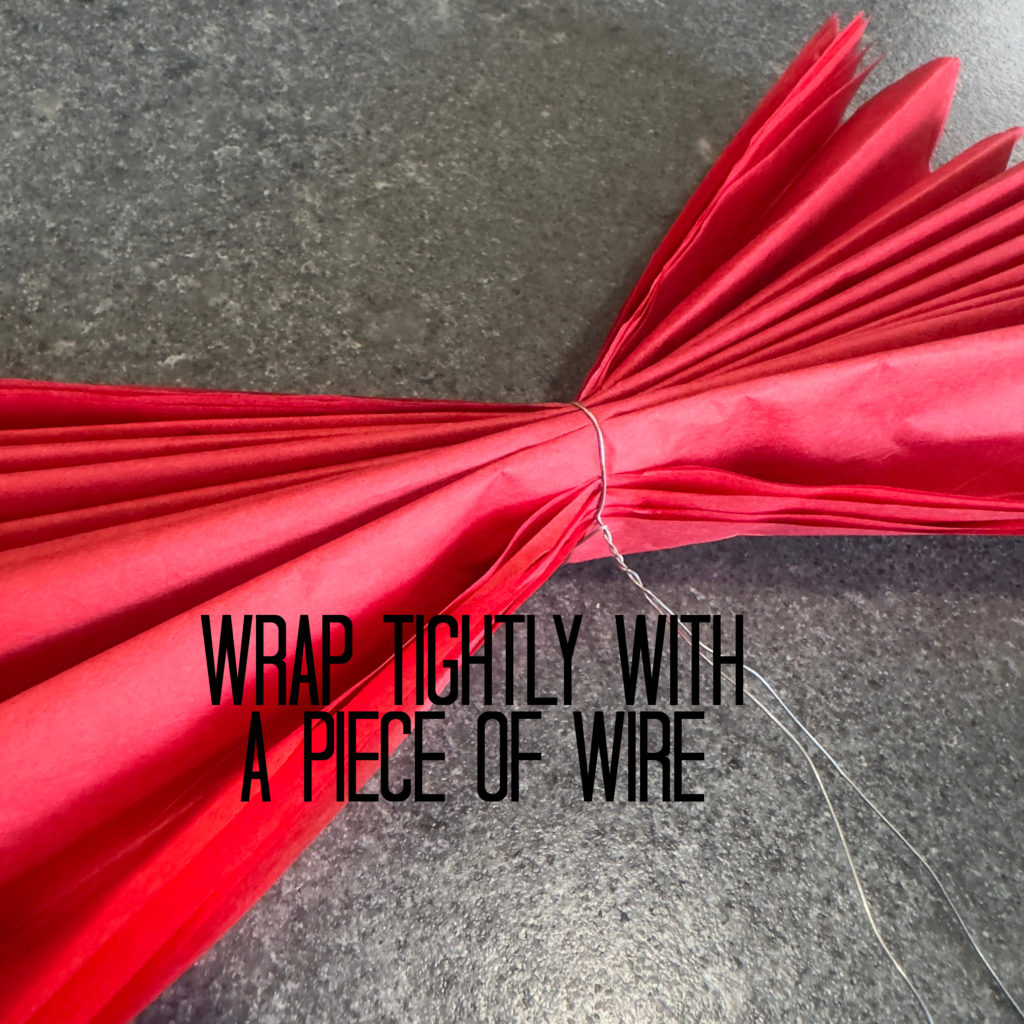
- Fold in half to find the center, wrap a long piece of wire around the center of the fold.
- BEFORE SPREADING THE PIECES decide if you want the ends cut. There are three options in this design. 1. Straight 2. Pointed 3. Fringed
- FOR THE STRAIGHT OPTION: Leave the end alone and fluff the flower
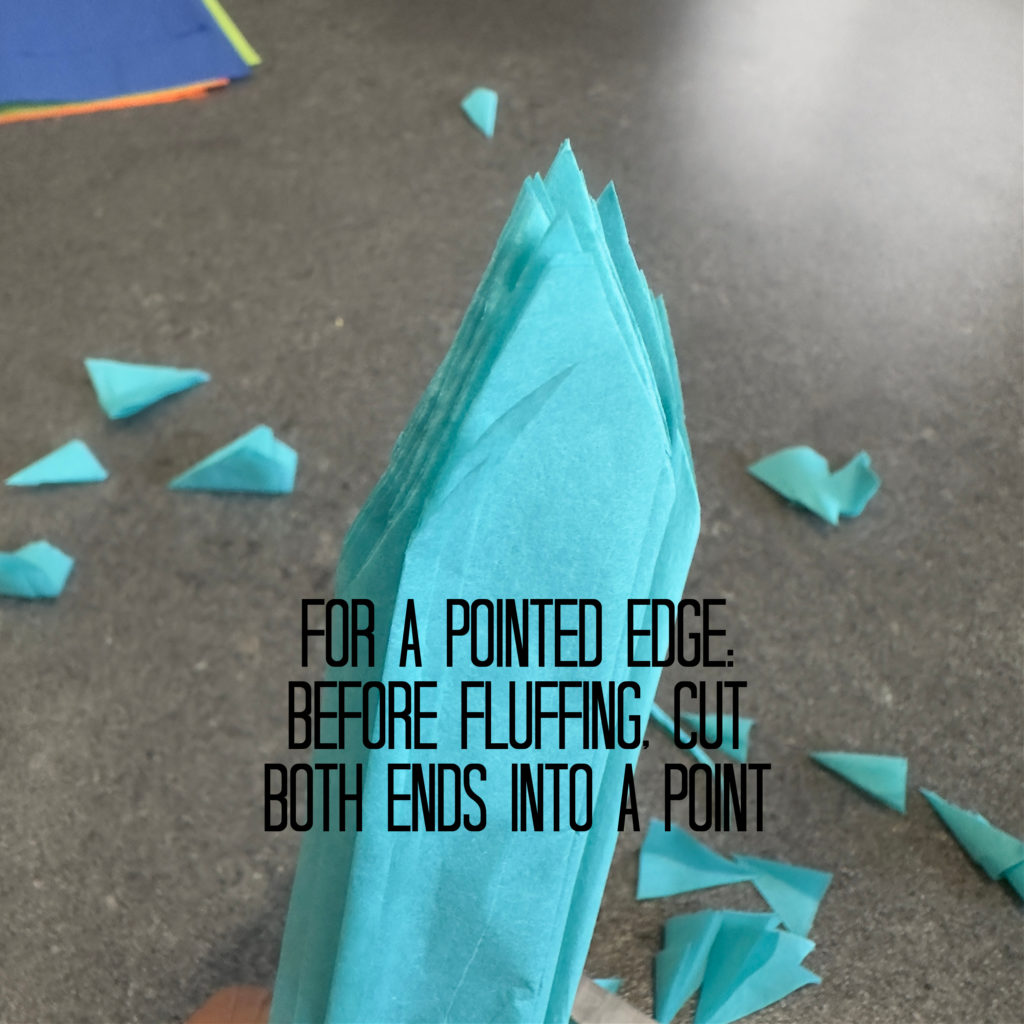
- FOR THE POINTED OPTION: While the flower is still folded cut one side pointing towards the center of the fold (see photo).
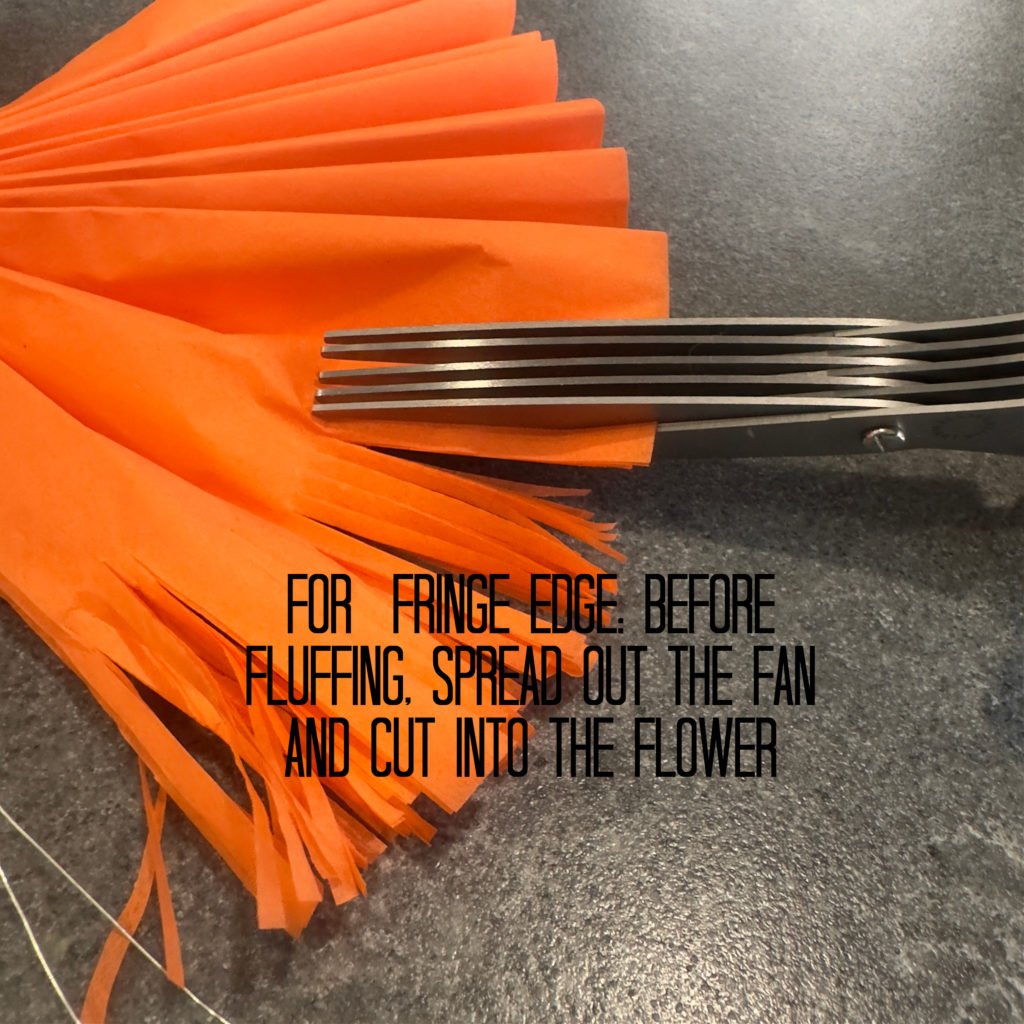
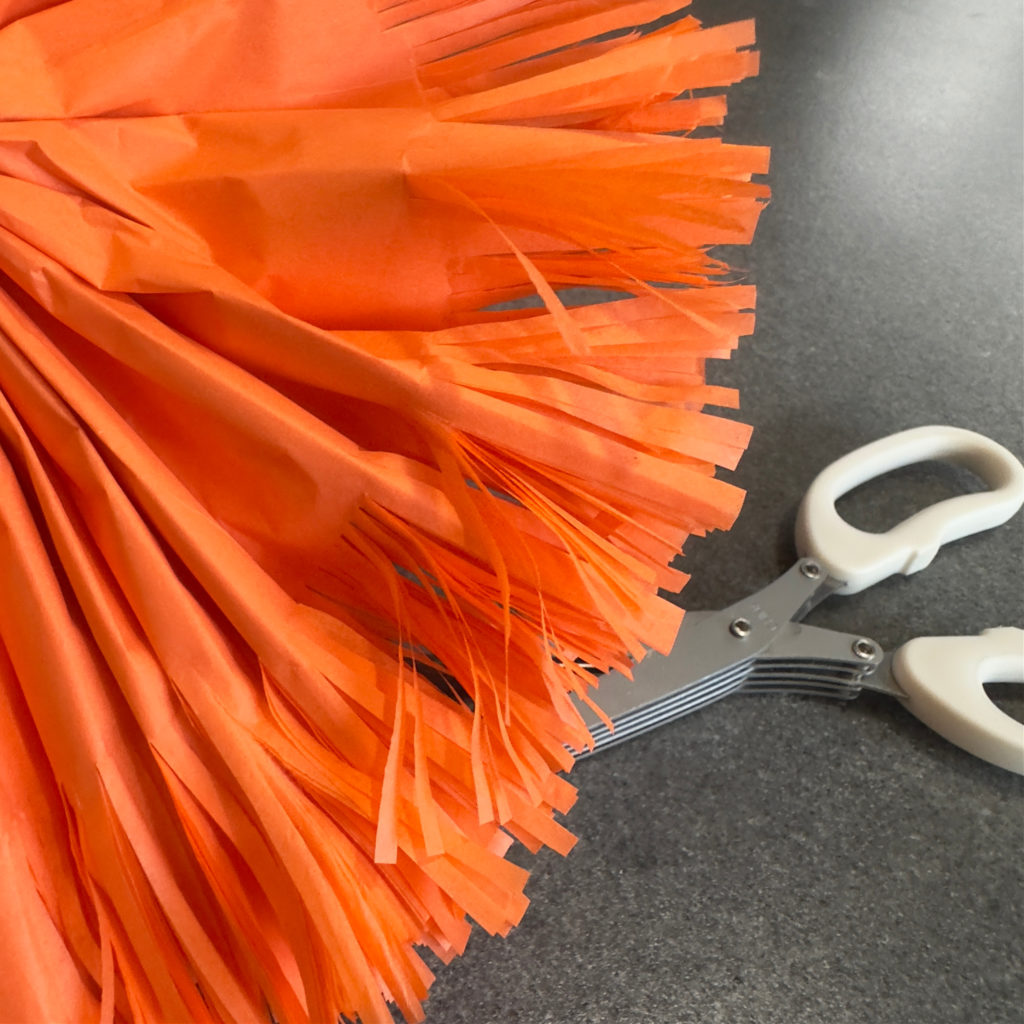
- FOR THE FRINGED OPTION: Spread the flower out (still with layers together) flat. Use a 5 blade pair of scissors to cut little strips (see photo).
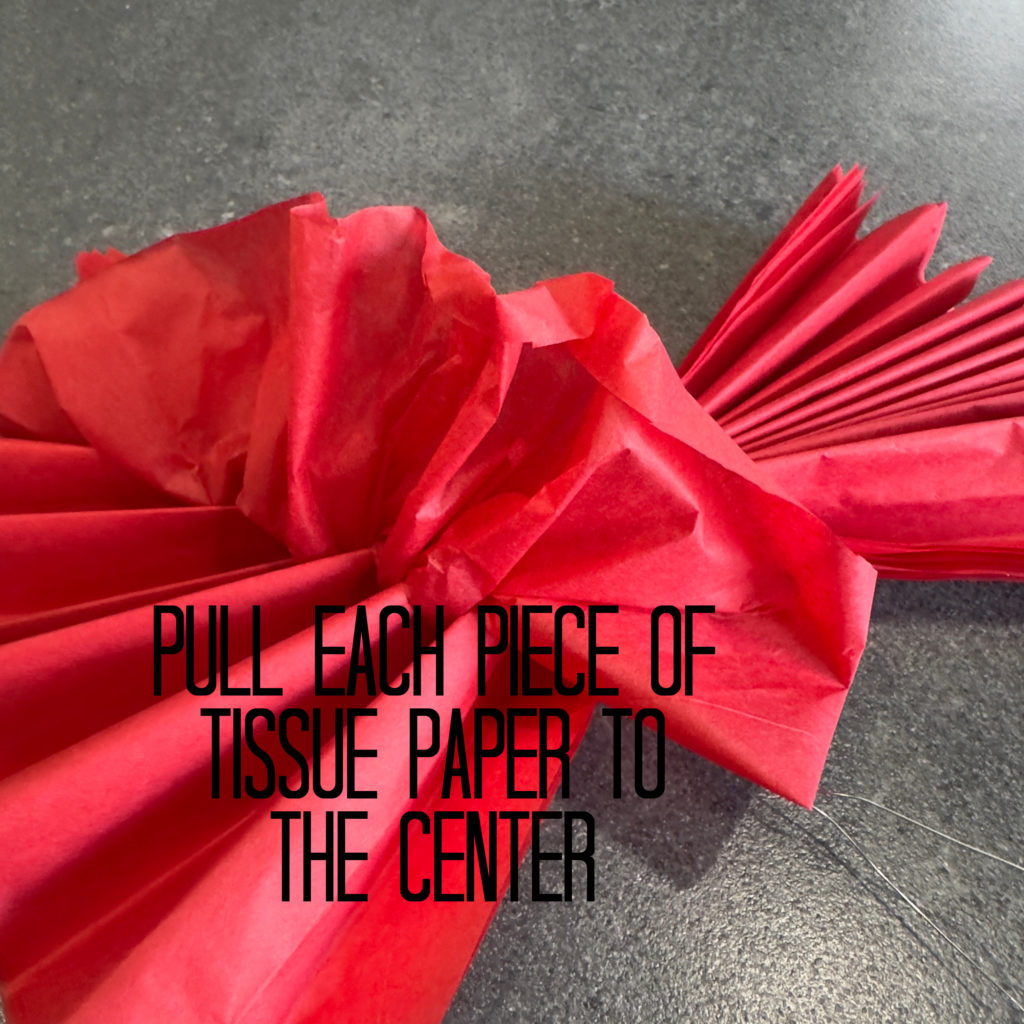
- Separate each piece of tissue paper pulling to the center all around the flower (see photo).
- Now your ready to attach the flower to a fun noodle and add a face!
OTHER PARTY THEMES FOR THIS FLOWER CENTERPIECE
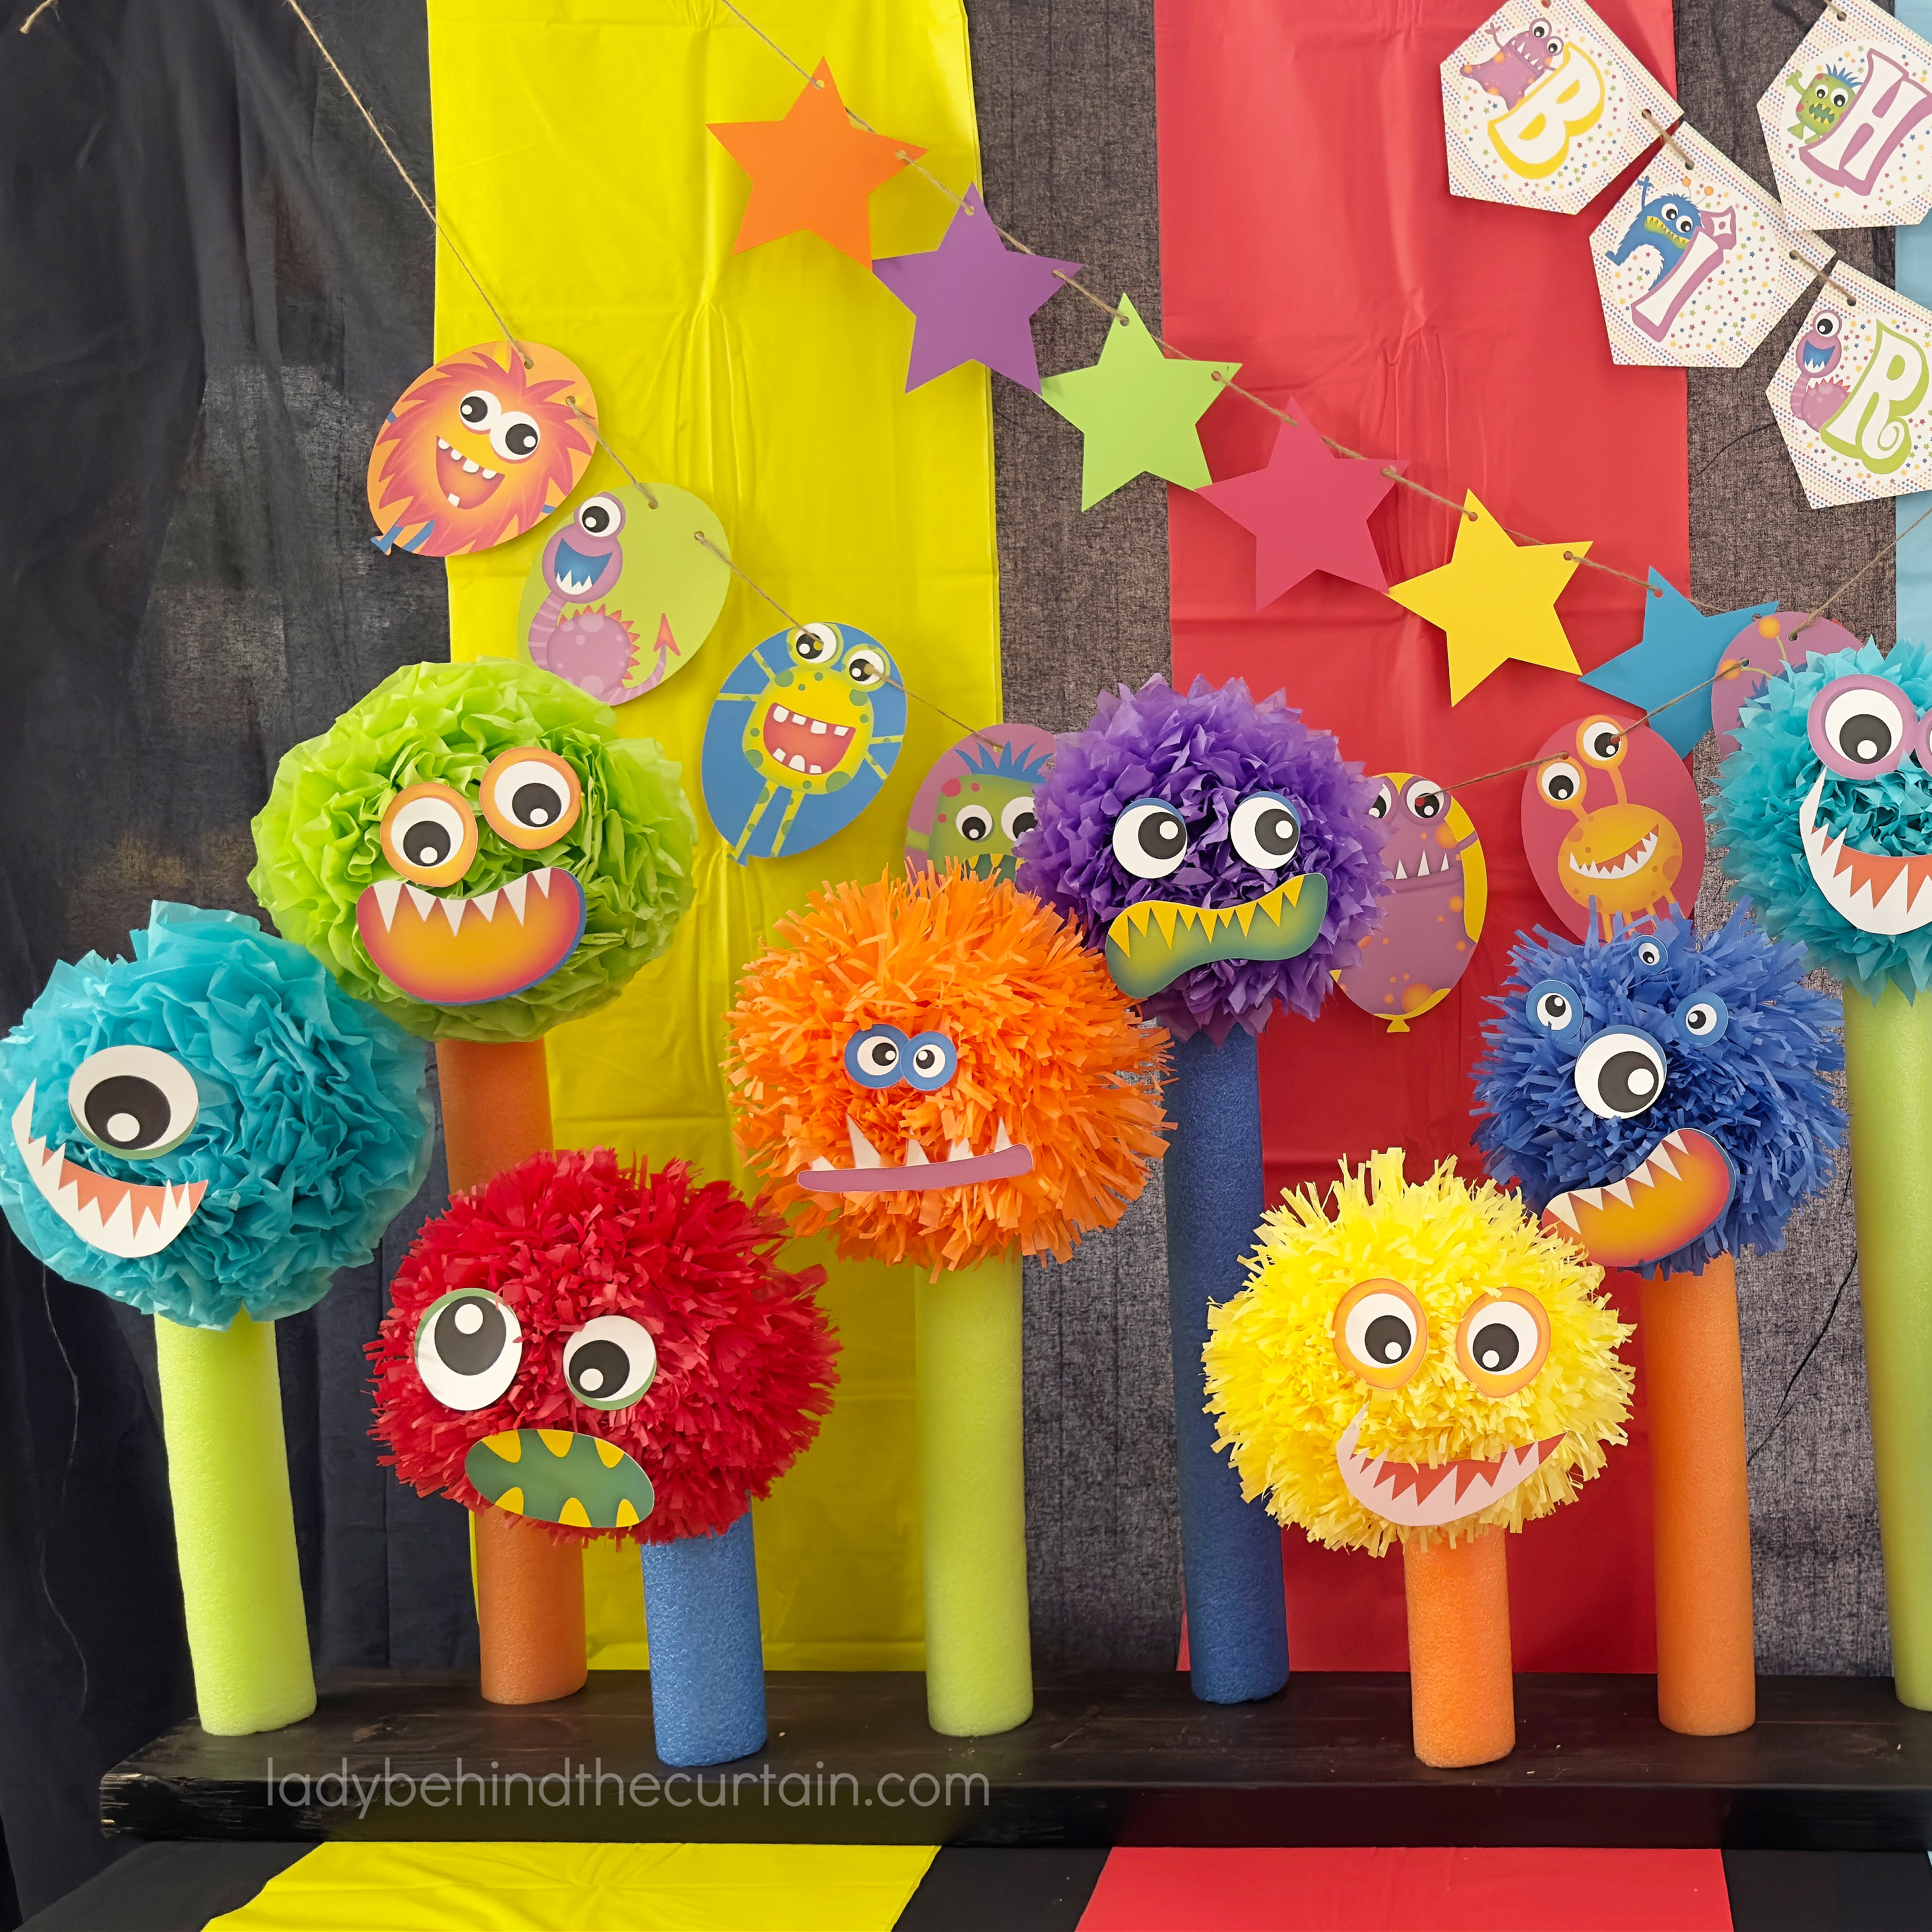
Once the party is over it’s easy to repurpose this monster head centerpiece. Below are a few NEW ideas.
- FIESTA: Remove the monster faces and create a fun colorful backdrop for your salsa bar.
- LUAU: Create a tropical centerpiece, use green fun noodles, and add more than one flower to each pool noodle stem. Place coconuts and pineapples around the base.
- BIRTHDAY CANDLES: Shorten the pool noodles to expose the dowels (about 5 inches shorter than the dowel). Place flame cut outs within 2½ inches from the top of the pool noodle leaving 2½ inches of the dowel exposed. Scroll down for FREE printable↓
HOW TO MAKE POOL NOODLE BIRTHDAY CANDLES
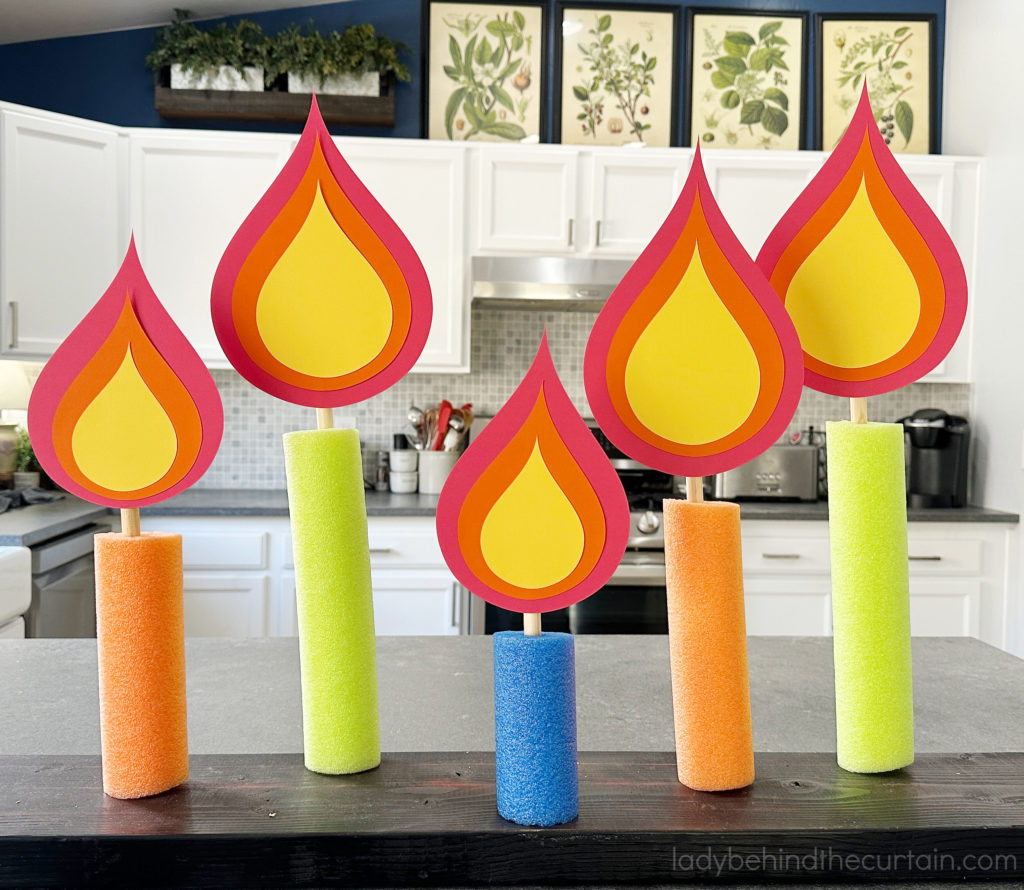
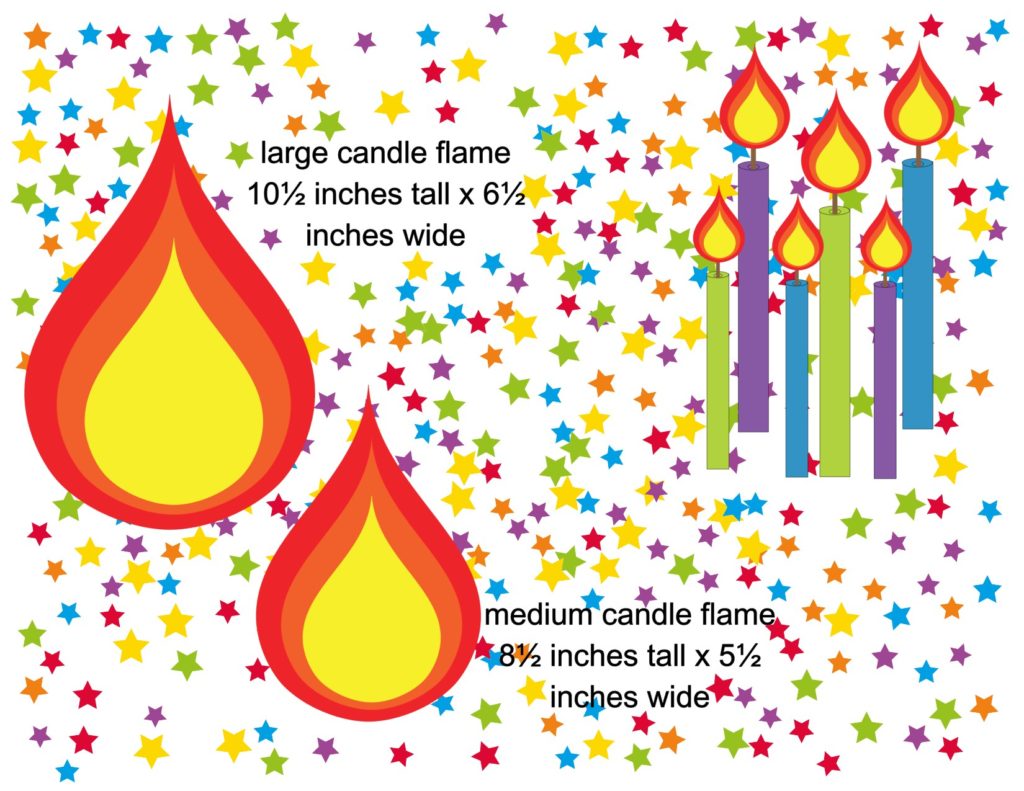
POOL NOODLE BIRTHDAY CANDLE CENTERPIECE: Use pool noodles to create a unique party table display or front yard display. Drill holes in a piece of wood to fit ½ inch dowels. Cut the pool noodles the desired height. Cut the dowels about 5 inches taller. Place flame cut outs within 2½ inches from the top of the pool noodle leaving 2½ inches of the dowel exposed. For indoor use, use double stick tape. For outdoor use, use waterproof glue or hot glue. NOTE FOR OUTDOOR USE—For sticking the candles in the yard make sure the dowel is not only 5 inches longer on top but at least 5 inches longer on the bottom. ♥2 flame sizes-large measures 10½ inches tall x 6½ inches wide-medium measures 8½ inches tall x 5½ inches. I used red stock paper, orange stock paper, and yellow stock paper. I DID NOT PRINT THE COLORS. —CLICK HERE FOR THE DOWNLOADS↓
MORE POOL NOODLE CENTERPIECE IDEAS
LATEST POSTS
In conclusion, for about $20 you can create a fun creative centerpiece or party table backdrop, and customize it to fit your color scheme. Your guests will love the bright colors and the new twist on how to use fun noodles. So, gather your supplies, start creating, and have fun!💗Sheryl
Monster Pool Noodle Centerpiece
Materials
- 1 (2inch x 8 inch x 6 foot) piece of wood
- 3-4 (½ inch round) 4 foot long wooden dowels
- 6 pool noodles
- 2 (40 sheet) packages multi colored tissue paper
- 26 gauge wire
- black spray paint
- white card stock (for the eyes and mouths)
Tools
- drill
- ½ inch drill bit
- wire cutters
- scissors
- double stick tape
- optional 5 blade scissors
Instructions
PUTTING THE MONSTER CENTERPIECE TOGETHER
- Drill ½inch holes in wood as indicated in photo.
- Spray paint wood.
- Cut dowels: 4 (15 inch), 5 (11 inch), 4 (8 inch). Insert cut dowels into drilled holes.
- Cut Pool Noodles: 4 (22 inches), 5 (19 inches), 5 (12 inches).
- Wrap wire (with tissue paper flower already attached) 3-4 inches down from the top of the pool noodle and tightly twist on.
- Print and cut out monster eyes and monster mouths.
- Add double stick tape to the back of the printed monster faces, press to the flower heads.
CLICK HERE FOR DOWNLOAD→POOL NOODLE MONSTER CENTERPIECE INSTRUCTIONS
HOW TO MAKE TISSUE FLOWER MONSTER HEADS
- Open tissue paper, lay the same color on top of each piece, cut in half (I used the fold line as my guide), place the cut pieces on top of the other side.
- Fold like a fan in a back and forth motion.
- Fold in half to find the center, wrap a long piece of wire around the center of the fold.
- BEFORE SPREADING THE PIECES decide if you want the ends cut. There are three options in this design. 1. Straight 2. Pointed 3. Fringed.
- FOR THE STRAIGHT OPTION: Leave the end alone and fluff the flower.
- FOR THE POINTED OPTION: While the flower is still folded cut one side pointing towards the center of the fold (see photo).
- FOR THE FRINGED OPTION: Spread the flower out (still with layers together) flat. Use a 5 blade pair of scissors to cut little strips (see photo).
- Separate each piece of tissue paper pulling to the center all around the flower (see photo).
- Now your ready to attach the flower to a fun noodle and add a face!
SIGN UP FOR THE LADY BEHIND THE CURTAIN NEWSLETTER

NEWSLETTER: Receive (twice a month) seasonally themed newsletters full of recipes, tips and tricks. Sometimes even FREE gifts! Click here for the Newsletter→CURTAIN CALL NEWSLETTER
THANKS FOR VISITING♥


Comments
Monster Pool Noodle Centerpiece — No Comments
HTML tags allowed in your comment: <a href="" title=""> <abbr title=""> <acronym title=""> <b> <blockquote cite=""> <cite> <code> <del datetime=""> <em> <i> <q cite=""> <s> <strike> <strong>