Kid’s Monster Theme Birthday Party + Video
Kid’s Monster Theme Birthday Party: Monsters under the bed? Not at this birthday party! Get ready to unleash your child’s imagination with a fun and monstrous celebration that will leave their friends roaring with excitement. In a world where magical creatures reign supreme, a monster-themed kid’s birthday party is the perfect way to bring fantasy to life. With colorful decorations, playful activities, and delicious treats, this party will be sure to keep your little monsters entertained from start to finish. Join us as we dive into the details of planning the ultimate monster bash and give your child a birthday party they will never forget!
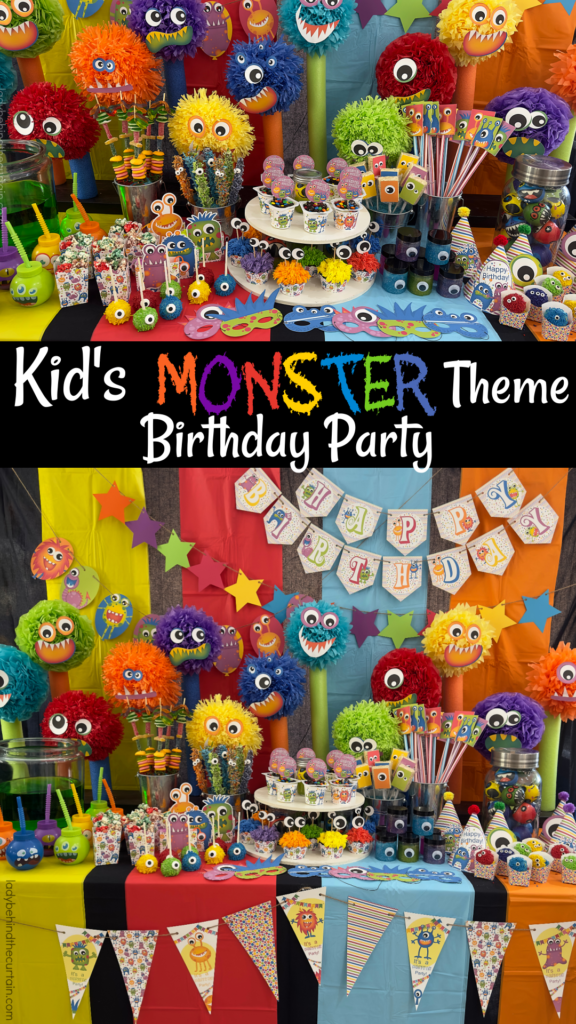
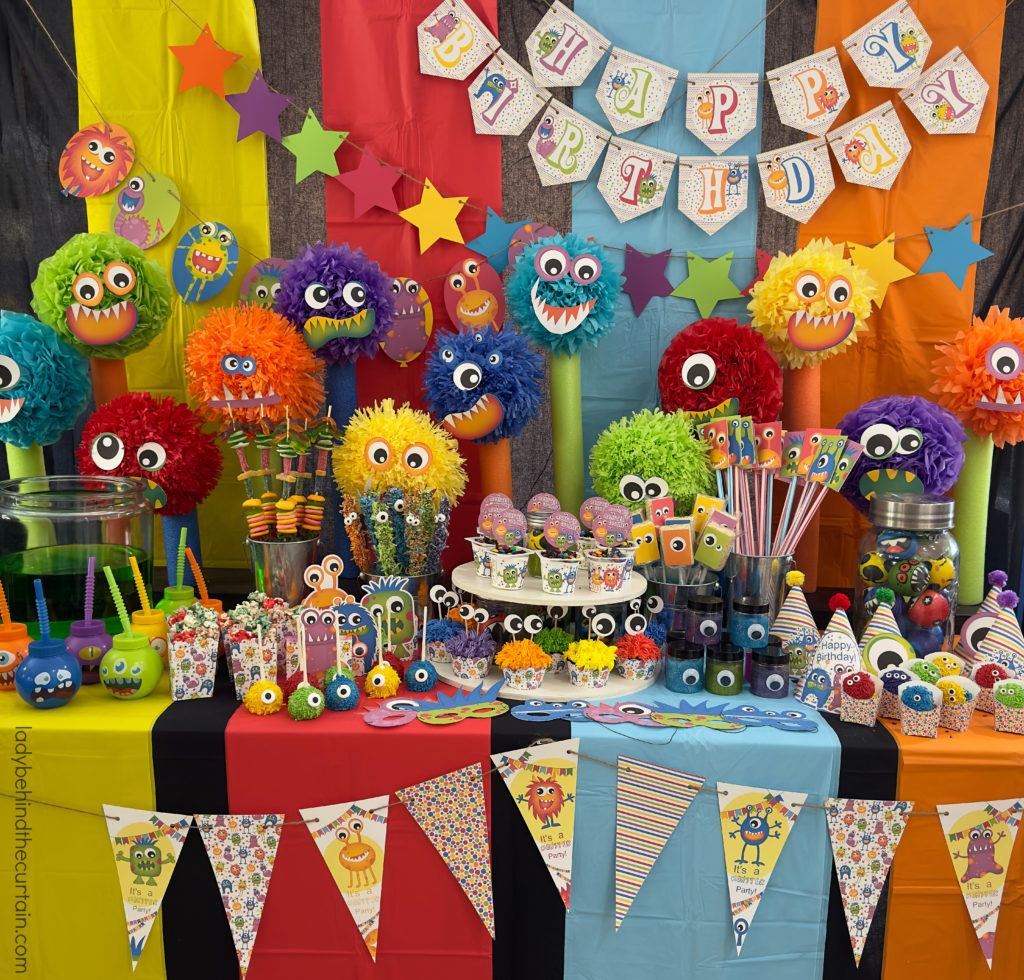
This brightly colored party features an assortment of monster-themed treats, easy-to-make FREE monster-themed party supplies, and monster-themed games. Learn how to take store-bought treats (like store-bought cake pops) and transform them into monster-themed party sweets. This party table is packed with birthday party decoration ideas. Pick and choose which ones to make or make them all!
How to Transform Store-Bought Treats into Party Treats
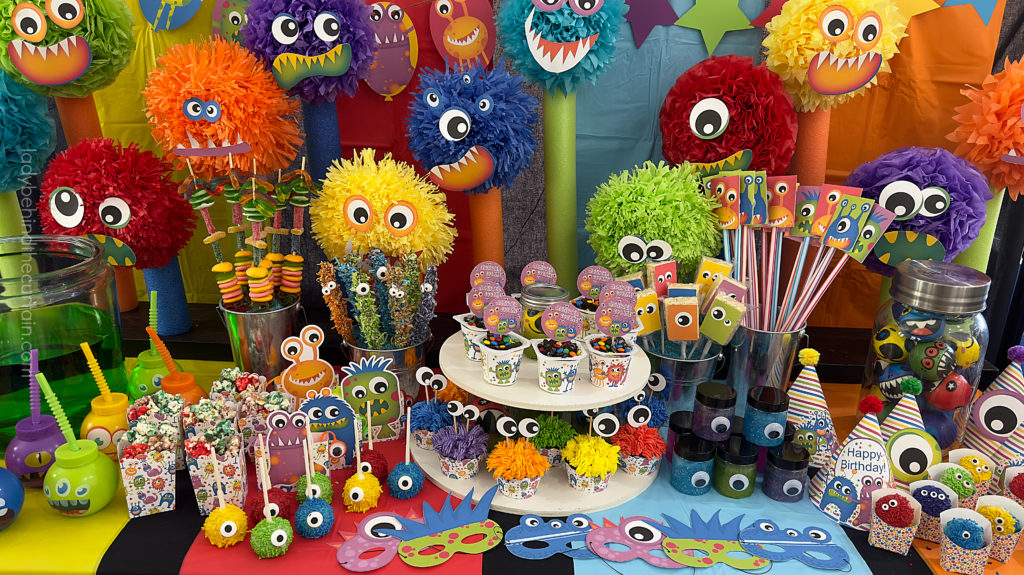
If you are too busy to create a fun party table or hate to bake this is the perfect party for you! I set out to see if I could create a party table full of colorful treats using store-bought items and I think it was a success! Below you will find an assortment of treat ideas. Some are 100% store-bought, some are semi-homemade, and some show you how to transform candy.
CAKE POPS
Only recently did I discover that Walmart carries cake pops in their freezer section. These are different than the ones out on the aisle in the bakery section. They are round while the other ones are more of a marshmallow shape. The Bettergoods brand cake pops come in raspberry, chocolate, and birthday cake flavors.
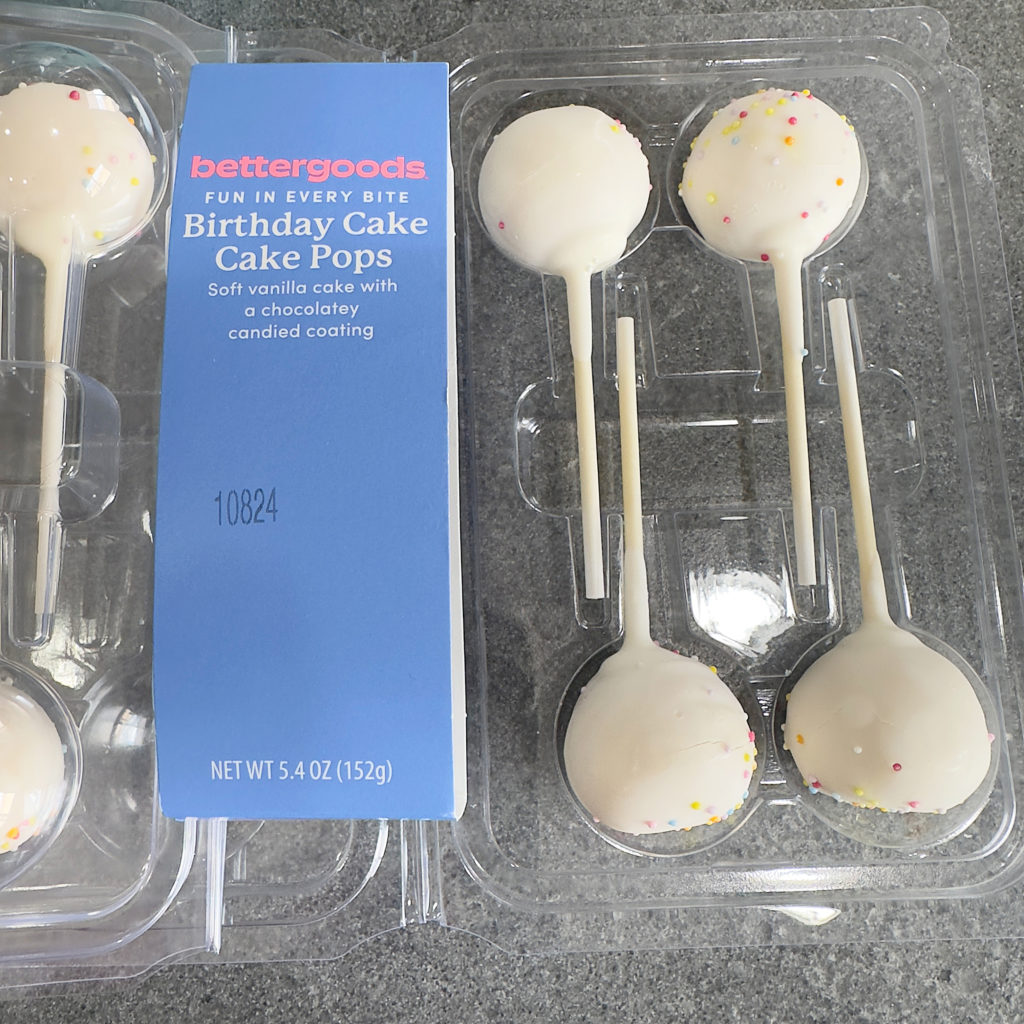
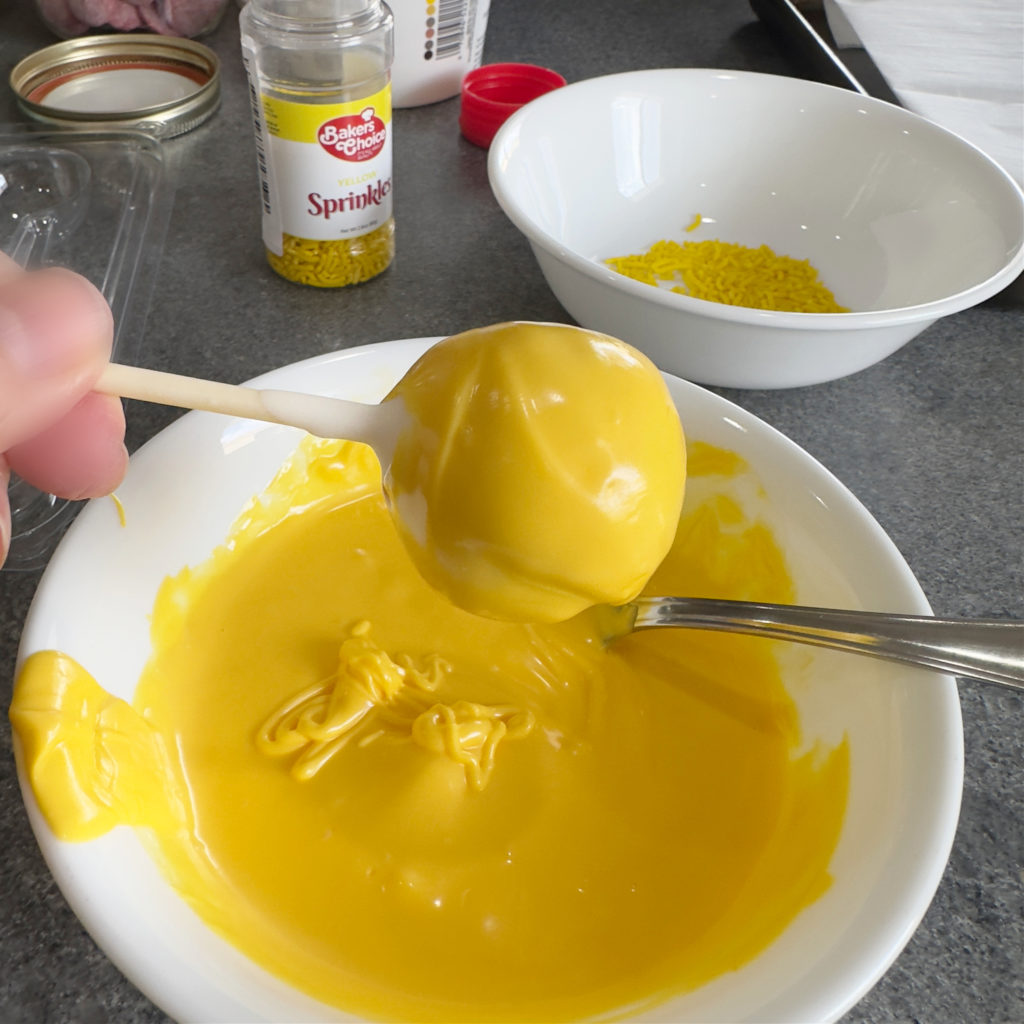
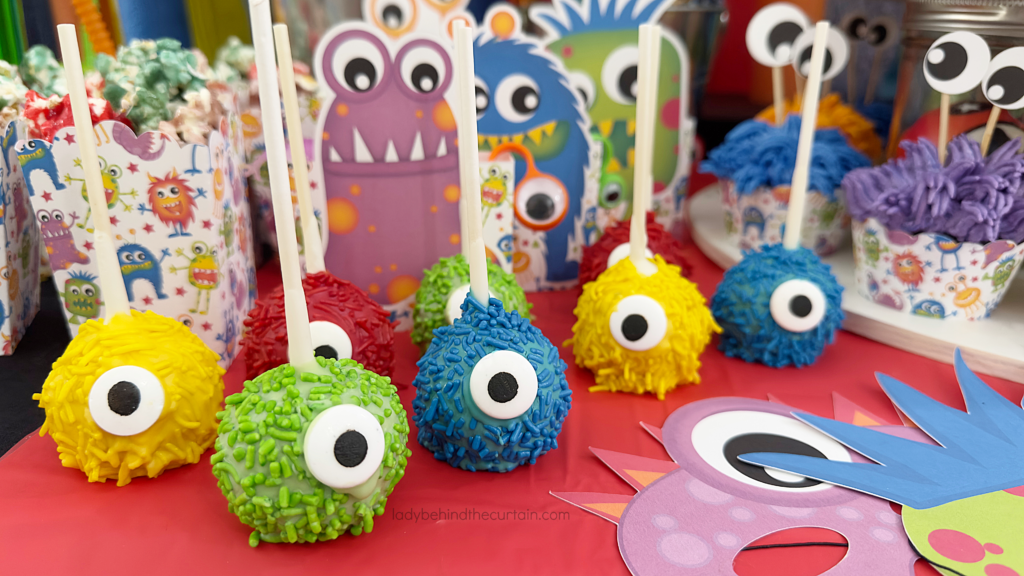
HOW TO TRANSFORM STORE-BOUGHT CAKE POPS INTO MONSTER CAKE POPS INGREDIENTS LIST
- cake pops
- melting candy in a variety of colors
- vegetable shortening (1 tablespoon per cup of melting candy)
- jimmies sprinkles in the same colors as the melting candy
- sugar eyes
MONSTER CAKE POPS INSTRUCTIONS
- If using the frozen cake pops from Walmart—take them out of the freezer and allow them to reach room temperature. Dipping cold cake pops into warm candy will cause the candy to crack.
- NOTE: The store-bought cake pops have sprinkles on them. Don’t worry, the addition of the melting candy and sprinkles will hide them. ALSO, make sure your dipping candy isn’t too hot. If it’s too hot it will melt the existing coating off the cake pops.
- Pour melting candy and shortening into a microwave-safe bowl. Heat 1 minute on high, stir until melted and creamy. TIP: ONLY WORK WITH ONE COLOR AT A TIME
- Dip the cake pop into the warm melted candy coating it completely.
- Shake off any excess candy, and add sprinkles.
- Place on a cookie sheet lined with parchment paper.
- Before the leftover candy hardens, dip eye in and stick to cake pop. TIP: Use the same color of melting candy for the eye as you used for the cake pop coating and sprinkles.
- Continue with the remaining colors and cake pops.
MINI CHOCOLATE CHIP COOKIES
Mini cookies are the star of this monster-themed treat. You can use any mini cookie. I chose to use Chips Ahoy cookies.
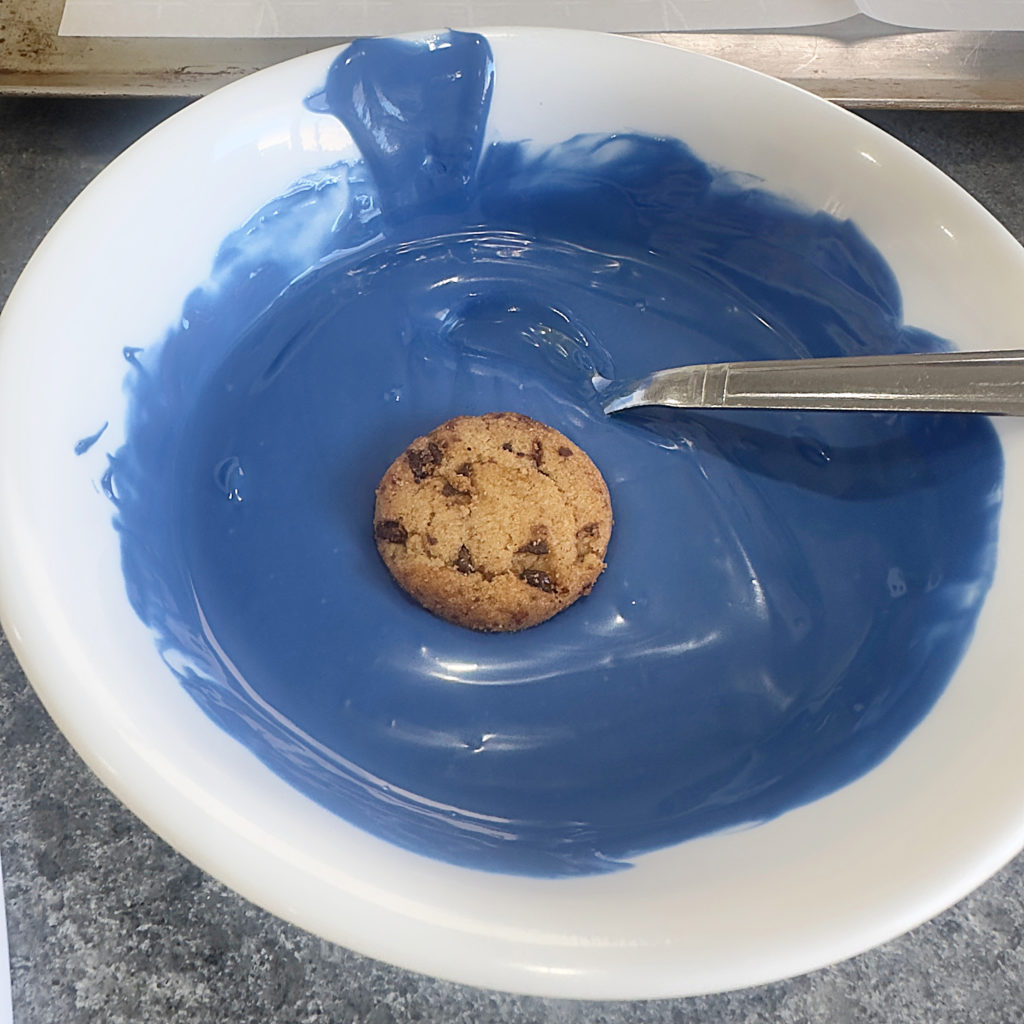
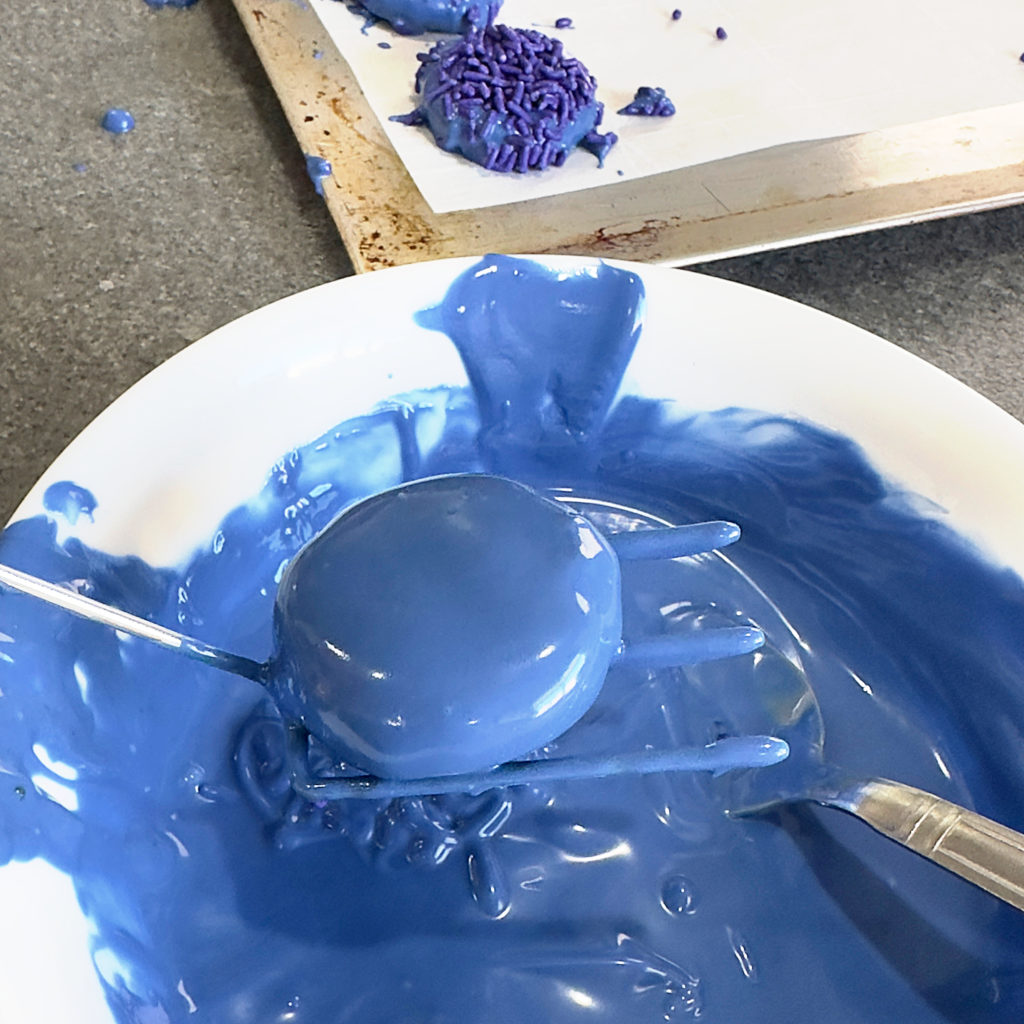
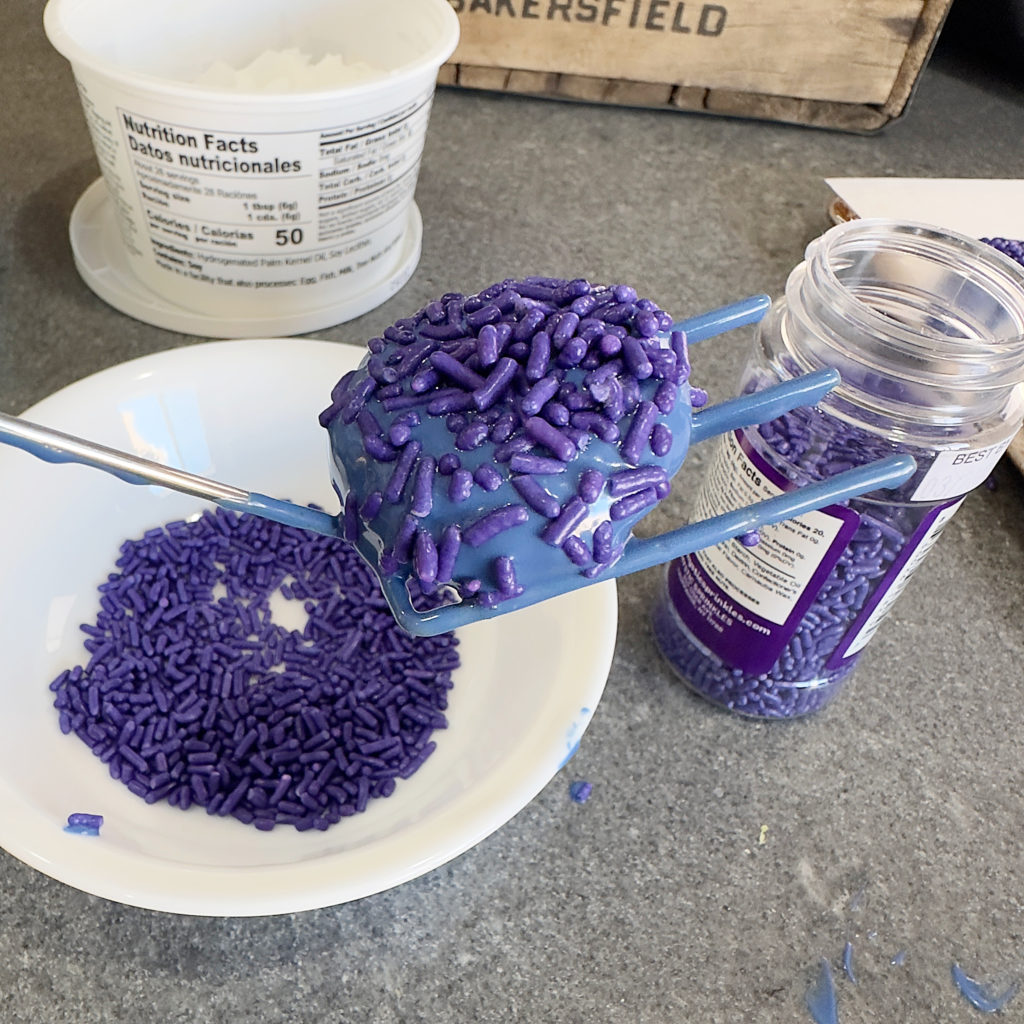
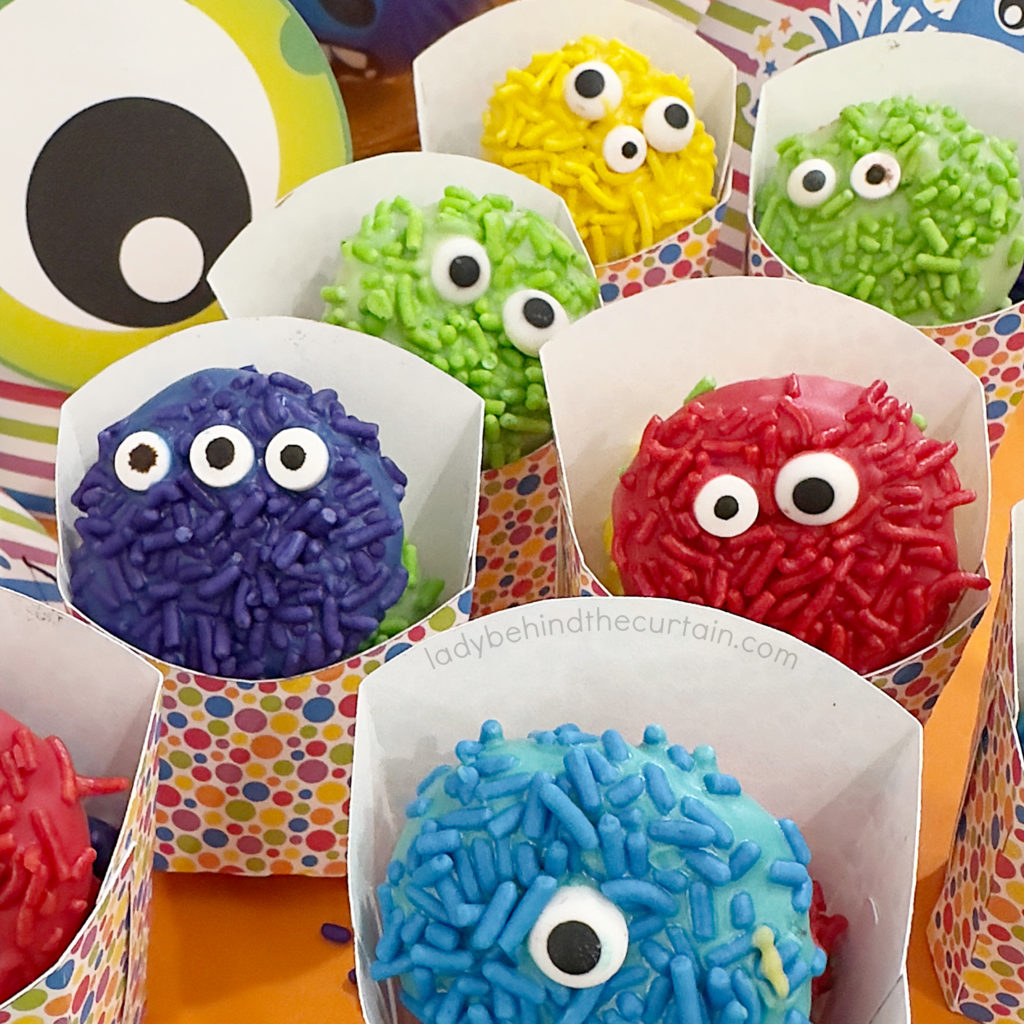
HOW TO TRANSFORM STORE-BOUGHT CHIP AHOY COOKIES INTO MONSTER COOKIES INGREDIENTS LIST
- MINI Chip Ahoy chocolate chip cookies
- melting candy in a variety of colors (TIP: 1 cup of melted candy will cover 15 mini cookies)
- vegetable shortening (1 tablespoon per cup of melting candy)
- jimmies sprinkles in the same colors as the melting candy
- sugar eyes
STORE-BOUGHT MONSTER MINI COOKIES INSTRUCTIONS
- Pour melting candy and shortening into a microwave-safe bowl. Heat 1 minute on high, stir until melted and creamy. TIP: ONLY WORK WITH ONE COLOR AT A TIME
- Dip the cookie into the warm melted candy coating it completely.
- Shake off any excess candy, and add sprinkles.
- Place on a cookie sheet lined with parchment paper.
- Before the leftover candy hardens, dip eye/eyes in and stick to the cookie. TIP: Use the same color of melted candy for the eye as you used for the cookie coating and sprinkles.
PUDDING CUPS
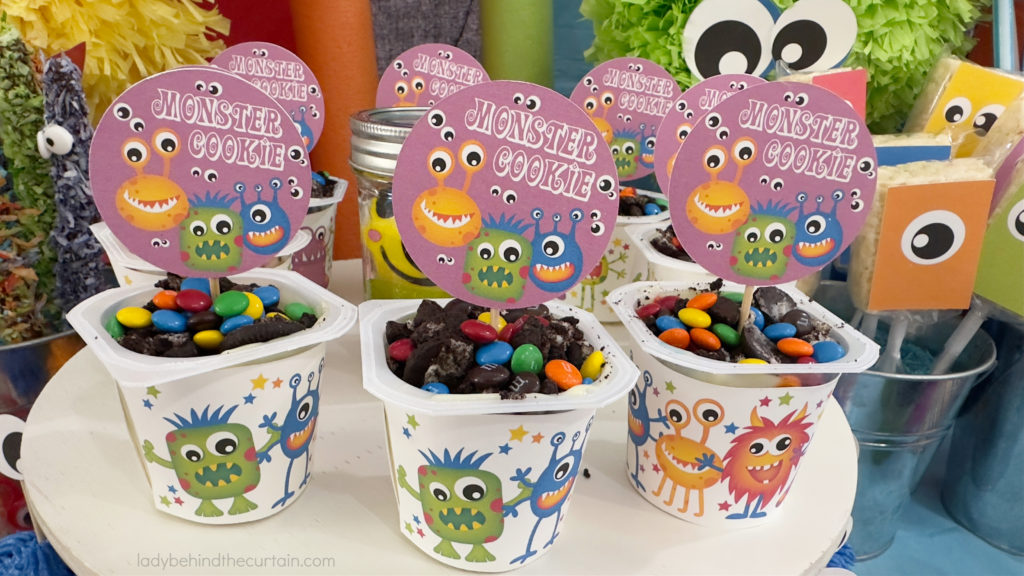
Transforming store-bought pudding cups is easy with a few added ingredients, my pudding cup wrapper, and pick.
HOW TO TAKE A STORE-BOUGHT PUDDING CUP AND TRANSFORM IT INTO A PARTY PUDDING CUP
MONSTER COOKIE PUDDING CUP INGREDIENTS LIST
- pudding cups (flavor of your choice)
- Oreo cookies, crumbles
- mini M&M’s
PUDDING CUP INSTRUCTIONS
- Print and cut pudding cup wrapper.
- Take the top off of the pudding cup and drop it in the wrapper.
- Add a sprinkle of crushed Oreo cookies and M&M’s.
- Glue the topper to a pick and insert it into the pudding cup.
RICE KRISPY TREATS
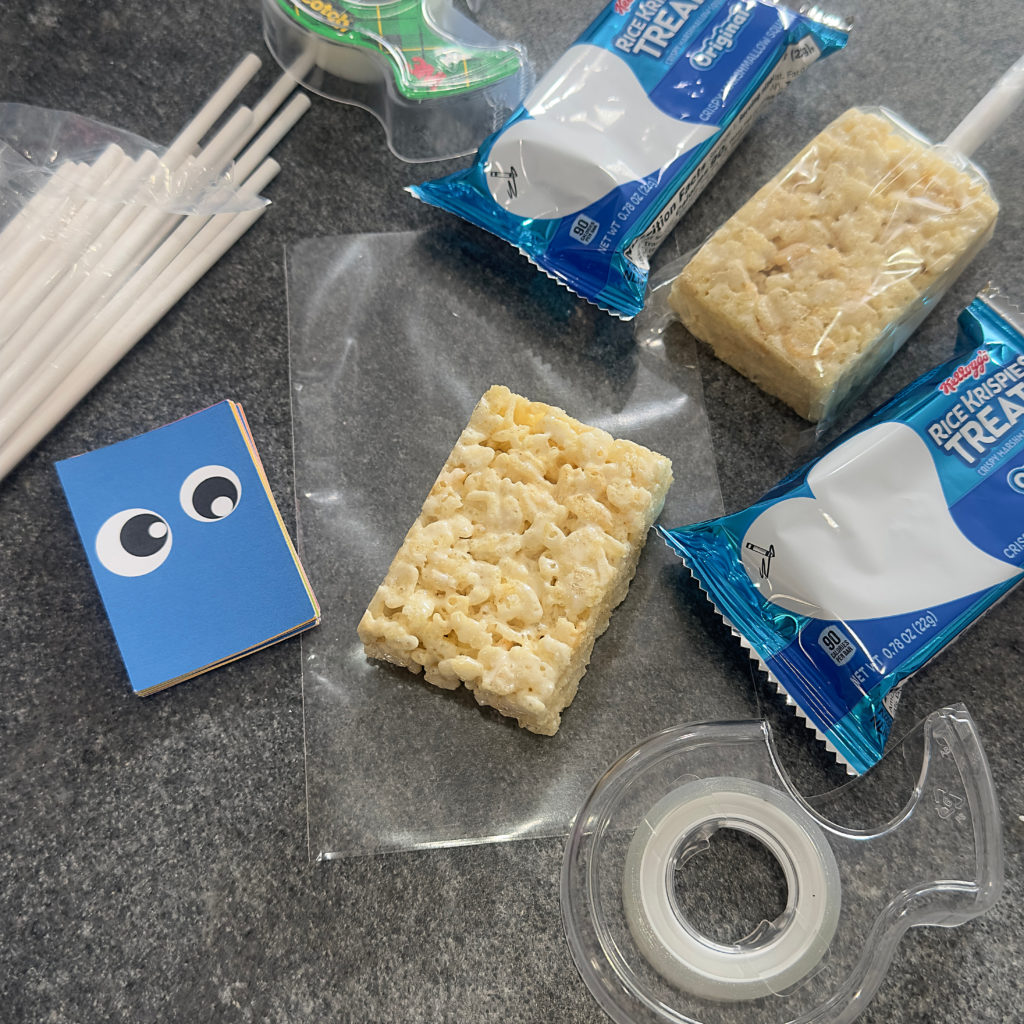
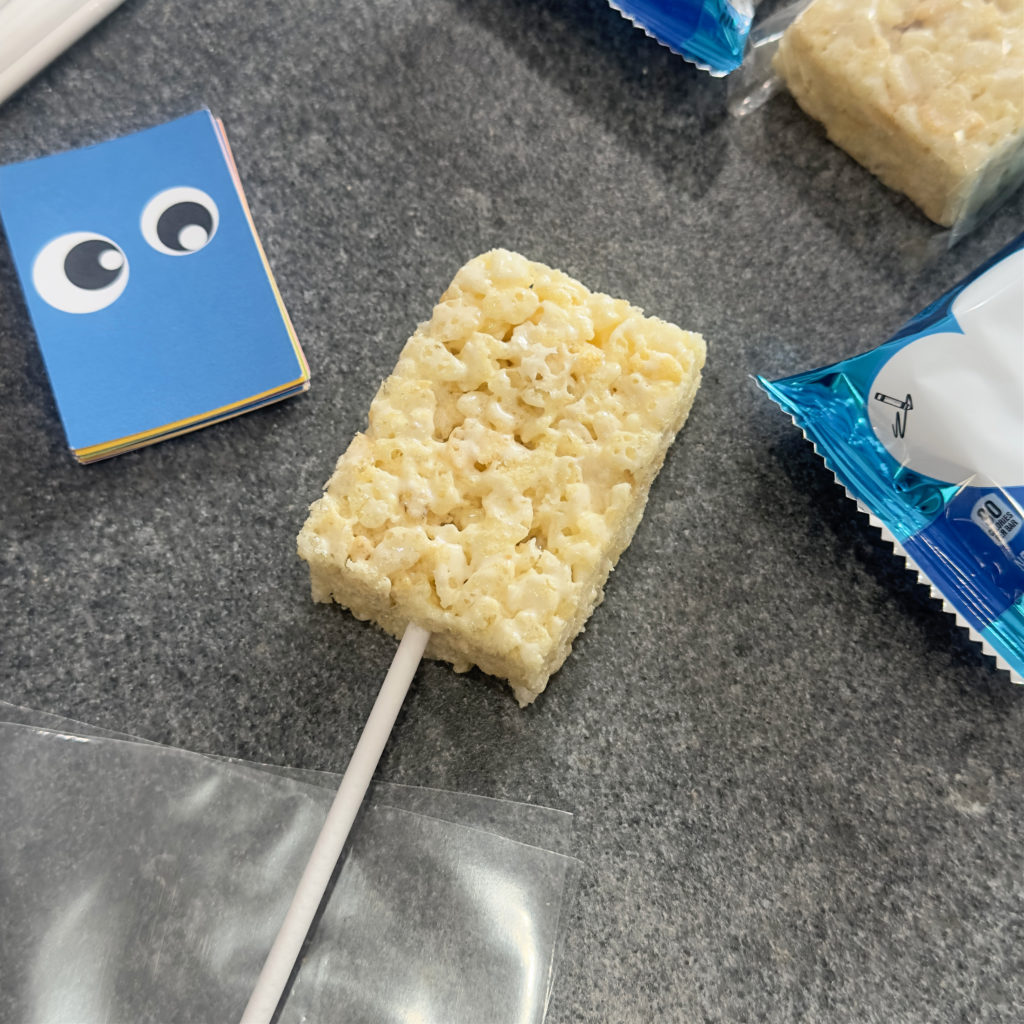
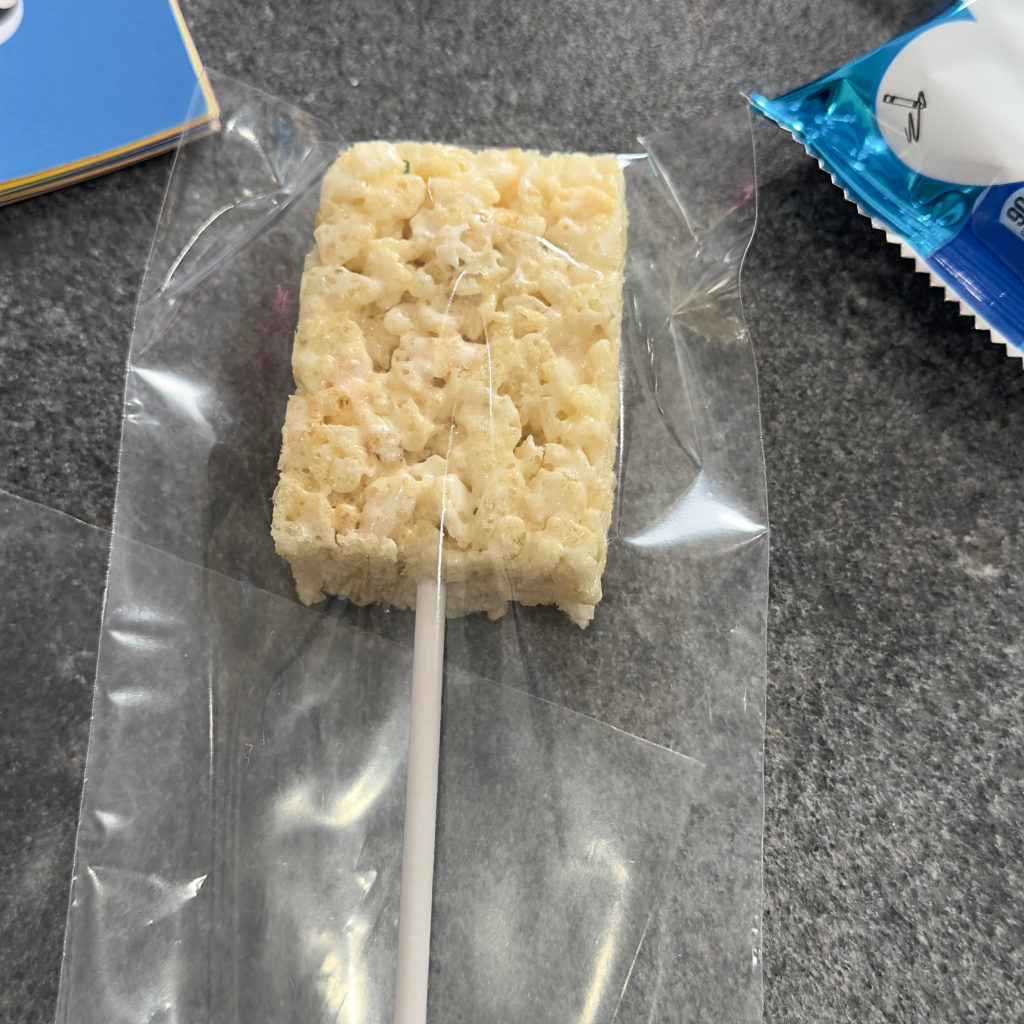
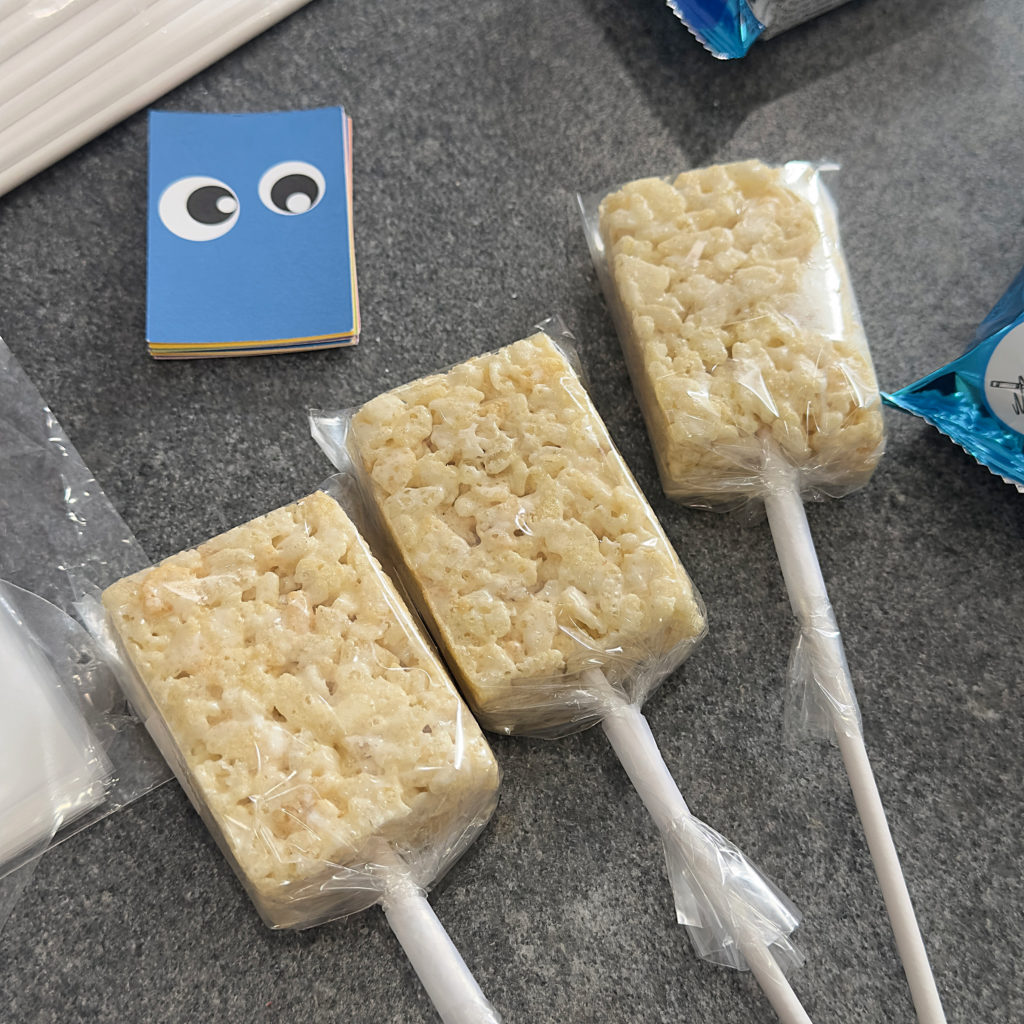
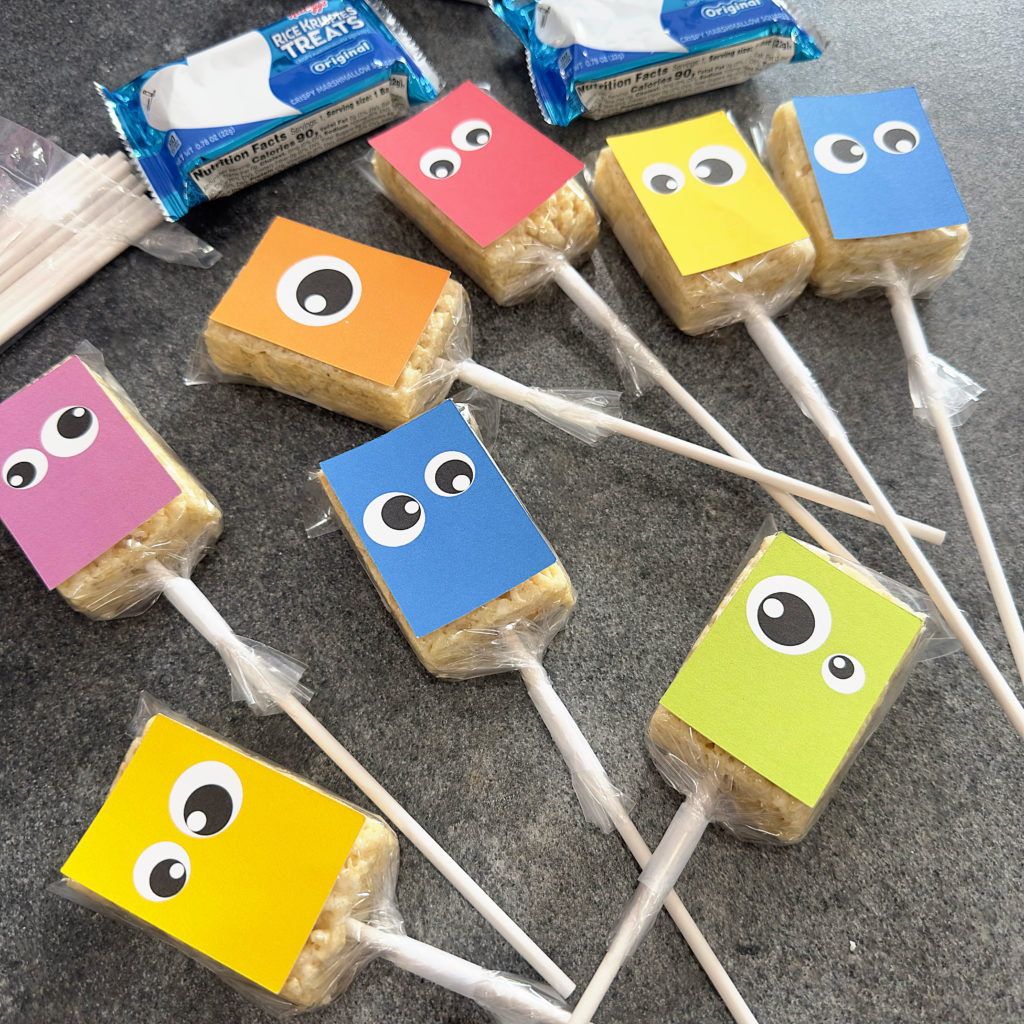
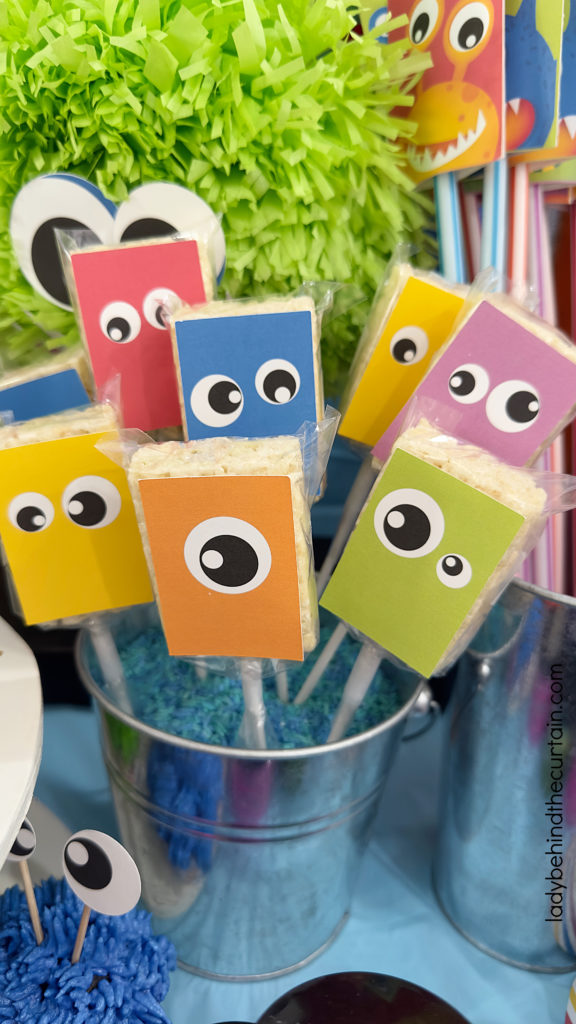
You can make homemade rice krispy treats but for this party, I used store-bought rice krispy treats. The brightly colored monster faces fit perfectly on them.
STORE-BOUGHT RICE KRISPY TREAT SUPPLIES LIST
- Store-bought rice krispy treats
- 4×6 treat bags
- monster face printable
- tape
- double stick tape
MONSTER FACE RICE KRISPY TREAT INSTRUCTIONS
- Print and cut monster face treat covers.
- Take the wrapper off the treat and drop it in the treat bag.
- Center monster face printout over treat, double stick tape onto treat bag.
- Fold the side of the treat bag around the sides of the krispy treat and tape.
- Tightly pull the treat bag around the bottom of the rice krispy treat, twist, and tape.
Semi-homemade monster-themed party Treats
MONSTER CUPCAKES
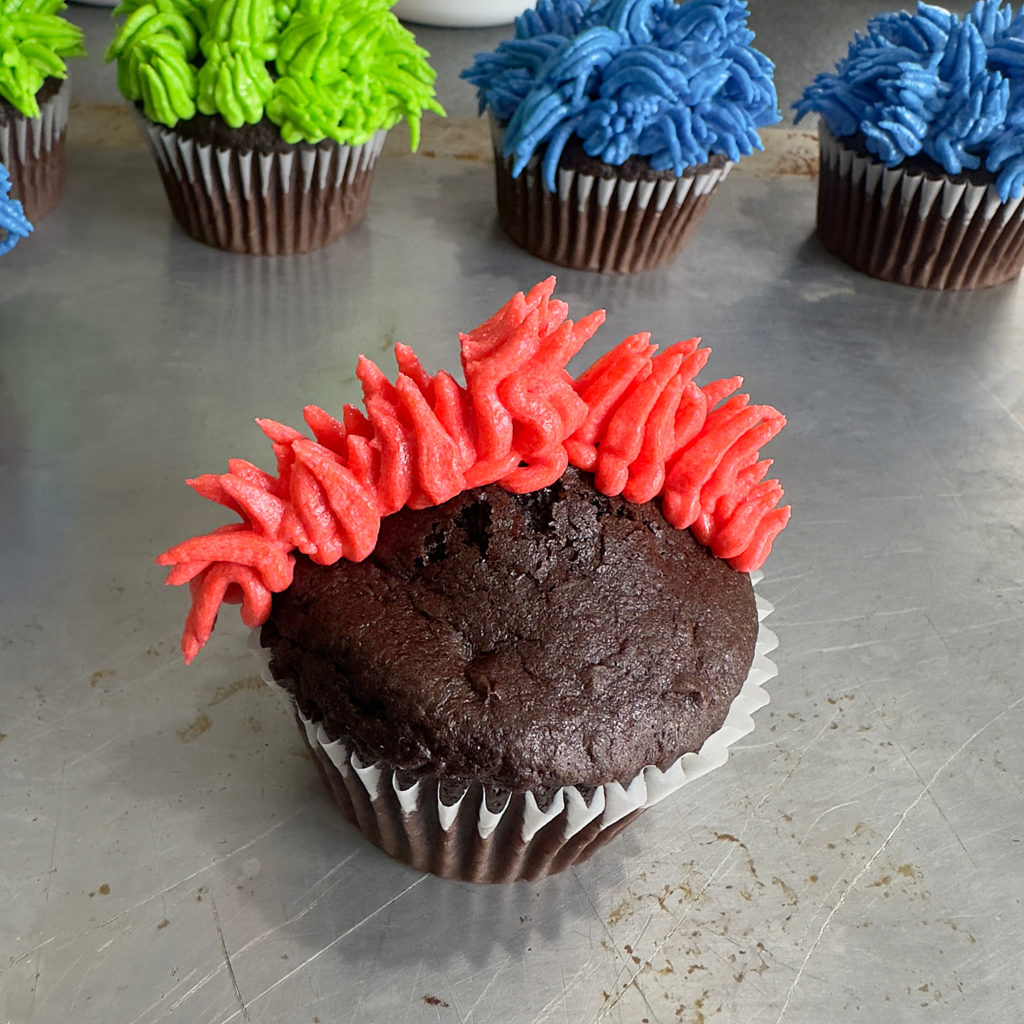
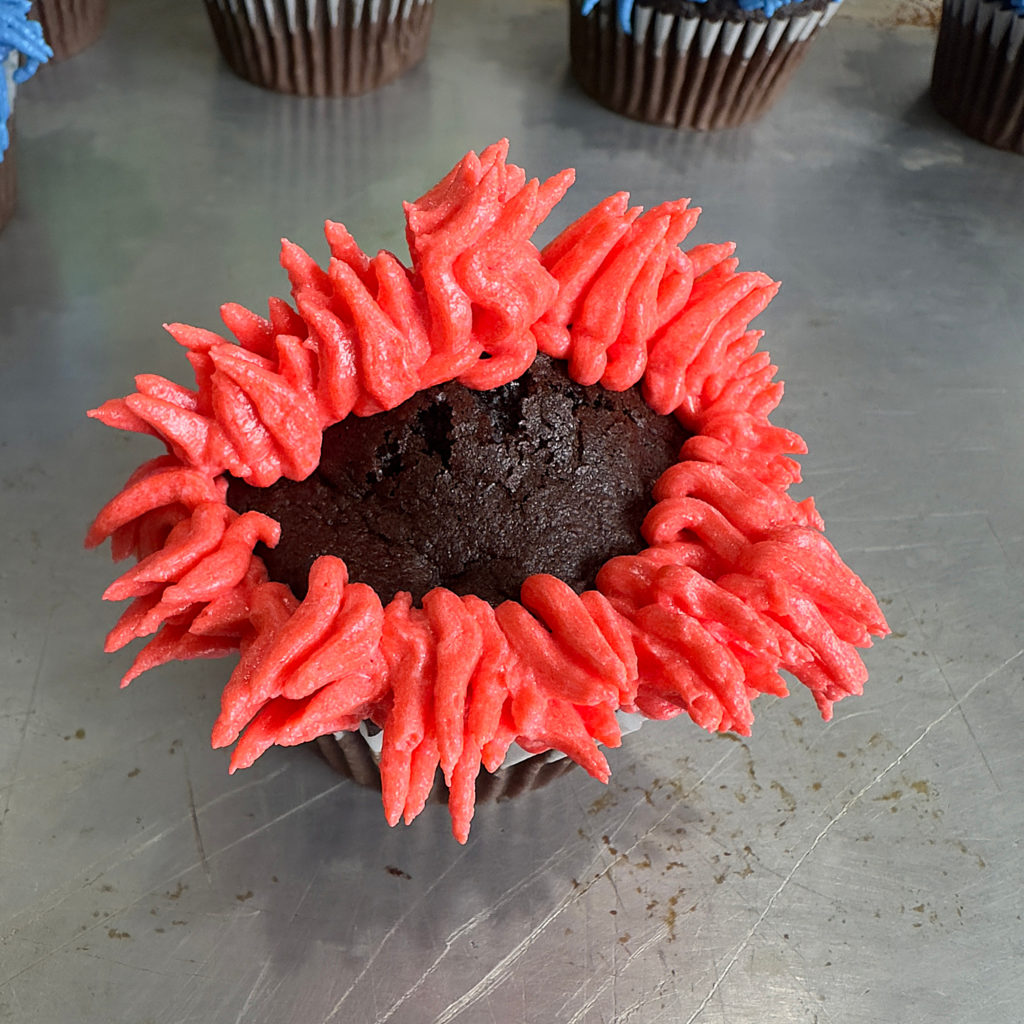
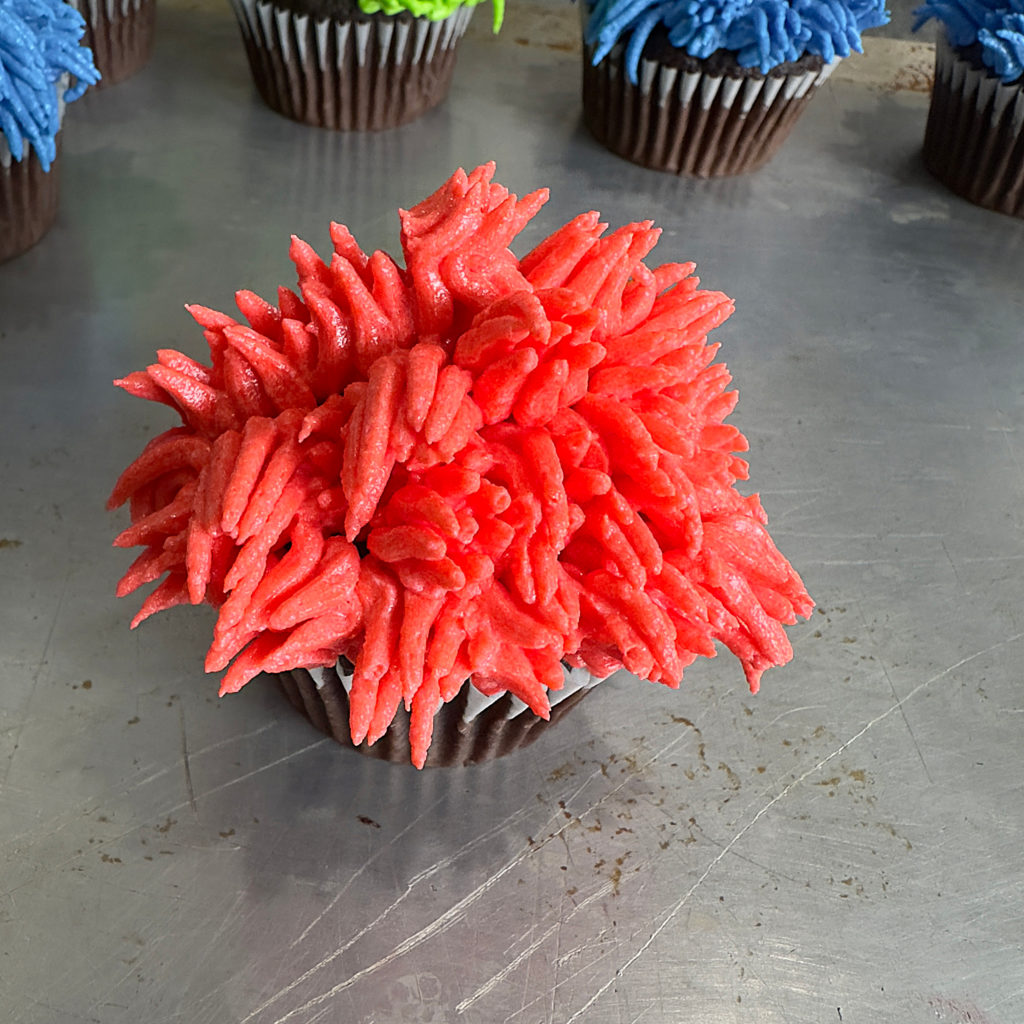
Store-bought cake mix never looked so cute! I used a dark chocolate cake mix to make the cute monster cupcakes. The real star of this fun dessert is the tip I used to make the monster hair. But before we get to that let’s talk about the frosting. The best frosting for the job is always and will always be homemade. My bakery white frosting is perfect! The homemade frosting holds its shape, doesn’t have to be refrigerated, and tastes delicious!
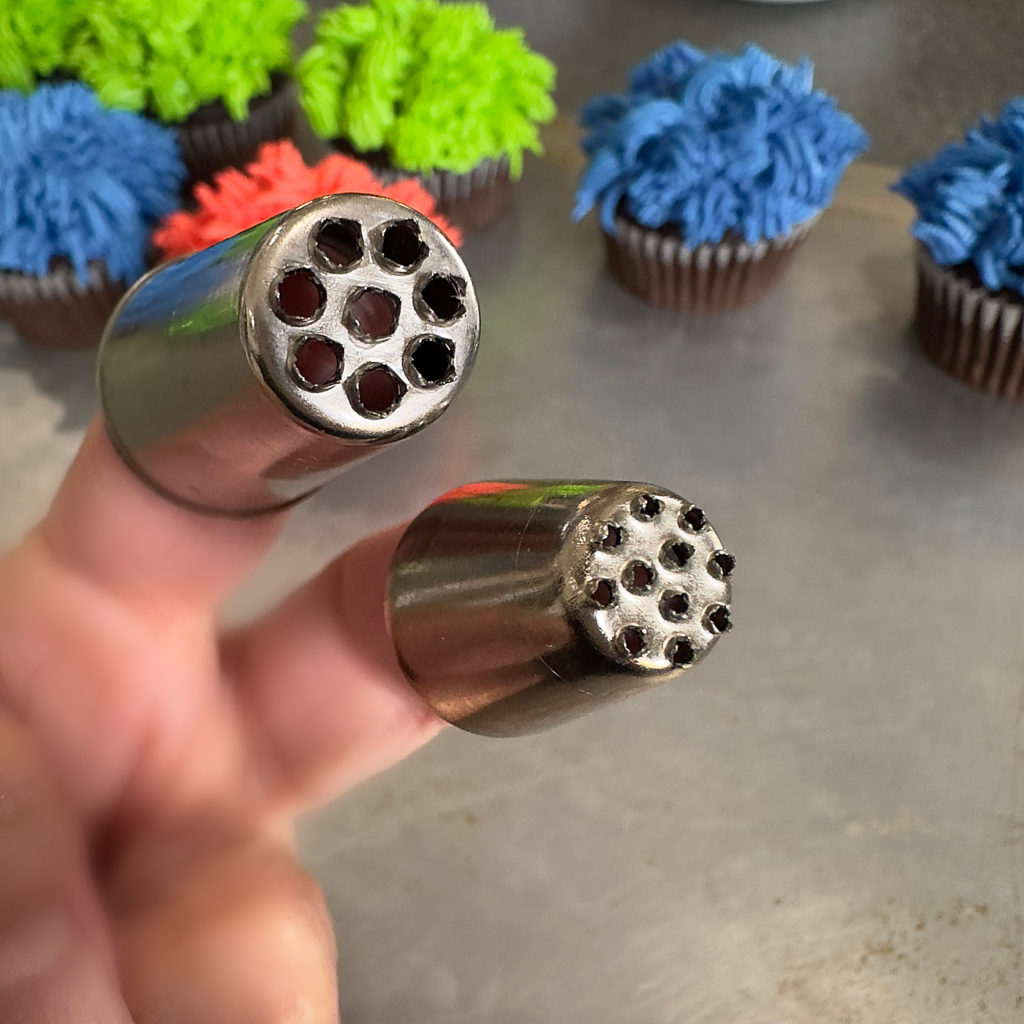
PIPING TIP #234 VERSES TIP #233—These two “grass” piping tips create the same effect but with different sizes. Tip # 233 is the traditional “grass” tip, creating small pull-out lines for making hair, fur, and grass. Tip #234 has fewer openings and creates larger pull-out lines for making hair, fur, and grass. I USED TIP #234. Starting down the center of the top of the cupcake, moving around the outer edge, and then filling in.
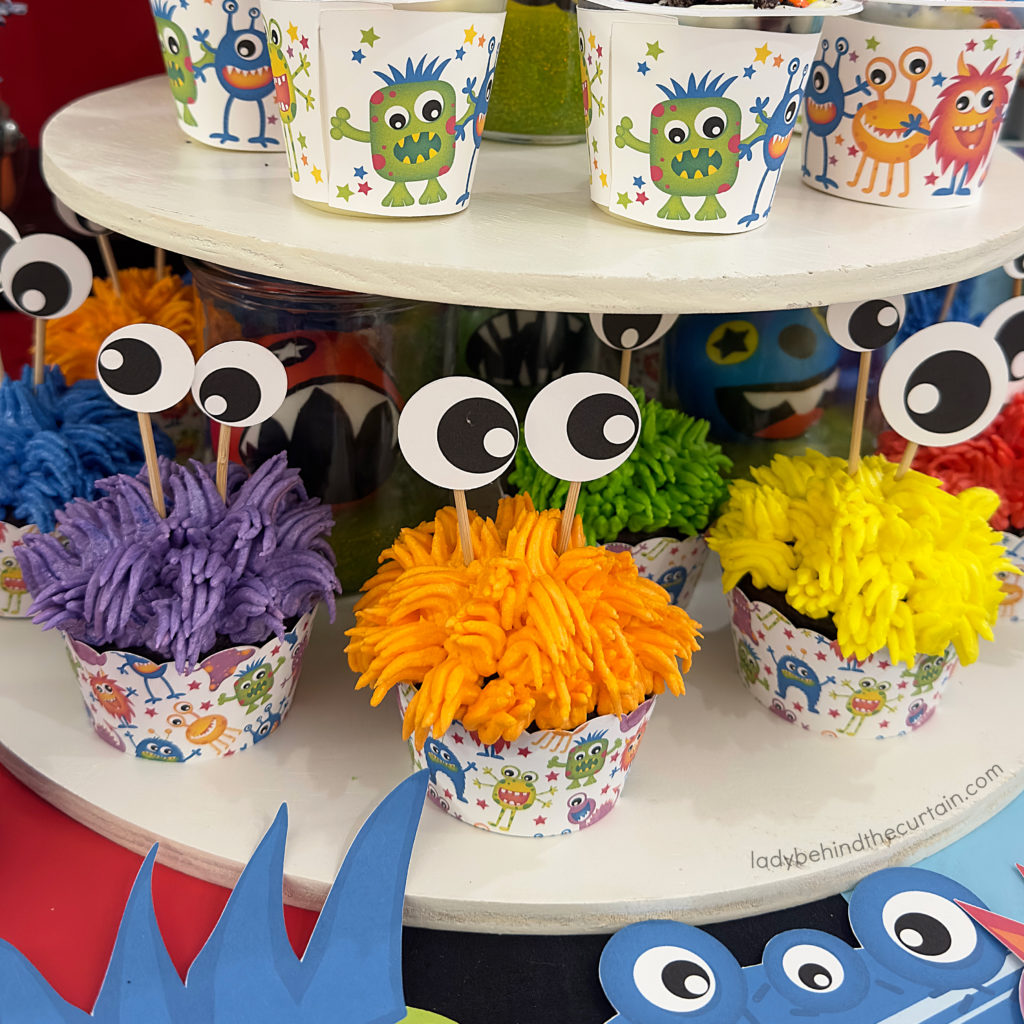
BAKERY WHITE FROSTING: Once the frosting is made, divide the frosting into small bowls (the amount is determined by how many different colors you are using). Add a few drops of desired gel food coloring, and mix until combined. Fit the piping bag with a piping tip, and fill it with one color of frosting. FOR PIPING GRASS: Hold the end of the tip just above the surface of your cupcake. Apply pressure and quickly release while pulling the tip up and away from the top of the cupcakes in a straight line. To see a visual click here→HOW TO PIPE GRASS FROSTING
FUZZY MONSTER DECORATED PRETZELS
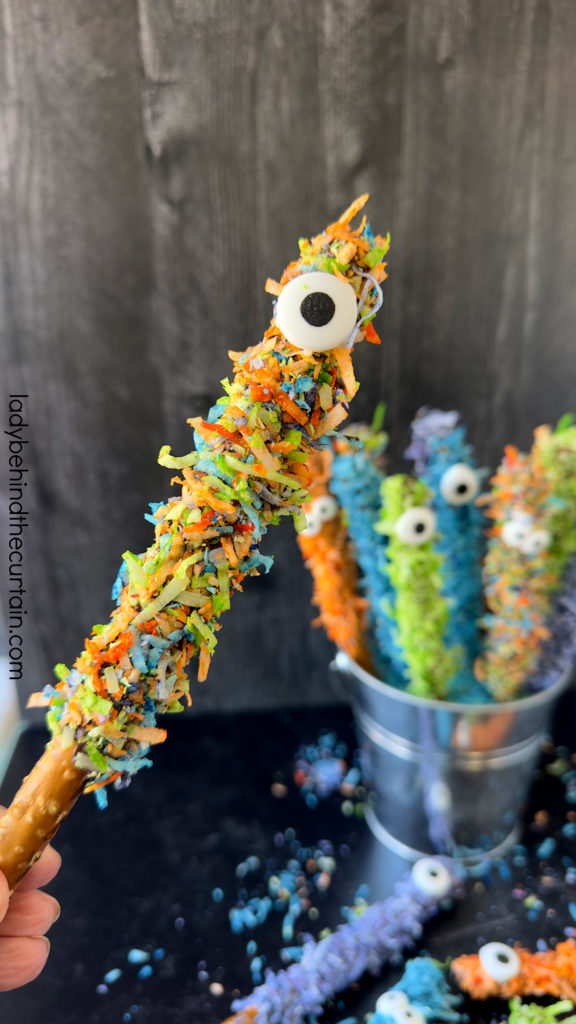
FUZZY MONSTER PRETZELS: Dark chocolate coconut-coated decorated pretzels are the perfect indulgence for anyone with a sweet tooth. These delectable treats combine the rich and deep flavor of dark chocolate with the tropical twist of coconut, all while adding a fun and decorative element to the classic pretzel. As you take your first bite, the satisfying crunch and explosion of flavors will leave you wanting more. Impress your guests at your monster-themed birthday party. CLICK HERE FOR ALL THE DETAILS→FUZZY MONSTER PRETZELS
GREEN MONSTER PUNCH
Every monster party needs a slimy green punch! This delicious punch is easy to make and perfect for any monster-themed party. The kids will love the flavor of this Halloween punch.
GREEN MONSTER PUNCH INGREDIENTS LIST
- 1-gallon green berry rush Hawaiian punch
- 1 (46 ounces) can pineapple juice
- 1 (2 liter) bottle ginger ale
MONSTER PARTY PUNCH INSTRUCTIONS
- Make sure all the ingredients are cold before making the punch.
- Into a large container, add the Hawaiian punch, pineapple juice, and ginger ale.
- Gently stir them together.
Monster Party Treats
Ingredients
For the Store Bought Cake Pops:
- cake pops
- melting candy in a variety of colors
- vegetable shortening (1 tablespoon per cup of melting candy)
- jimmies sprinkles in the same colors as the melting candy
- sugar eyes
For the Store Bought Mini Chocolate Chip Cookies:
- MINI Chip Ahoy chocolate chip cookies
- melting candy in a variety of colors (TIP: 1 cup of melted candy will cover 15 mini chocolate chip cookies)
- vegetable shortening (1 tablespoon per cup of melting candy)
- jimmies sprinkles in the same colors as the melting candy
For the Monster Punch:
- 1 gallon green berry rush Hawaiian punch
- 1 (46 ounce) can pineapple juice
- 1 (2 liter) bottle ginger ale
- sugar eyes
Instructions
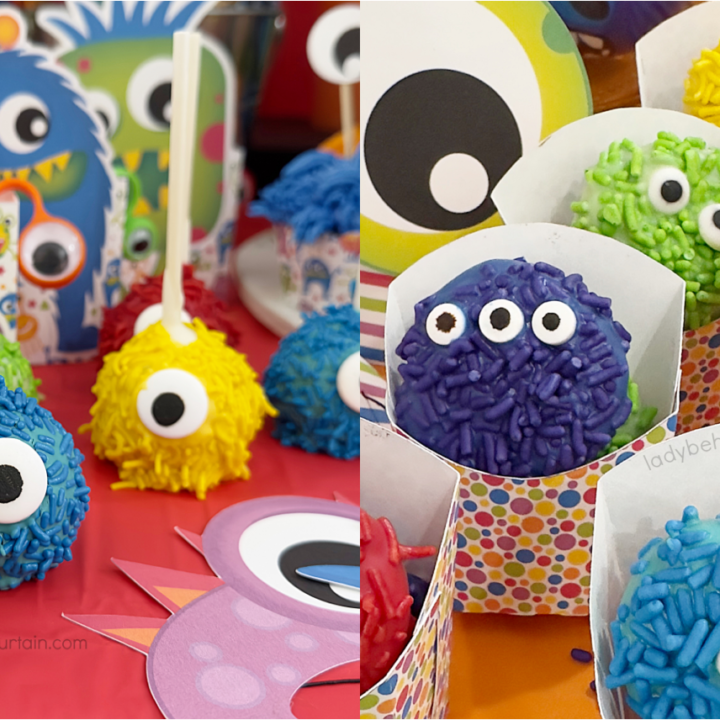
MONSTER CAKE POPS
- If using the frozen cake pops from Walmart—take them out of the freezer and allow them to reach room temperature. Dipping cold cake pops into warm candy will cause the candy to crack.
- NOTE: The store bought cake pops have sprinkles on them. Don't worry the addition of the melting candy and sprinkles with hide them. ALSO, make sure your dipping candy isn't too hot. If it's too hot it will melt the existing coating off the cake pops.
- Pour melting candy and shortening into a microwave safe bowl. Heat 1 minute on high, stir until melted and creamy. TIP: ONLY WORK WITH ONE COLOR AT A TIME
- Dip cake pop into the warm melted candy coating it completely.
- Shake off any excess candy, add sprinkles.
- Place on a cookie sheet lined with parchment paper.
- Before the leftover candy hardens, dip eye in and stick to cake pop. TIP: Use the same color of melting candy for the eye as you used for the cake pop coating and sprinkles.
- Continue with remaining colors and cake pops.
STORE BOUGHT MINI CHOCOLATE CHIPS COOKIES
- Pour melting candy and shortening into a microwave safe bowl. Heat 1 minute on high, stir until melted and creamy. TIP: ONLY WORK WITH ONE COLOR AT A TIME
- Dip cookie into the warm melted candy coating it completely.
- Shake off any excess candy, add sprinkles.
- Place on a cookie sheet lined with parchment paper.
- Before the leftover candy hardens, dip eye/eyes in and stick to the cookie. TIP: Use the same color of melted candy for the eye as you used for the cookie coating and sprinkles.
MONSTER PUNCH
- Make sure all the ingredients is cold before making the punch.
- Into a large container add the Hawaiian punch, pineapple juice, and ginger ale.
- Gently stir together.
CANDIED POPCORN
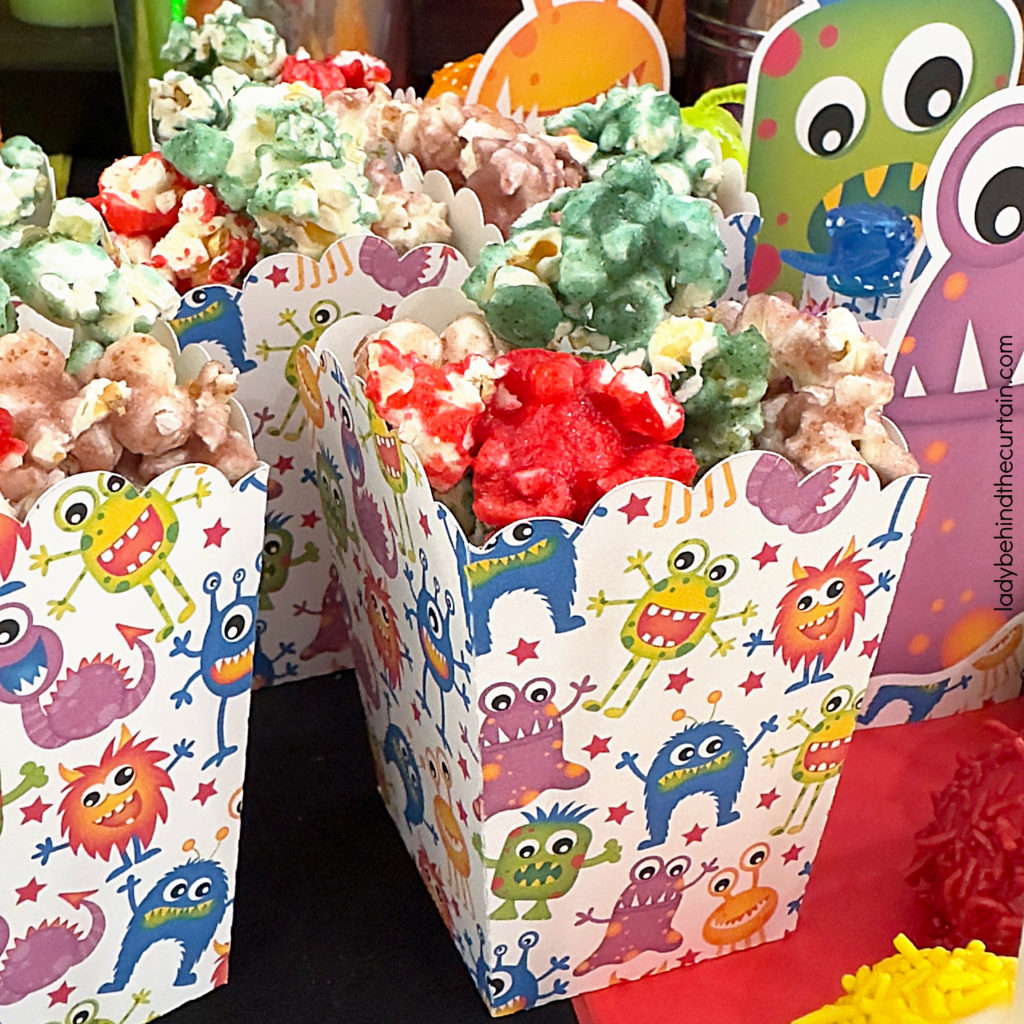
Summer Fruity Candy Popcorn: Add the flavors of summer to your popcorn. Flavors like lemon, lime, orange, grape and cherry! Watermelon and blueberry would make nice additions too! You could almost call this a FRUIT SALAD or SKITTLES POPCORN! The crunchy sweet and salty combo is delicious and super easy to make. Customize your popcorn flavors to fit your party color scheme. CLICK HERE TO FIND OUT HOW EASY IT IS TO MAKE→FRUITY CANDY POPCORN
Food Extras
GIANT PIXY STICKS
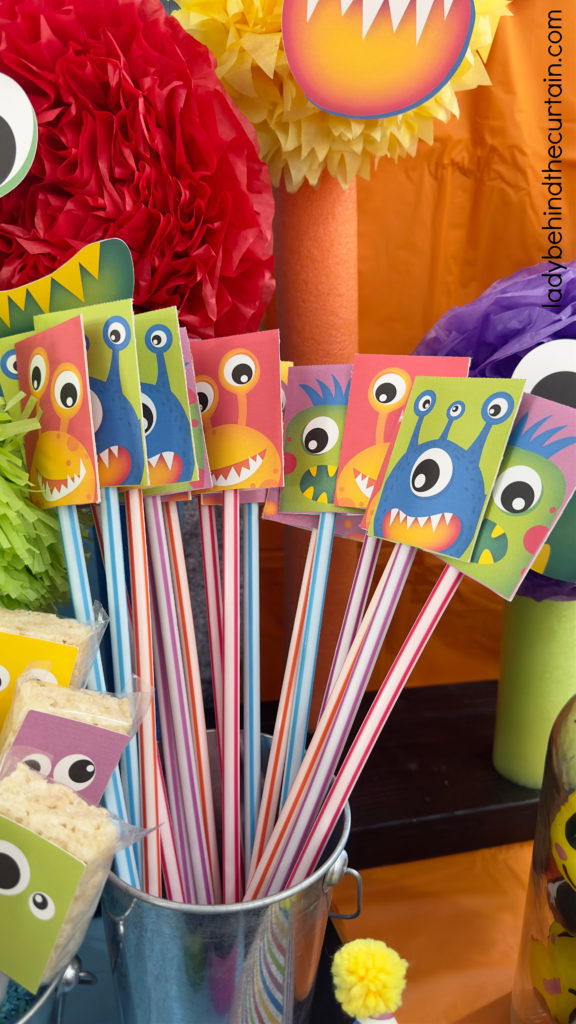
Here’s a cute party dessert table idea. Add Giant Pixy Sticks! The candy straws offer height and a touch of the monster theme. If you have a Party City nearby you can purchase the large pixy sticks for $1.00 each. I’ve seen them at Five Below too. Of course, there’s always Amazon. All you need to transform a giant pixy stick (15-inches) into a monster party-themed treat (besides the pixy stick) is this cute double-sided label cover. Perfect for needing one more treat without any fuss. No baking or creating! Each label has a cute monster face. There are four different monsters. All you need to do is print, cut, fold, and attach the edges. If you used hot glue you can use tape or staples. No need to remove the label, the pouch will slide right over it. ♥4 Designs
GUMMY KABOBS
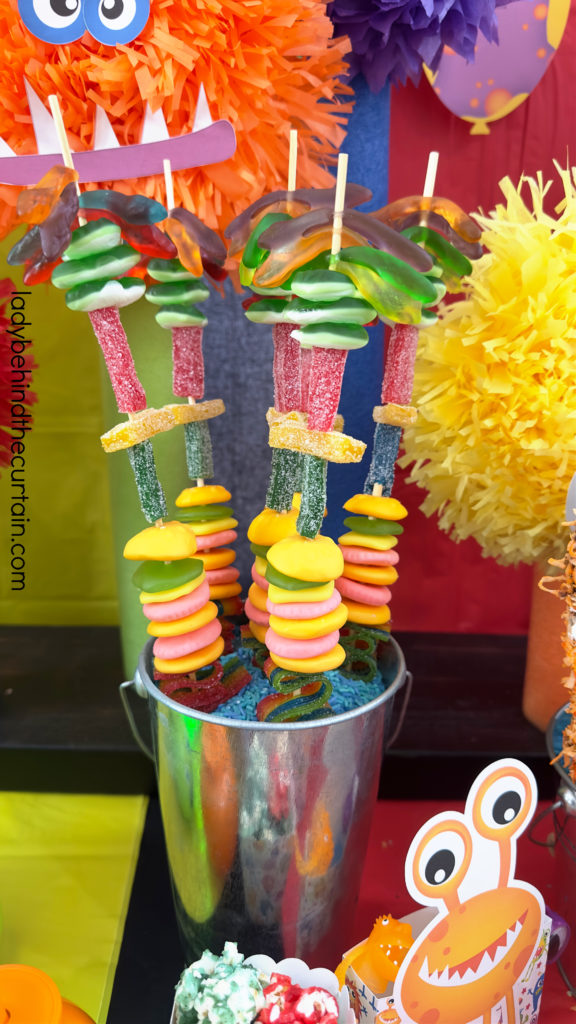
KIDS LOVE GUMMY CANDIES! Go to your favorite gummy candy supplier ( I like Five Below and Dollar Tree) and put together a fun collection of gummy candies. If you catch it at the right time you’ll be able to add gummy eyeballs! Or plan ahead and collect them while they’re available. I don’t recommend ordering them in the summer. They will melt!
How to Make a Kids Monster-Themed Party Table
BACKDROP
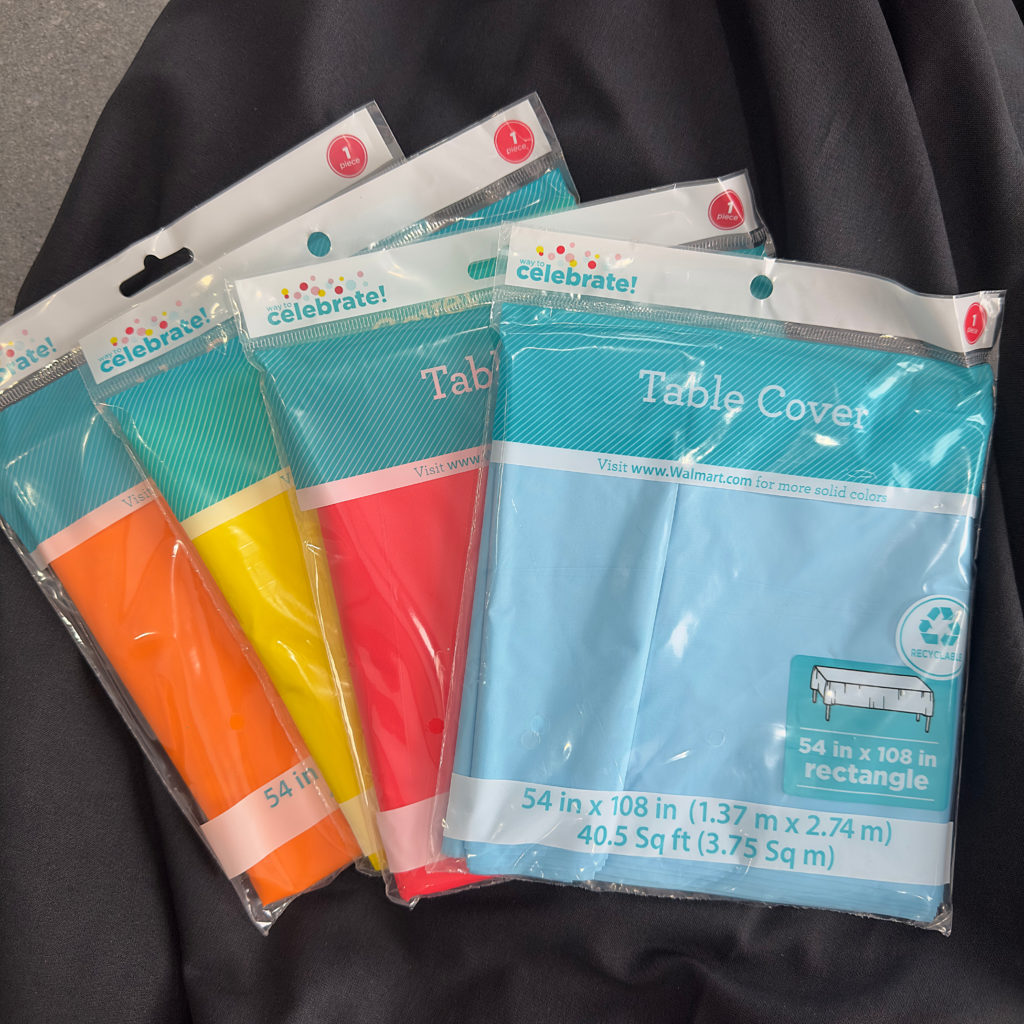
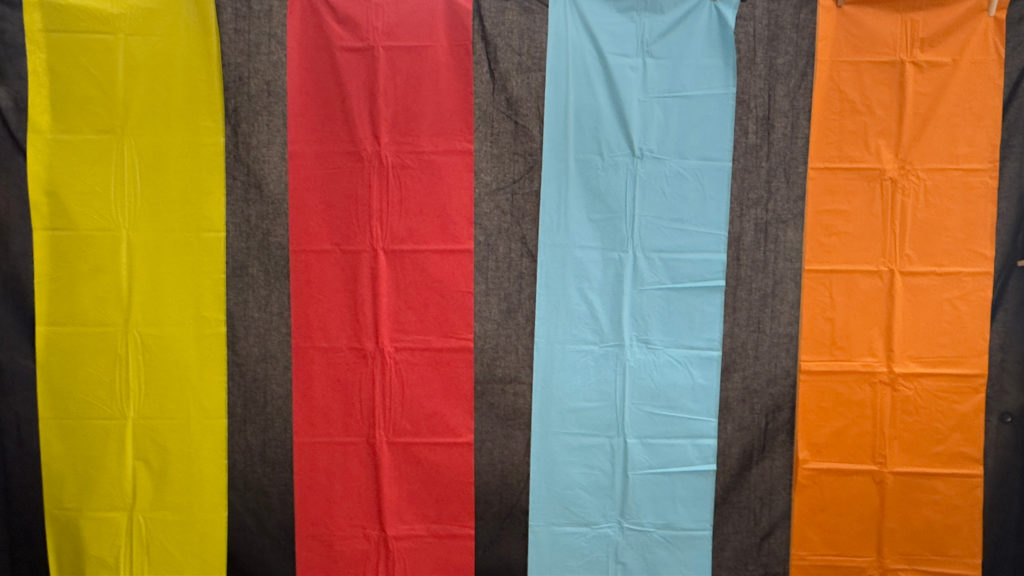
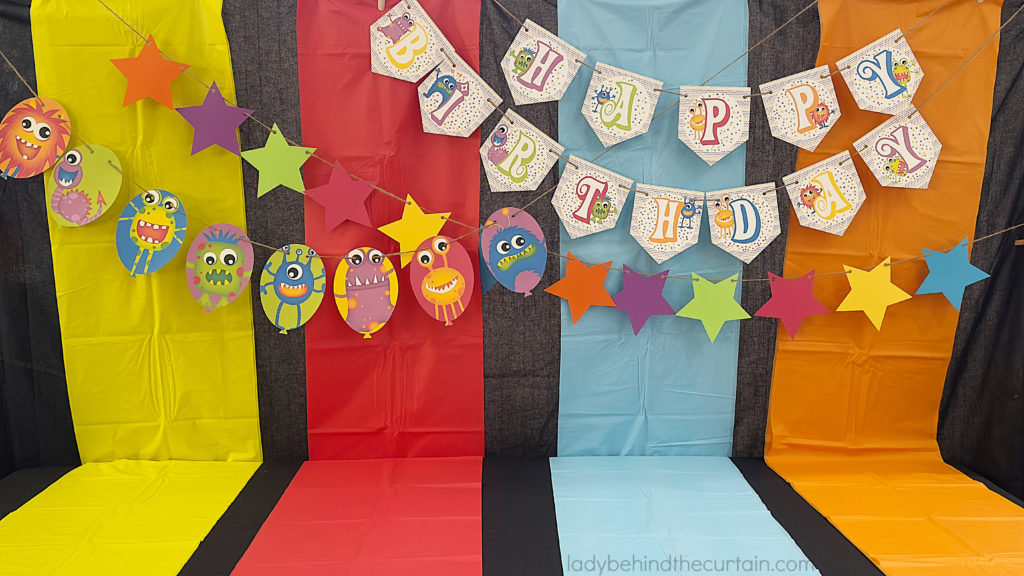
For the backdrop, I started with a plain black background. I used black fabric (I used the same black fabric for the table covering). You can attach the fabric to a wall or use a stand. On top of the black fabric, I attached a cheap plastic table cover from Walmart found in the party section of the store. I only opened the table cover one fold and left the rest like it was in the package. The table covers measure 54 inches x 108 inches. The long length allowed for the table covers to reach not only down the backdrop but up onto the top of the treat table.
MONSTER POOL NOODLE CENTERPIECE AND POOL NOODLE BIRTHDAY CANDLE CENTERPIECE
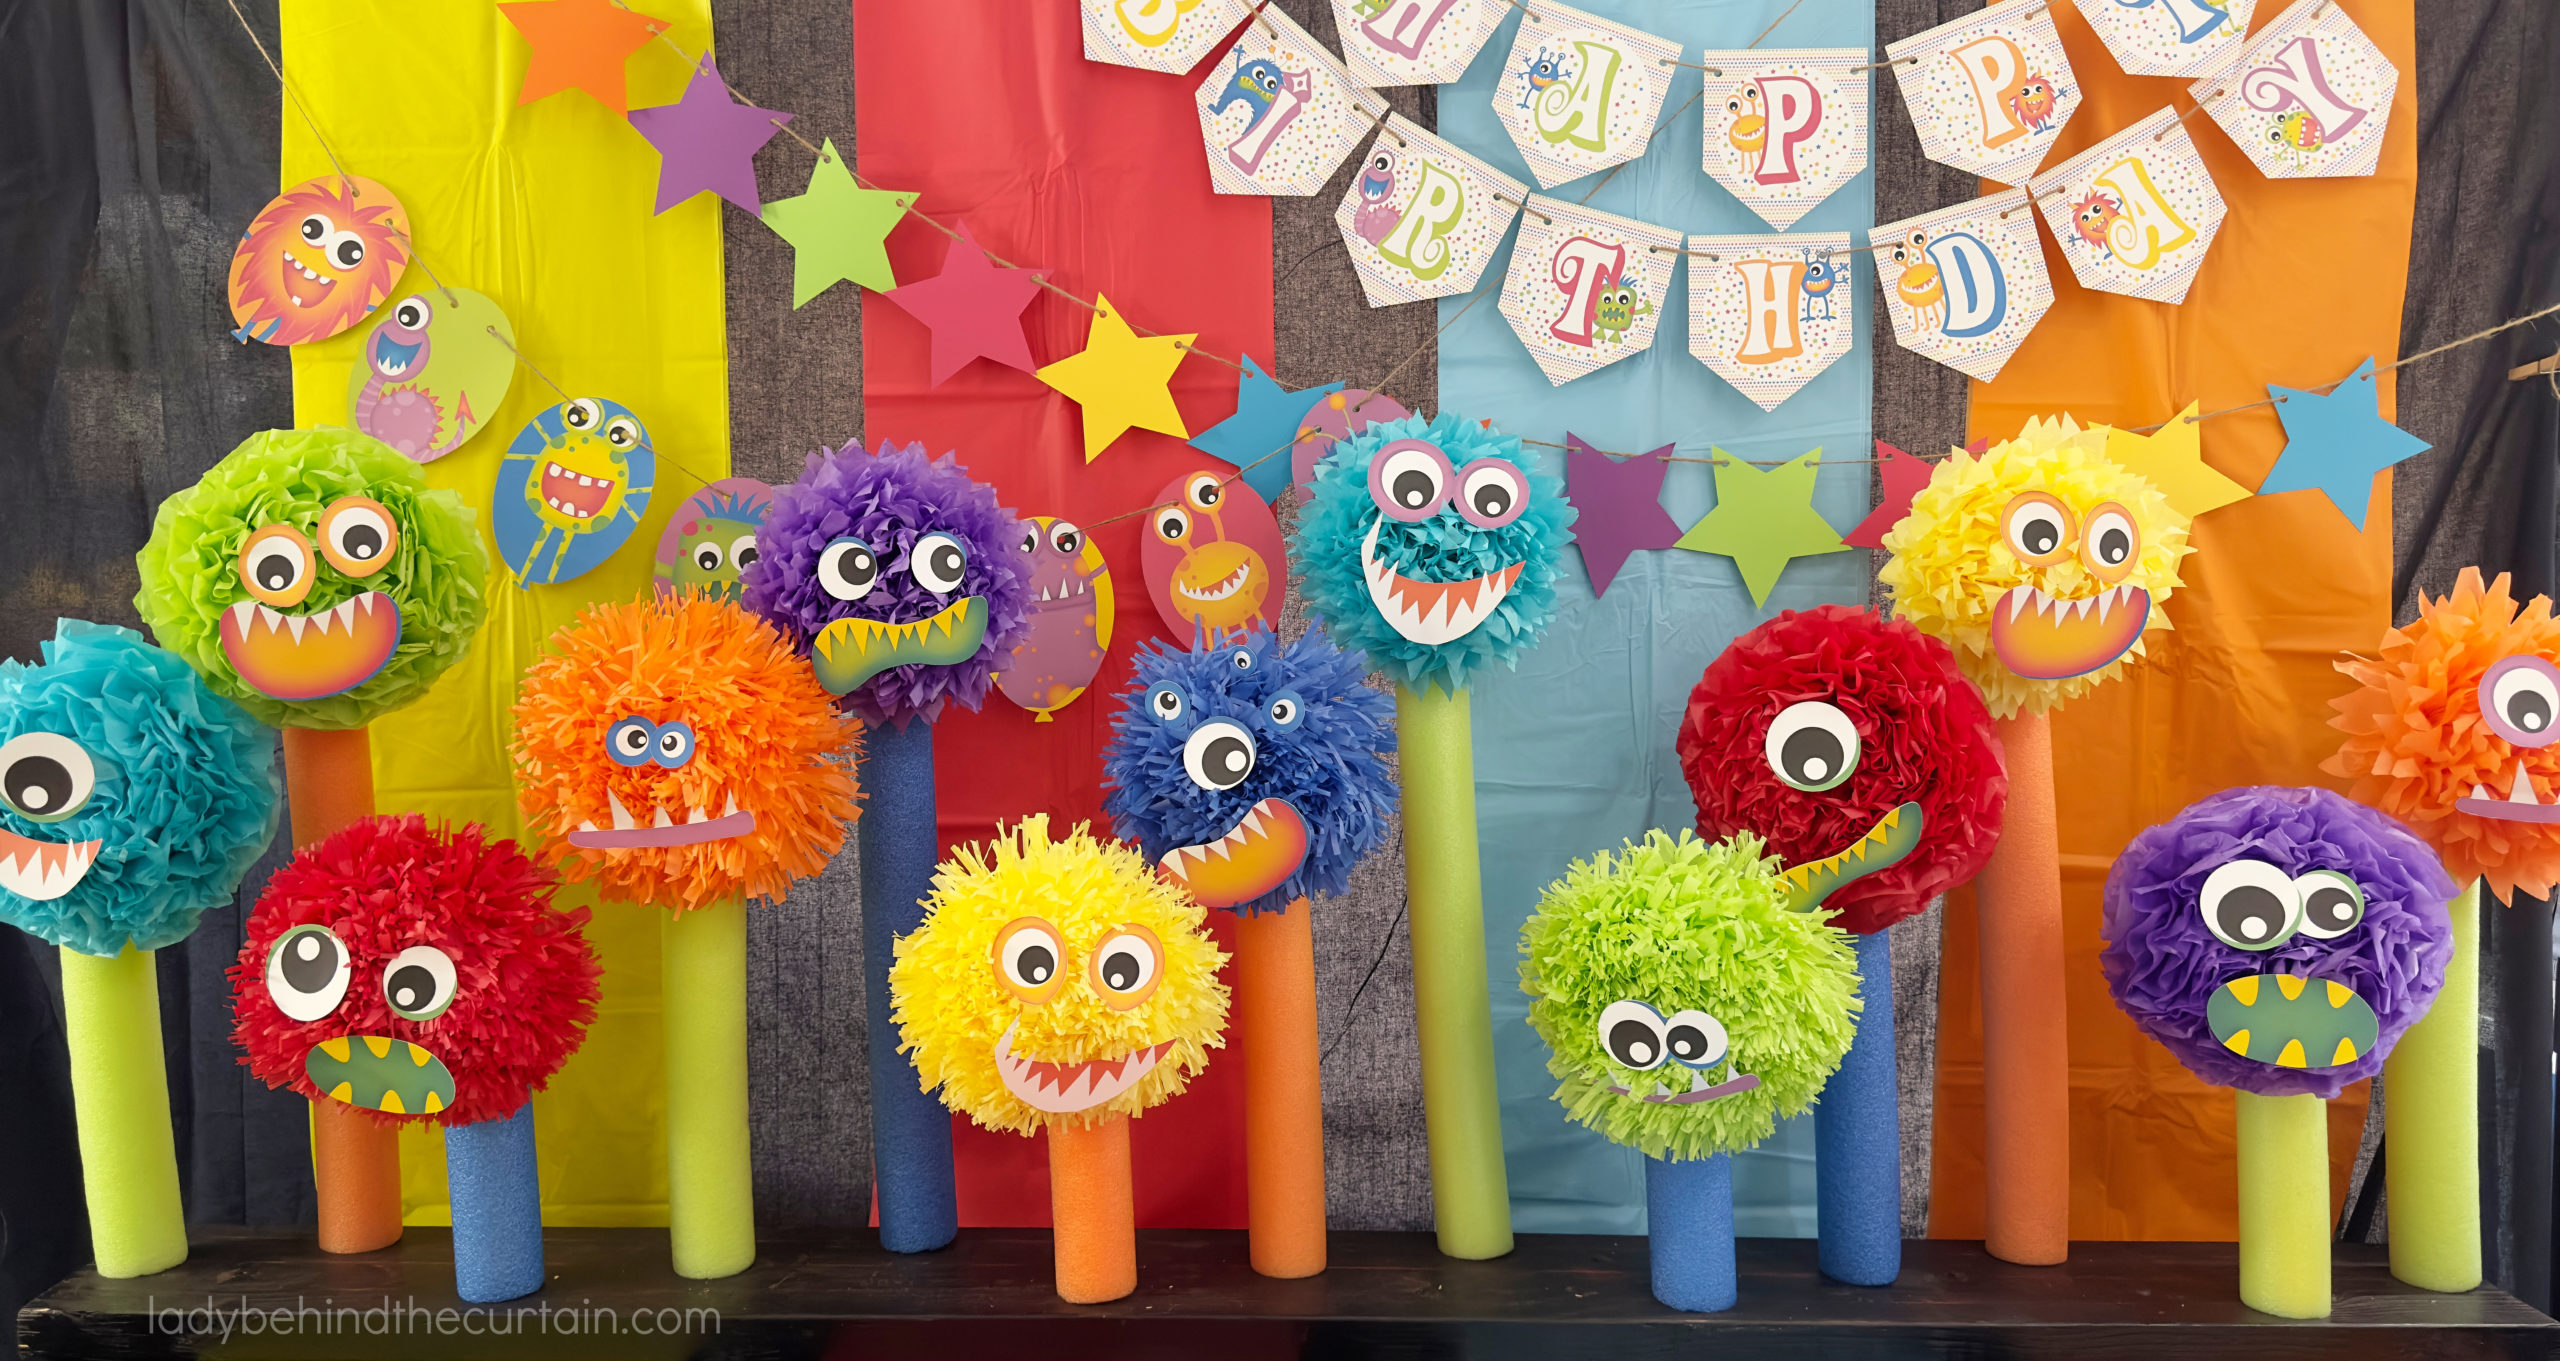
MONSTER POOL NOODLE CENTERPIECE: This easy-to-make creative birthday party centerpiece or party backdrop, inexpensively adds a collection of colors and height to your party table. Print and cut out the FREE assortment of monster eyes and monster mouths to create your monster collection.
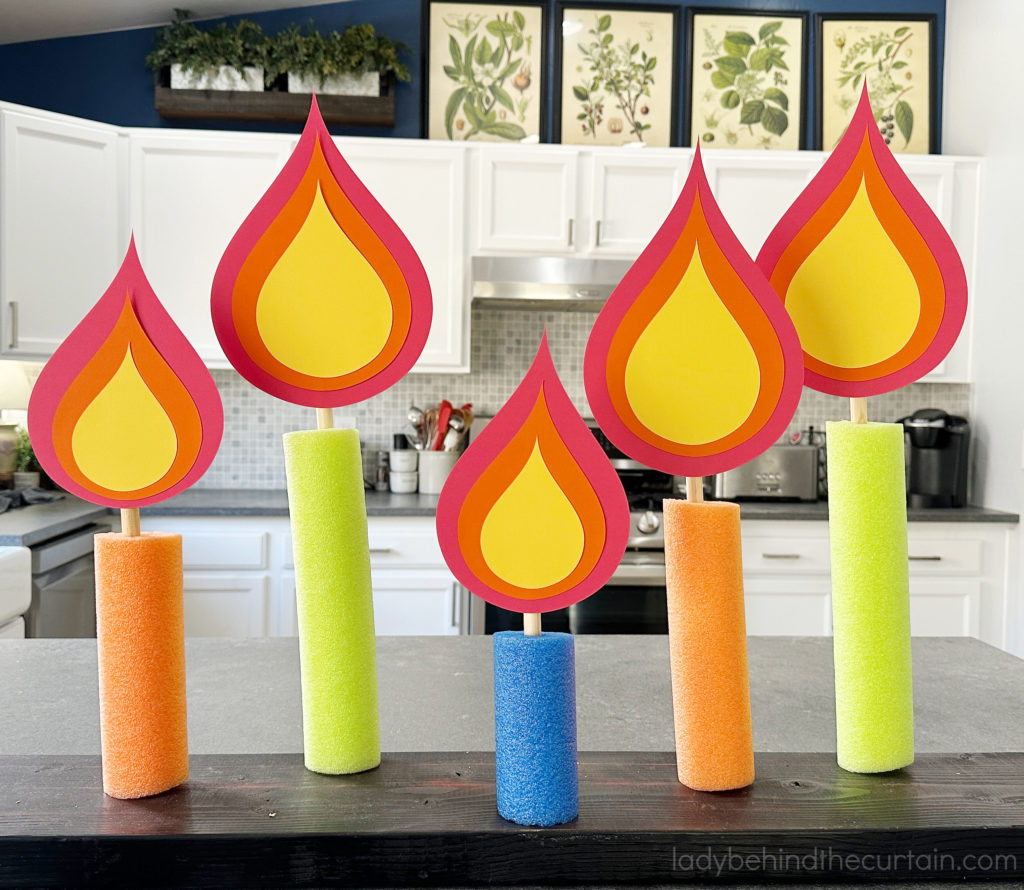
POOL NOODLE BIRTHDAY CANDLE CENTERPIECE: Use pool noodles to create a unique party table display or front yard display. Drill holes in a piece of wood to fit ½ inch dowels. Cut the pool noodles to the desired height. Cut the dowels about 5 inches taller. Place flame cutouts within 2½ inches from the top of the pool noodle leaving 2½ inches of the dowel exposed. For indoor use, use double-stick tape. For outdoor use, use waterproof glue or hot glue. NOTE FOR OUTDOOR USE—For sticking the candles in the yard make sure the dowel is not only 5 inches longer on top but at least 5 inches longer on the bottom. ♥2 flame sizes-large measures 10½ inches tall x 6½ inches wide-medium measures 8½ inches tall x 5½ inches. I used red stock paper, orange stock paper, and yellow stock paper. I DID NOT PRINT THE COLORS.
FREE PRINTABLE KID’S MONSTER BIRTHDAY PARTY FAVORS
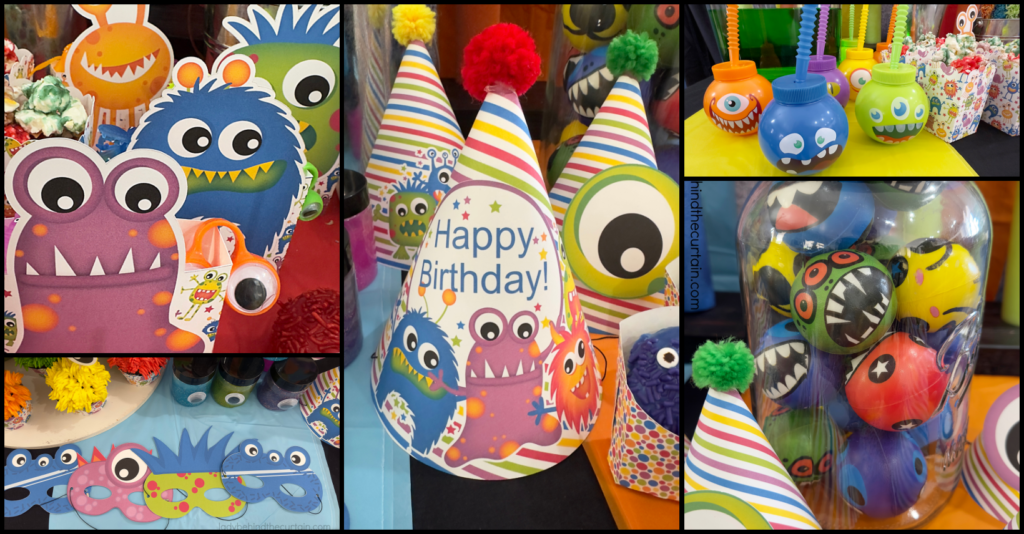
There is more printable monster party favors available CLICK HERE FOR THE WHOLE COLLECTION→CARTOON MONSTER PARTY FREE PRINTABLE COLLECTION
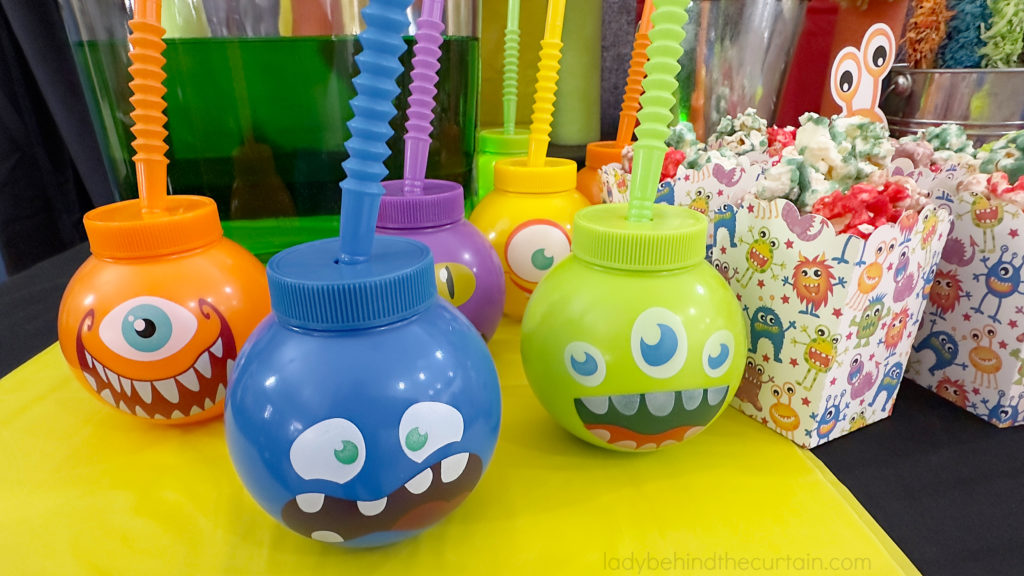
- MONSTER CUPS: The monster cups were purchased from TEMU and as usual if you see it you should grab it because just like the mini monsters mentioned below the cups are sold out.
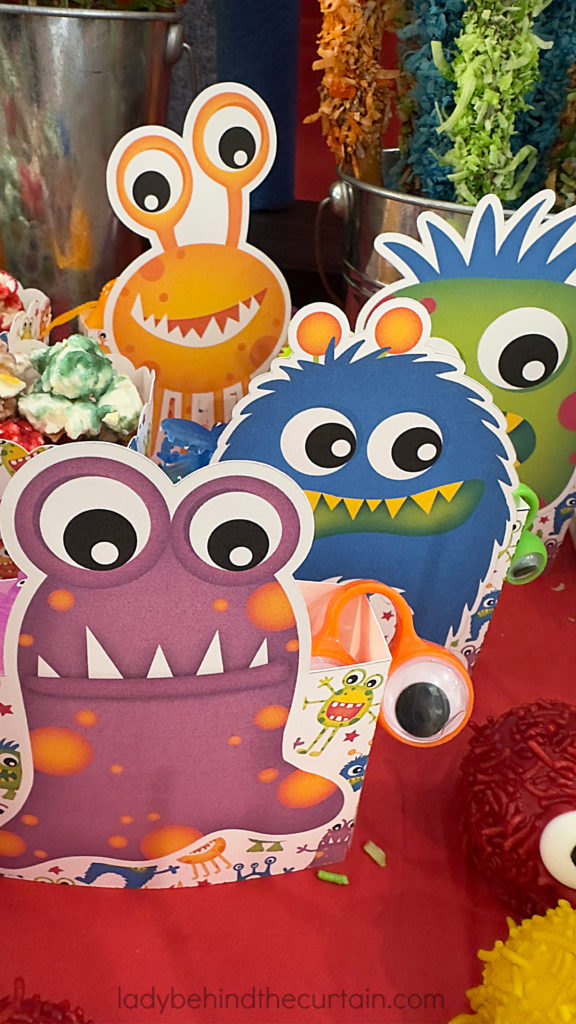
- MONSTER PARTY FAVOR BOXES: These fun little boxes can be filled with little monster toys like monster finger puppets and googly eyes rings, candy, or both! Perfect for a cute Halloween Party or a kid’s birthday party. ♥ (4) custom designs- measuring 4½ to 6¼ inches tall x 3½ inches wide x ¾ inch deep. Use card stock paper and the boxes can stand on their own. —EASY-TO-FOLLOW INSTRUCTIONS ARE INCLUDED—CLICK FREE MONSTER PARTY PRINTABLE COLLECTION BUTTON BELOW
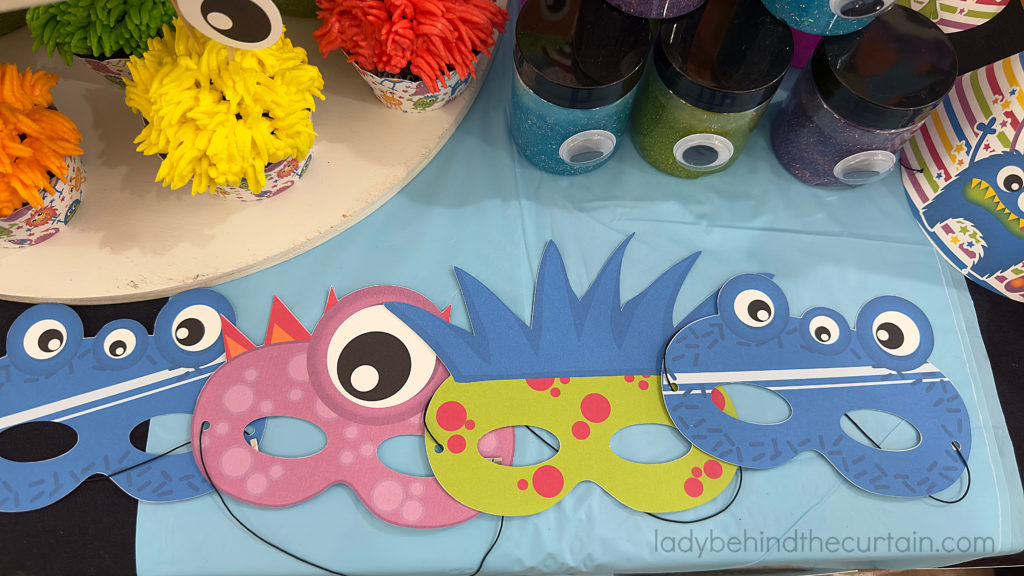
- MONSTER MASKS: Kids love wearing masks! Transform your little cuties into little monsters with these easy-to-make DIY Birthday Party Monster Masks. ♥3 styles—Green monster, purple monster, and blue monster. ♥3 sizes— large measures 8 inches wide, medium measures 6½ inches wide, and small measures 5 inches wide. No special instructions are needed. Cut out the outside of the mask, cut out the eye holes, and side holes for the bands. Use white cardstock paper for printing. Click here for what I used→Elastic Bands with metal ends (not an affiliate link). CLICK FREE MONSTER PARTY PRINTABLE COLLECTION BUTTON BELOW
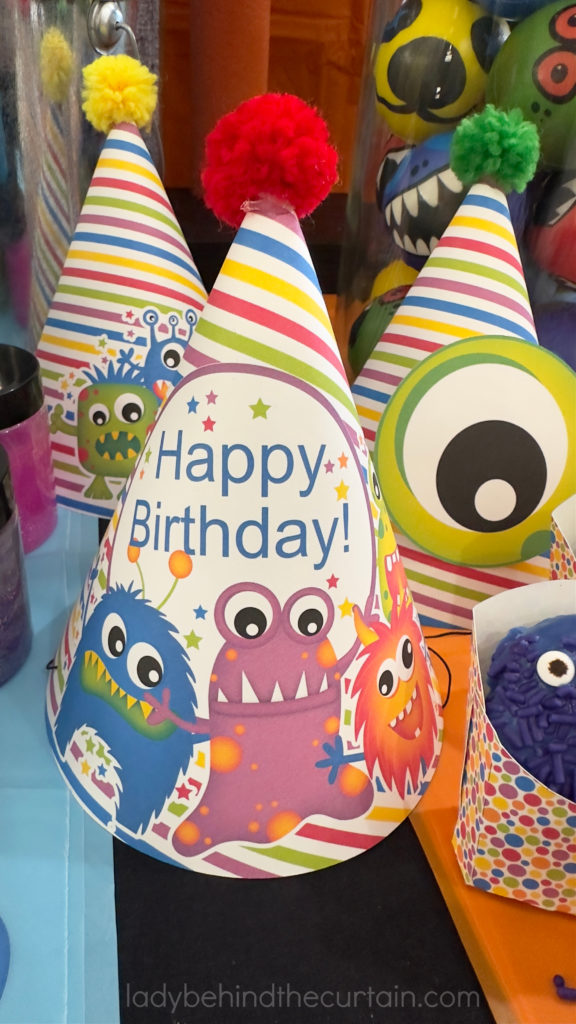
- BIRTHDAY PARTY HATS: These cute paper hats can be cut out by hand and with a paper cutter (like Cricket or Silhouette). All of the hats have brightly colored stripes. TWO of the hats come adorned with monsters (one of them with Happy Birthday on it) and the other hat is blank. Large monster eyes ( in green, purple, or blue) come with the “blank” hat and can be attached with double stick tape. Hot gluing pom poms to the tops make the perfect finishing touch. Tiny holes are on the sides for adding a ribbon or elastic. Click here for what I used→Elastic Bands with metal ends (not an affiliate link)♥Three hat designs— plain (with large eyeball), monsters, and happy birthday monsters •Hats measure 5 inches at the bottom (when assembled) x 5½ inches tall (without the pom pom). CLICK FREE MONSTER PARTY PRINTABLE COLLECTION BUTTON BELOW
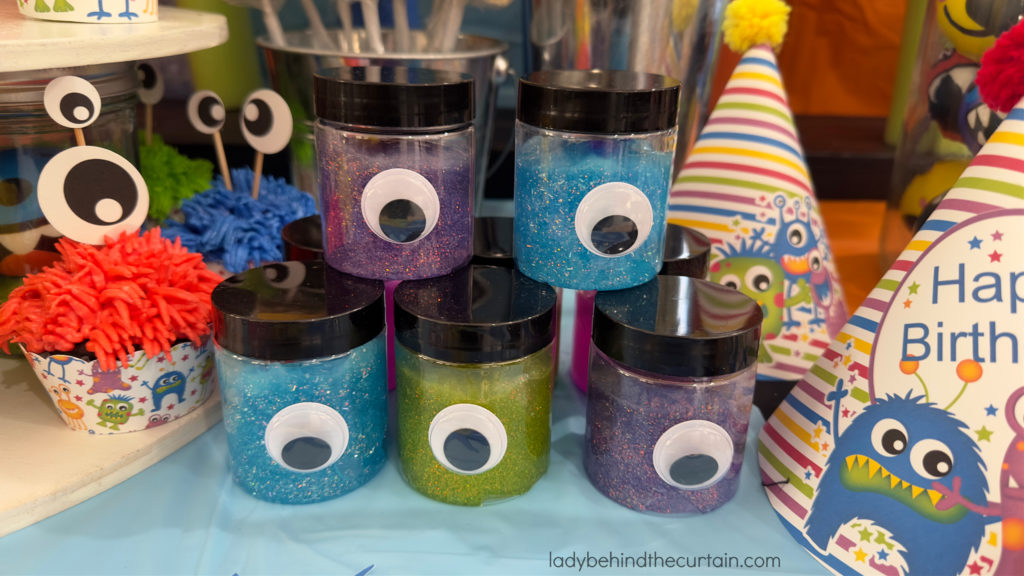
- MONSTER SLIME: An easy and expensive way to make a party favor. Attach a large google eye (found in the craft department at Walmart). Optional: Add a surprise and submerge a mini monster into the slime.
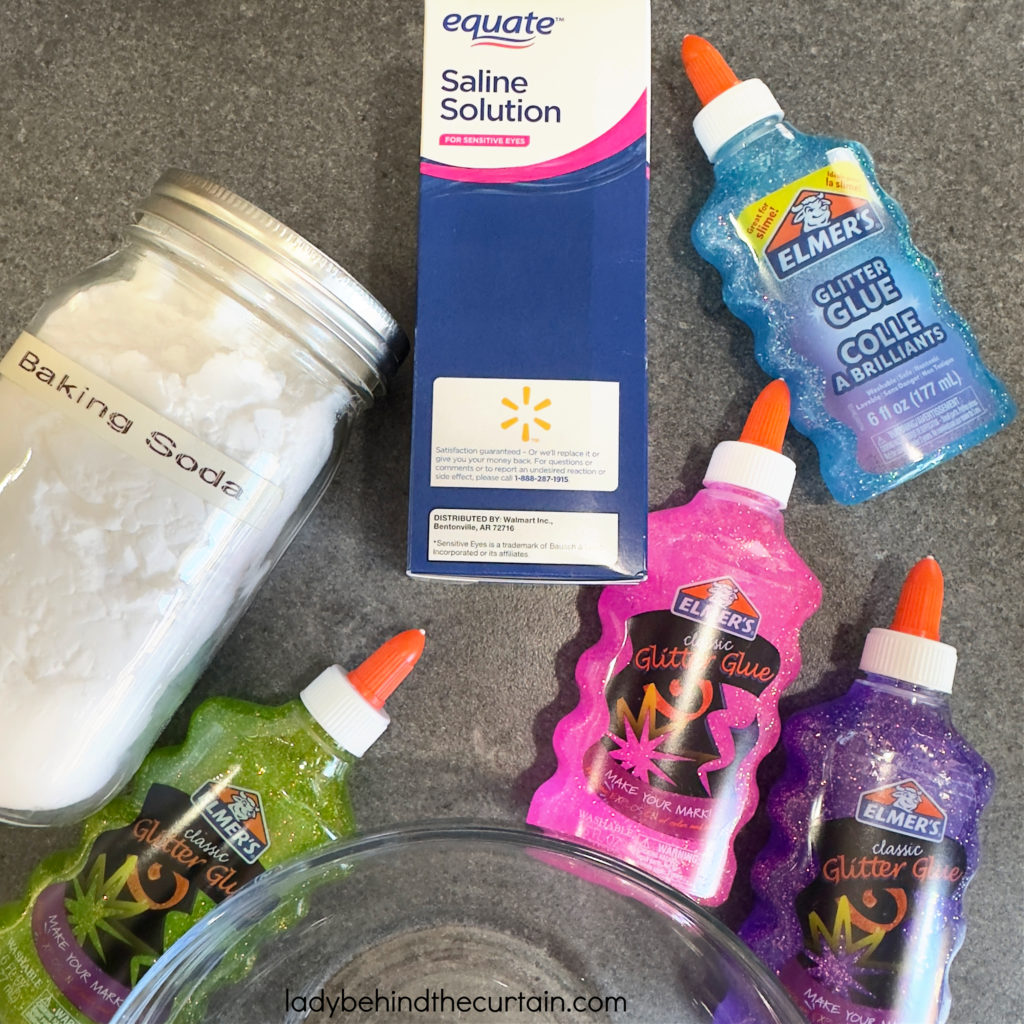
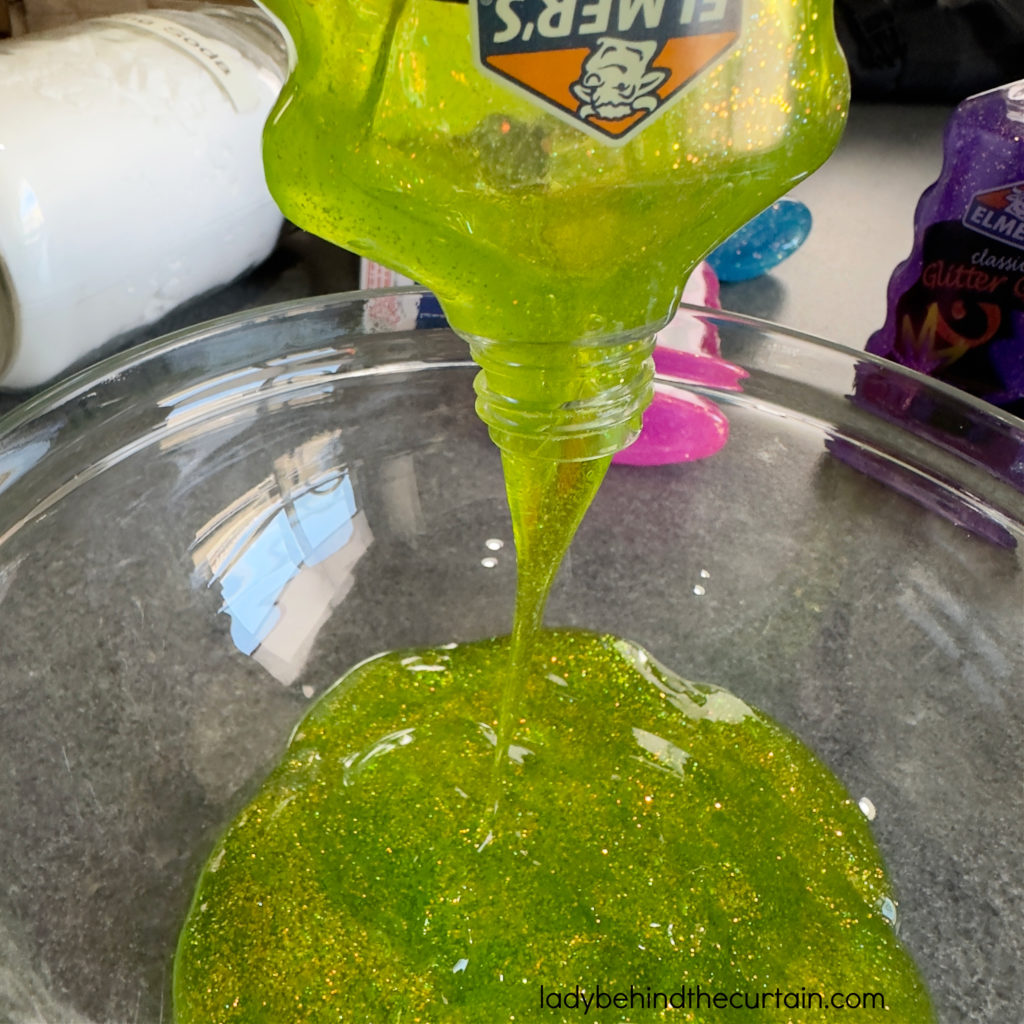
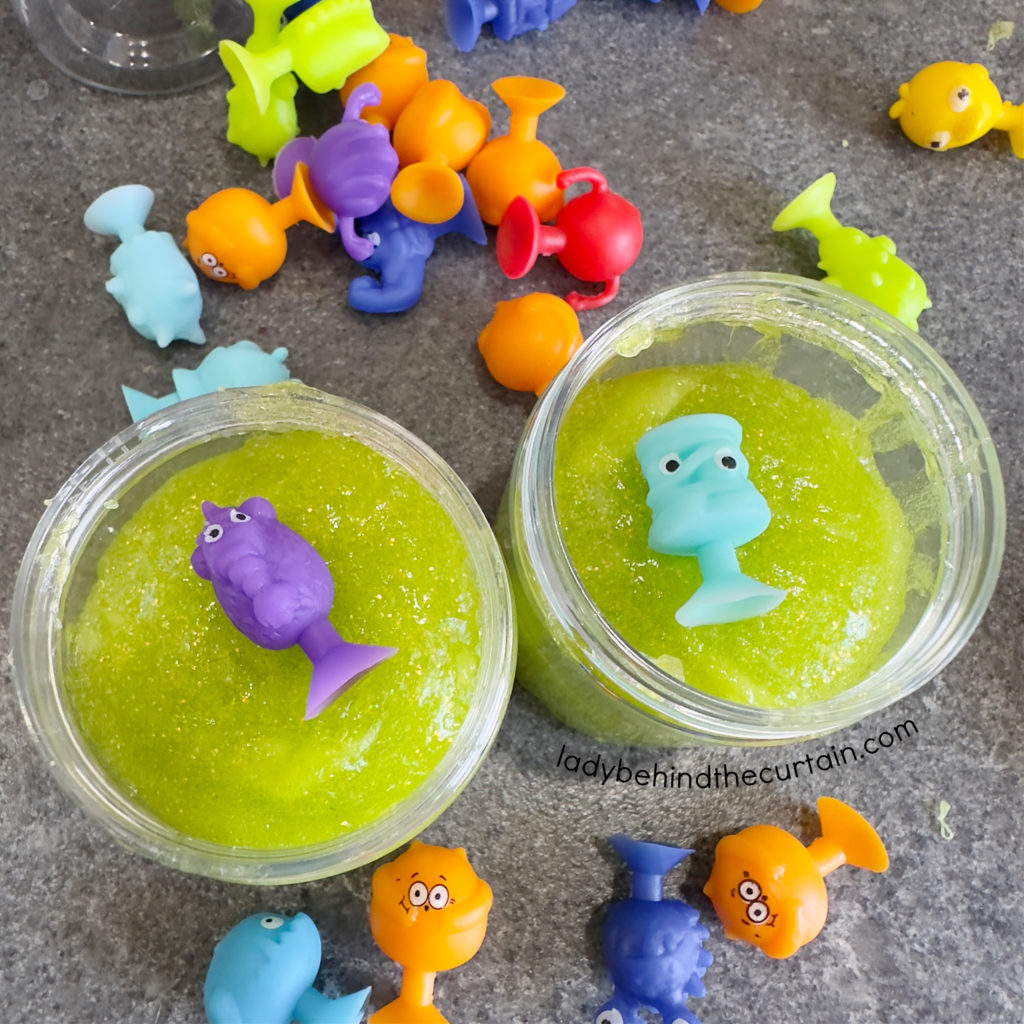

HOW TO MAKE MONSTER SLIME—one recipe makes 2 (4 ounce) containers
- 1 (6-ounce) bottle of glitter glue
- ½ tablespoon baking soda
- 1 tablespoon contact lens solution
- googly eyes
- mini monster
MONSTER SLIME INSTRUCTIONS
- Squeeze as much glue out of the bottle as possible into a medium bowl.
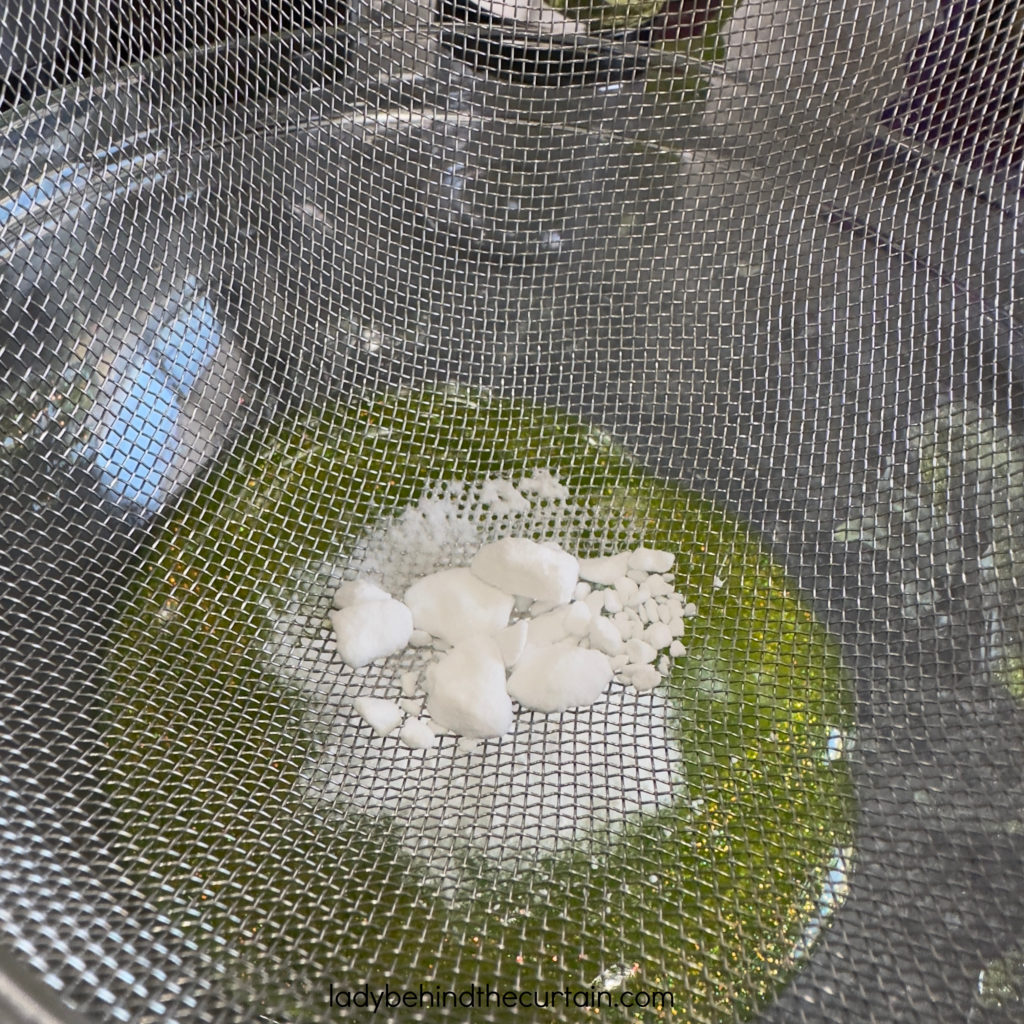
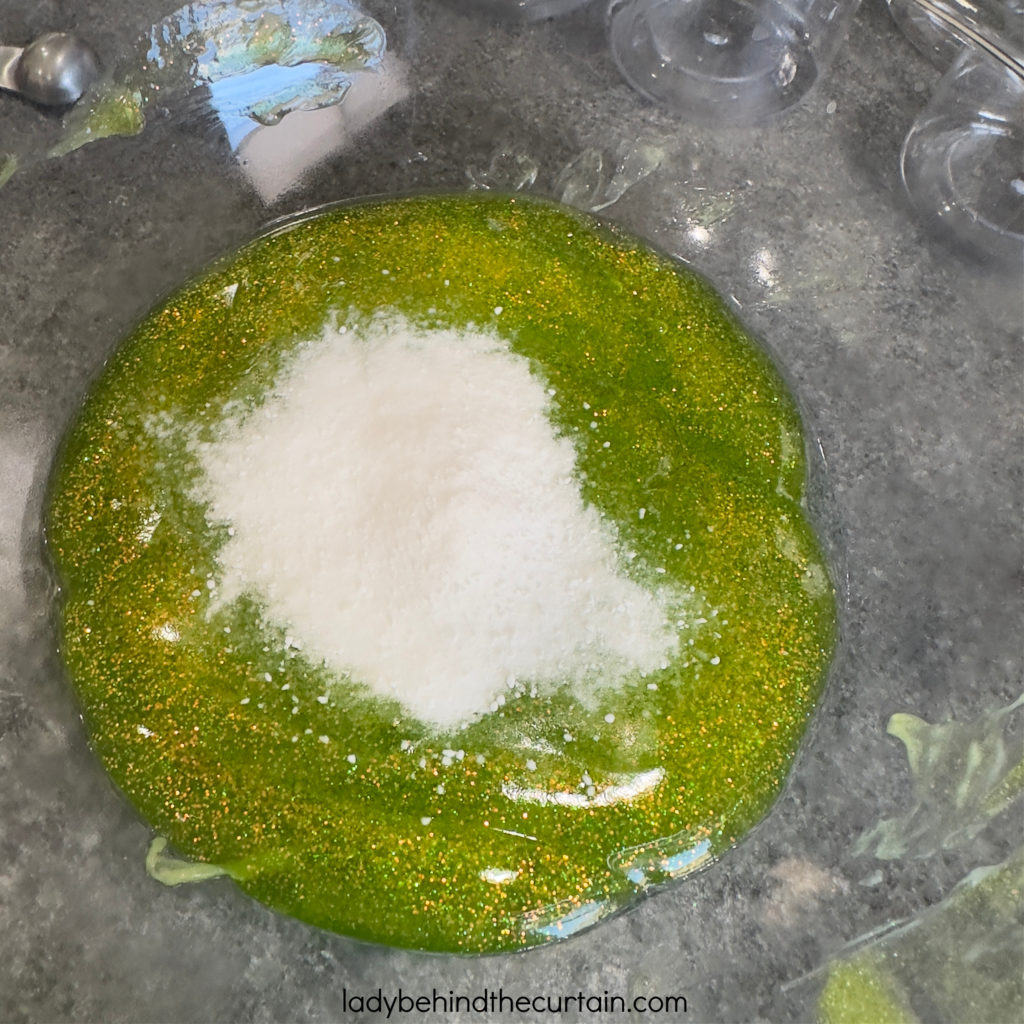
- Add baking soda to the glue. TIP: If your baking soda has lumps like mine did, pour it into a fine sieve and run it through into the glue.
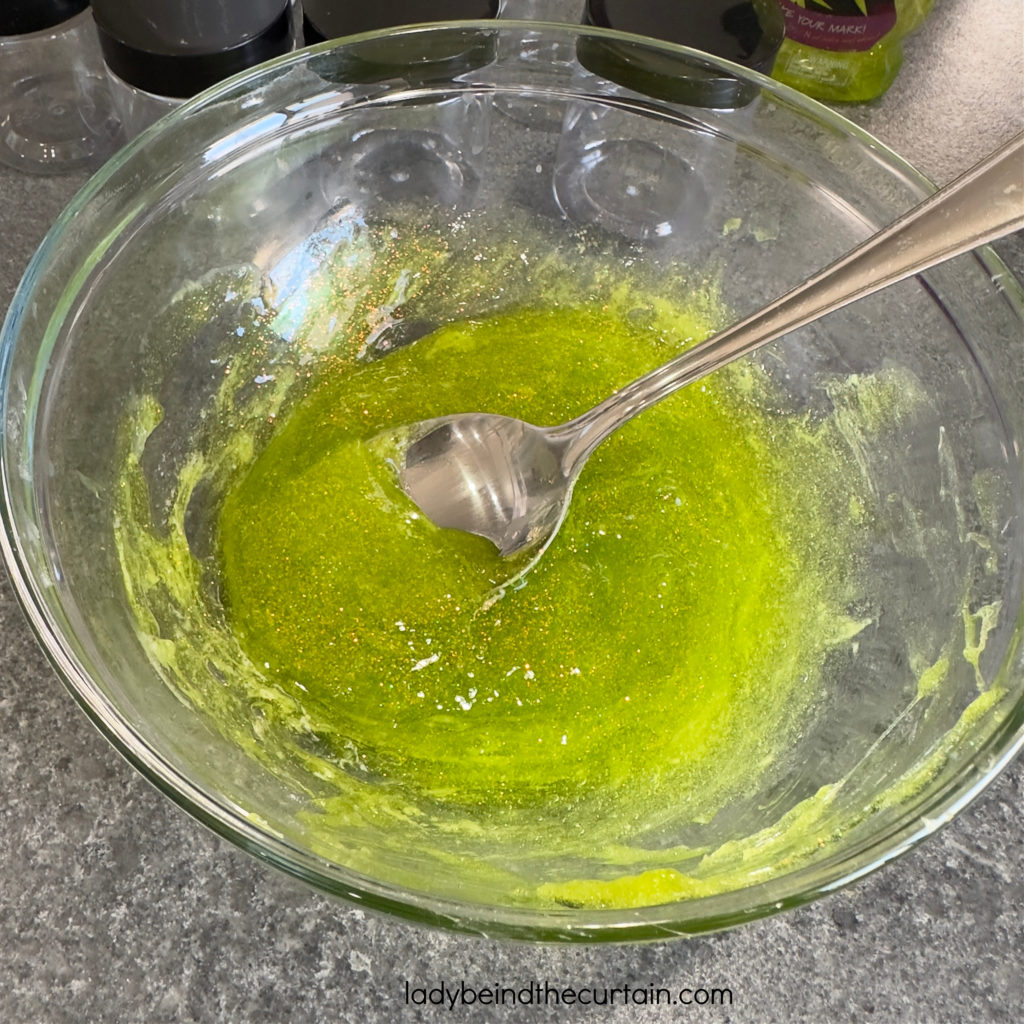
- Mix the glue and baking soda together.
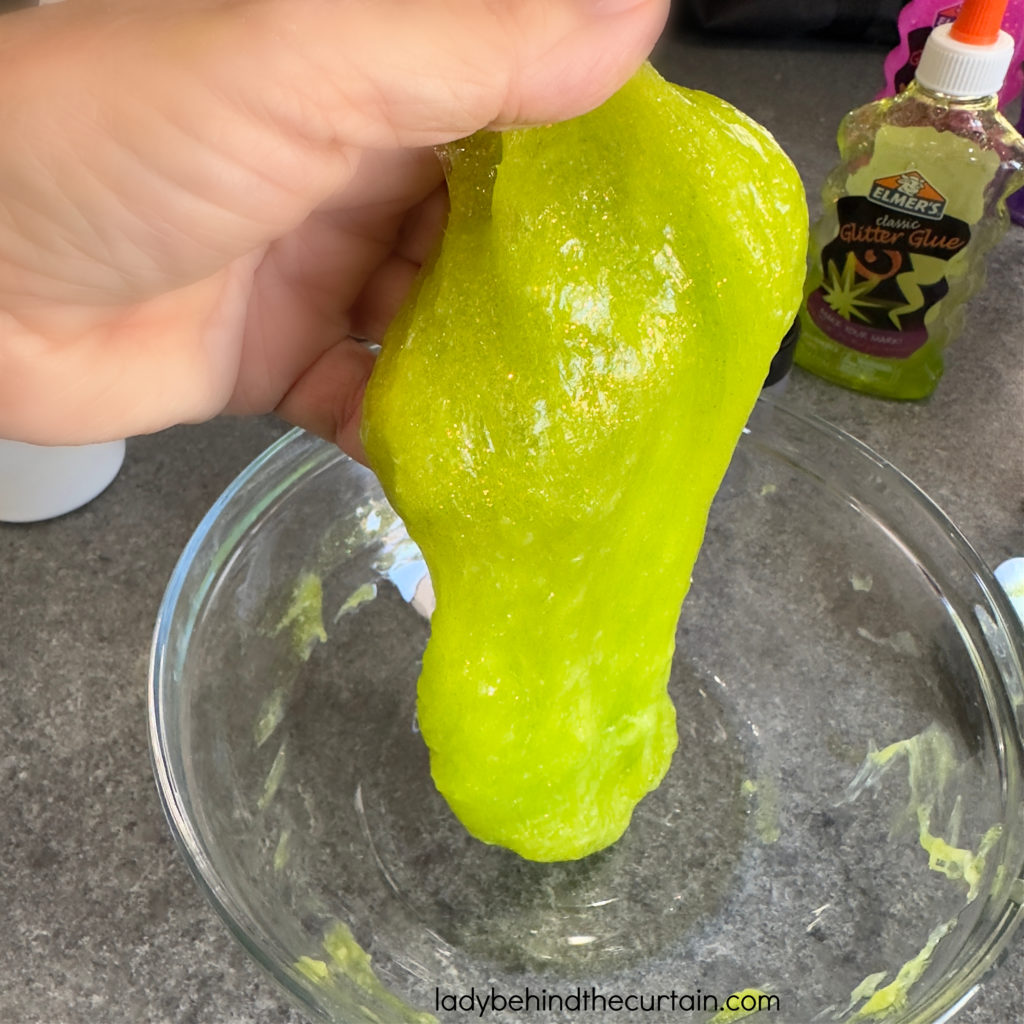
- Add contact lens solution, stir, or use your hands to combine.
- Divide into TWO 4-ounce containers.
- If desired, add a little surprise and submerge a mini monster into the slime. NOTE: I purchased the mini monsters from TEMU. The monsters have since been discontinued.
- Double Stick Tape the eye to the jar.
Latest Posts
In conclusion, throwing a monster-themed kid’s birthday party is a fun and creative way to celebrate your child’s big day. From cute spooky decorations to deliciously themed treats, there are endless possibilities for creating a truly unforgettable celebration. Whether you’re a seasoned event planner or a first-time party host, the key to success lies in the details. So go forth, plan an epic monster bash, and give your child a birthday party they’ll never forget. Who knows, you may even inspire some fellow parents to join in on the fun. Happy party planning!💗Sheryl
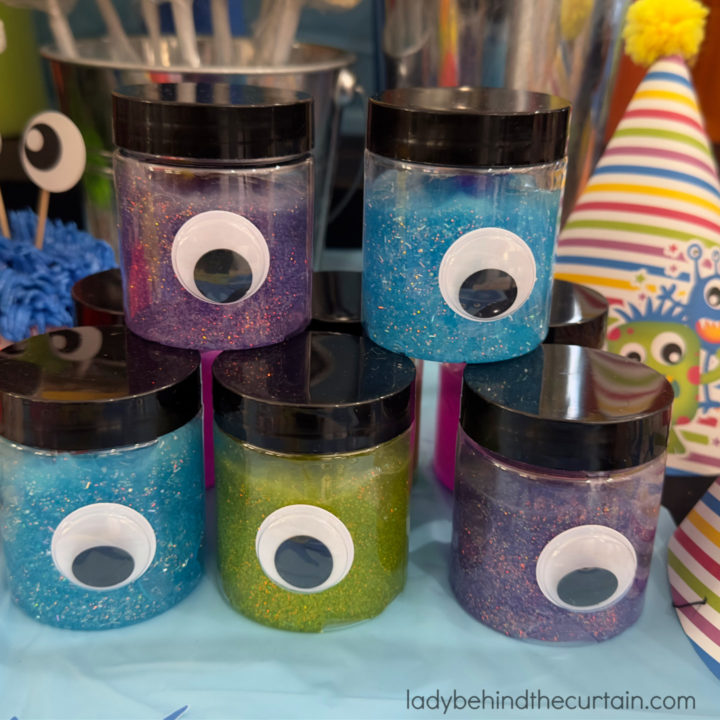
Monster Slime
Materials
- 1 (6 ounce) bottle glitter glue
- ½ tablespoon baking soda
- 1 tablespoon contact lens solution
- googly eyes
- mini monster (optional)
Tools
- bowl
- measuring spoons
- stirring spoon
- 4 ounce containers
- optional: double stick tape
Instructions
- Squeeze as much glue out of the bottle as possible into a medium bowl.
- Add baking soda to the glue. TIP: If your baking soda has lumps like mine did, pour into a fine sieve and run it through into the glue.
- Mix together the flue and baking soda.
- Add contact lens solution, stir or use hands to combine.
- Divide into TWO 4 ounce containers.
- If desired, add a little surprise and submerge a mini monster into the slime. NOTE: I purchased the mini monsters from TEMU. The monsters have since been discontinued.
- Double Stick Tape the eye to the jar.
SIGN UP FOR THE LADY BEHIND THE CURTAIN NEWSLETTER

NEWSLETTER: Receive (twice a month) seasonally themed newsletters full of recipes, tips, and tricks. Sometimes even FREE gifts! Click here for the Newsletter→CURTAIN CALL NEWSLETTER
THANKS FOR VISITING♥


Comments
Kid’s Monster Theme Birthday Party + Video — No Comments
HTML tags allowed in your comment: <a href="" title=""> <abbr title=""> <acronym title=""> <b> <blockquote cite=""> <cite> <code> <del datetime=""> <em> <i> <q cite=""> <s> <strike> <strong>